

_QRP6ByKZIT.png?auto=compress%2Cformat&w=900&h=675&fit=min)
Hardware components | ||||||
| × | 1 | ||||
 |
| × | 1 | |||
 |
| × | 1 | |||
| × | 1 | ||||
 |
| × | 1 | |||
Software apps and online services | ||||||
| ||||||
I recently heard the CEO of Mycroft.ai, Joshua Montgomery, on startuphuscle.xyz discussing his companys' effort to bring an opensource, alternative voice assistant to market. Towards the end of the podcast, the interviewers suggested that they would love to be able to play rock, paper, scissors with Mycroft. I instantly thought to myself, I can make that happen. . .
MycroftMycroft is an open source voice assistant. Mycroft is software and Mycroft is also hardware. You can run the Mycroft software on a Raspberry Pi( called PiCroft ), on a linux based computer, or on the Mycroft Mark 1.
The core idea behind Mycroft is to provide the best voice assistant in a fully opensource manner. This has a lot of appeal from the security, privacy and freedom of choice perspectives. From a makers' perspective, it is a dream. Everything is open source and the base language of voice skills is Python! The documentation has been greatly improved, there are a large number of skills published to learn from and the community forum is friendly and responsive.
This project is run on the Mycroft Mark I device, but could easily be updated to run on the PiCroft version of Mycroft as well. I started experimenting with Mycroft with the PiCroft version, but through the generosity of Joshua Montgomery at Mycroft, I now have a Mycroft Mark I to work with.
If you want to start hacking away at a voice assistant project, you should really consider Mycroft as an option.
ClarifaiIn their own words. . .
The Clarifai API offers image and video recognition as a service. Whether you have one image or billions, you are only steps away from using artificial intelligence to recognize your visual content.
The API is built around a simple idea. You send inputs (an image or video) to the service and it returns predictions.
The type of prediction is based on what model you run the input through. For example, if you run your input through the 'food' model, the predictions it returns will contain concepts that the 'food' model knows about. If you run your input through the 'color' model, it will return predictions about the dominant colors in your image.
So clarifai is a software as a service providing machine learning/ai to process pictures and video. The AI is off loaded to the clarifai servers in the cloud. Basically you send clarifai a picture, and clarifai sends you back a set of tags/word/concepts in finds in that picture.
Clarifai offers apis is several different languages one of which is python. This makes it ideal to function along with Mycroft skills as they are written in python as well. There is a very generous developer option that costs nothing to use and gives you access to clarifai's standard models and the ability to create and train your own model.
If you want to start hacking away at a computer vision/machine learning project, you should really consider clarifai.
Working with the Mycroft Mark IThe Mycroft Mark I is an "embedded" linux application running on a Raspberry Pi in headless mode. Being headless means that you either have to attach a monitor and keyboard to the Mark I or preferably, log into your Mark I from your computer using ssh. There is comprehensive information on doing this in the Mycroft community forum and more generally in, Exploring Raspberry Pi: Interfacing to the Real World with Embedded Linux 1st Edition by Derek Molloy. This is an incredible book for any maker interesting in going beyond the basics of working with the pi.
I won't go into more detail here, but here are some ssh tips:
- Open lots of terminal windows on your desktop/laptop
- You can cut and paste text from your desktop into the nano editor
- Download and install feh on your Mycroft to view images
You can learn more about feh at feh – a fast and light image viewer. In order to use feh to view images using ssh, use the -X switch as such to bring up an x windows terminal:
ssh -X
If the x terminal window "times" out and doesn't let you view after awhile, just kill it and create another x terminal window as above.
Adding the PiCamera to Mycroft Mark IA Raspberry Pi 3 sits at the heart of the Mycroft Mark 1, however the PiCamera connector is not exposed, so you will have to do a bit of surgery to attach the PiCamera. I purchased the 2 meter PiCamera ribbon cable from adafruit to attach the camera. This might be a bit of overkill in terms of length but one that is too short, would be worse.
The following set of pictures will help you however as you can see, however, the PiCamera ribbon is already in place. I took these pictures after the fact! But I think you will be able to follow along.
1. The first step is to remove the foot pads. Each foot pad conceals a single screw. Use an allen wrench to loosen and remove these.
2. Once open, you will see the Raspberry Pi. Unfortunately, the Pi must be removed from it's posts from the underlying board to expose the PiCamera ribbon cable connector.
3. The Raspberry Pi has been removed from it's posts and the ribbon cable connector exposed.
4. Now feed the ribbon cable through the linear vent openings on the top of the case.
5. The last part of the setup is having a nice enclosure for the camera. There are many you can choose from on thingiverse. I have tried and several, and so far, my favorite is PiCamera 2 Axis Rotating Holder by migrassi and seen below sitting on top of Mycroft. I Printed it on my lulzbot mini using GizmoDorks HIPS 3mm. The stand and camera slots needed a bit of sanding to fit properly. Be careful when inserting the camera in the slot. It is a snug fit as I printed it!
Once the camera is attached and placed in its' enclosure, make sure to configure your pi to use the camera:
sudo raspi-config
You will then be provided with the following menu and key down to option 5 Interfacing Options.
Then select and follow the prompts from there. A reboot is recommended after this.
Please read this through entirely before you begin to install clarifai! Otherwise on reboot you will wind up with a zombie Mycroft, staring at you lovingly, but silently though yellow eyes forever!
Installing the clarifai python api is simple:
pip install clarifai
However, doing so unistalls the version of Pillow running on the Mark 1 and installs version 2.9.0 of a library called Pillow. So if you reboot your Mark I for any reason after installing clarifai, Mycroft will not work but you can still ssh into it. A quick look at the /var/log/mycroft-skills.log shows this:
Traceback (most recent call last):
 File "/usr/local/bin/mycroft-skills", line 9, in <module>
   from pkg_resources import load_entry_point
 File "/usr/local/lib/python2.7/site-packages/pkg_resources/__init__.py", line 3147, in <module>
   @_call_aside
 File "/usr/local/lib/python2.7/site-packages/pkg_resources/__init__.py", line 3131, in _call_aside
   f(*args, **kwargs)
 File "/usr/local/lib/python2.7/site-packages/pkg_resources/__init__.py", line 3160, in _initialize_master_working_set
   working_set = WorkingSet._build_master()
 File "/usr/local/lib/python2.7/site-packages/pkg_resources/__init__.py", line 668, in _build_master
   return cls._build_from_requirements(__requires__)
 File "/usr/local/lib/python2.7/site-packages/pkg_resources/__init__.py", line 681, in _build_from_requirements
   dists = ws.resolve(reqs, Environment())
 File "/usr/local/lib/python2.7/site-packages/pkg_resources/__init__.py", line 870, in resolve
   raise DistributionNotFound(req, requirers)
pkg_resources.DistributionNotFound: The 'pillow==4.1.1' distribution was not found and is required by mycroft-core
So we need version 4.1.1 of Pillow, not 2.9.0 installed by clarifai! But don't just sudo pip install Pillow as this will install Pillow 5.0.0 and Mycrfot will not work with it. Instead uninstall Pillow and force the installation of version 4.1.1 with:
sudo pip install Pillow==4.1.1
But we are not there just yet! After a reboot, I still got the jaundiced and silent treatment! Looking again at /var/log/mycroft-skills.log shows:
Traceback (most recent call last):
 File "/usr/local/bin/mycroft-skills", line 9, in <module>
   from pkg_resources import load_entry_point
...
pkg_resources.DistributionNotFound: The 'future==0.16.0' distribution was not found and is required by mycroft-core
So I just issued the following command,
sudo pip install future=0.16.0
closed my eyes and rebooted! And he lives! The last step is to make sure you grant access to Mycroft to use the PiCamera:
sudo usermod -a -G video mycroft
I don't remember having to go through all of this with my previous clarifai & mycroft project, so something must have changed. Lessons learned: always read the install messages and always look at /var/log/mycroft-skills.log when something is up. Now the fun can begin!
Using ClariaiThe clarifai python api is easy to use. I recommend writing a few test scripts and trying it out before trying to integrate it into a skill. This will give you a chance to get familiar with it and parsing through the json packages it sends back.
Additionally you can debug much of the visual functionality and not have to worry about this as you debug the voice components. After you have done this, incorporating the clarifai aspects into your skill is quite easy, think "cut & paste".
The clarifai documentation is a must read and I have a couple of projects that will help you as well:
In this write-up I will concentrate on creating and training a custom model. Go ahead and get sign up for you free clarifai developer account, get your api key a and create an app!
Creating, Training and Using a Custom ModelClarifai has manh ready-to-use trained models, such as color, celebrity, travel and many more. They don't, however, have a "Rock Paper Scissors" model. This is where custom models come into play. Creating a custom model is well described in the clarifai documentation. I'll show how I applied that process to create my "rockpaperscissors" model here.
The custom model process:
- add your images with associated concepts
- create the model
- train the model
- use the model
The full code for all the scripts I used as utilities to create and train the model are on my github page.
I made images of hands in each of the rock, paper or scissors position. These were pictures taken with an iPhone and I used myself, my wife and son as "hand" models. Then I made a simple and crude script to "upload" these images with my concepts and not concepts to clarifai. I load each image separately as such:
clarifai_app.inputs.create_image_from_filename(filename="rock1.jpg", concepts=['rock'], not_concepts=['paper','scissors'])
After adding all you images with associated concepts, you have to create the model. This is very simple and only requires a line of code.
model = clarifai_app.models.create('rockpaperscissors', concepts=['rock','paper','scissors'])
The model id is simply the name you give it, in this case, "rockpaperscissors". Your images are loaded and your model is made. Now, your model will require some training to work properly:
from clarifai.rest import ClarifaiApp
app = ClarifaiApp(api_key='YOU API KEY HERE')
model = app.models.get('rockpaperscissors')
model.train()
Clarifiai not only returns concepts, but will also return an associated value representing how confident clarifai believes that the concept it is reporting is in the image.
When I first tested the model after training on my initial images, the model recognized everything as rock with a high confidence value. So you will need to do some follow up training. I trained on images taken with my iPhone, just 10 for each of rock, paper and scissors. Now I was looking are images from the PiCamera at my desk.
So to further train the model, I made a simple command line menu driven script. I run this on the Mark I command line from ssh. I could have incorporated this process into a Mycroft skill as well. Perhaps I will, but in order to get the model trained and running asap, I went cli old school!
This following is an output trace shows a run using the testModel.py script. The values to the right of the concept represent the confidence that concept has been observed in the picture.
------------------------------
  RPS - TEST MODEL MENU
------------------------------
0. Exit
1. Take Test picture
------------------------------
Enter your choice [0-1] : 1
Taking a picture...
scissors : 0.98923486
paper : 0.005966468
rock : 6.13205e-05
Enter your choice [0-1] : 1
Taking a picture...
scissors : 0.9895846
paper : 0.0037088227
rock : 0.0001315531
Enter your choice [0-1] : 1
Taking a picture...
paper : 0.95485735
scissors : 0.22752154
rock : 0.00014038719
Enter your choice [0-1] : 1
Taking a picture...
paper : 0.89271563
scissors : 0.1276629
rock : 0.00030472572
Using this script, I tested a random sequence of 20 rounds of RPS. At the point of this training, model had been trained on 63 images (Rock 18, Paper 24, Scissors 21) using my hand. My model was 80% correct. Clarifai has a model explorer that allows you to look at the images, concepts, tags, values, etc. This is a key tool for custom models.
From looking at these images and the values returned to me with the testModel.py script. I could see that, I didn't train it to enough "palm" on images of rock and that the model was most "confused" with rock and paper. So I used my trainModel.py script to train the model with 5 more Rock and images and 4 more paper images. After this, using the same sequence, the clarfiai custom model scored 90%! Now I was concerned that the model was learning my hand, so I had my son run through the same 20 images. . .the score 75%! Suspicion confirmed.
Using this knowledge, in the future, I will train the model to many more hands and from different people. Additionally I am not really making proper use of the scores being returned. Some of the scores returned were very close to one another. We could use this fact to have Mycroft ask for another round instead of answering incorrectly or hedging and asking for confirmation. We could also use a training mechanism that would have mycroft periodically ask for a confirmation, especially when the confidence values are close.
With the generous free developer option with large allowable limits on images and operations, we could easily refine this model quite a bit. In fact seeing the model improve from 80-90% with just 10 images shows me how quickly we could make this a solid and general model.
The SkillOnce I was confident that my custom clarifai model was working well enough, I was ready to incorporate this into a skill. For general information on Mycroft Skill creation, please see. I'll highlight some of the important aspects I found here.
Mycroft skills reside in the /opt/mycroft/skills folder. Each folder within this folder represents a skill.
This skill has a relatively simple directory structure. The main action occurs in the __init__.py file. Here we create the skill and create a list to contain the words used later on in the game and game logic.
class RockPaperScissorsSkill(MycroftSkill):
    def __init__(self):
        super(RockPaperScissorsSkill, self).__init__(name="RockPaperScissorsSkill")
        self.gameChoices = ['rock','paper','scissors']
Mycroft can figure out what skill you want to run by using either the adapt intent parser or Padatious. Adapt matches keywords in a .vocab file to words detected in an utterance(what you say after the wake word, "Hey Mycroft"). Padatious uses a neural network pattern matching approach to compare the utterance with the sentences in the .vocab file.
I like the Padatious approach as it allows you to model utterances very closely to natural language. Each approach has its pluses and minuses but for rapid skill development in nautral sounding phrases I prefer Padatious. It does not yet truly support conversational context, which is a minus, but I assume this will change in the future.
In the initialize function we create the clarifai app and use this to access the rockpaperscissors model we created before. The "api_key" is unique to you after you create your clarifai account and app. I place this in the settings.json file in the skill directory to increase flexibility.
def initialize(self):
        self.load_data_files(dirname(__file__))
        self.clarifai_app = ClarifaiApp(api_key=self.settings["api_key"])
        self.rpsModel = self.clarifai_app.models.get('rockpaperscissors')
        self.register_intent_file('rps.intent',self.handle_rps)
A skill may execute many task based on what is spoken(recognized utterance). Each of these utterances is paired with a handler. In this case, there is only one handler, def handle_rps(). You can see here that Mycroft does not cheat, he just randomly picks either rock, paper or scissors and this "choice" is held within a list. Mycroft's choice is held in index 0. Then he prompts the player to chose. This could be done through a dialog file, and then you could add some variety to the starting cue as the lines in the dialog file would be chosen randomly. I just kept it simple here and used the self.speak() function.
def handle_rps(self,message):
    rpsRound = []
    rpsRound.append(self.mycroftChoice())
    self.speak("O K lets play")
    self.speak("rock paper scissors go")
    rpsRound.append(self.playerChoice())
    self.speak("i chose " + rpsRound[0])
    self.speak("you chose " + rpsRound[1])
    self.gameLogic(rpsRound)
Mycroft will then determine what the player has chosen by evaluating the response from the clarifai custom model.
def playerChoice(self):
    self.take_picture()
    resp = self.rpsModel.predict_by_filename(self.settings["img_location"] +     'rps.jpg')
return self.parseResponse(resp)
When parsing the response, we simply return the concept associated with the highest confidence value. However, as I mentioned above, this doesn't really take advantage of all that clarifai is offering and this is where we could add some logic to use these values to improve the experience.
The last function in the skill is the game logic function. This simply looks at the two values chosen by Mycroft and the player, if they are the same. It declares a tie, if different it steps through to see which combination was chosen and uses the simple logic of the game to state the result.
No attempt here is made to record or keep track of the results. It would be nice to not only keep track of the results, but also keep track of the player and their hands to perhaps give Mycroft a slight "edge in play. . .many future improvements.
ConclusionThe main conclusion here is TL;DR! But if you made it this far, you have seen how easy it is to create and train a custom model with clarifai and to get this model to 90% accuracy very rapidly. Supervised learning with less that 100 images. It also should be apparent how easy and fun it is to incorporate this two great platforms, Mycroft and Clarifai to explore both voice and vision ai concepts.
If you made it this far, do me a favor and let me know some idea, improvements, etc you would like to see with this skill/game. Thanks in advance!
More Videos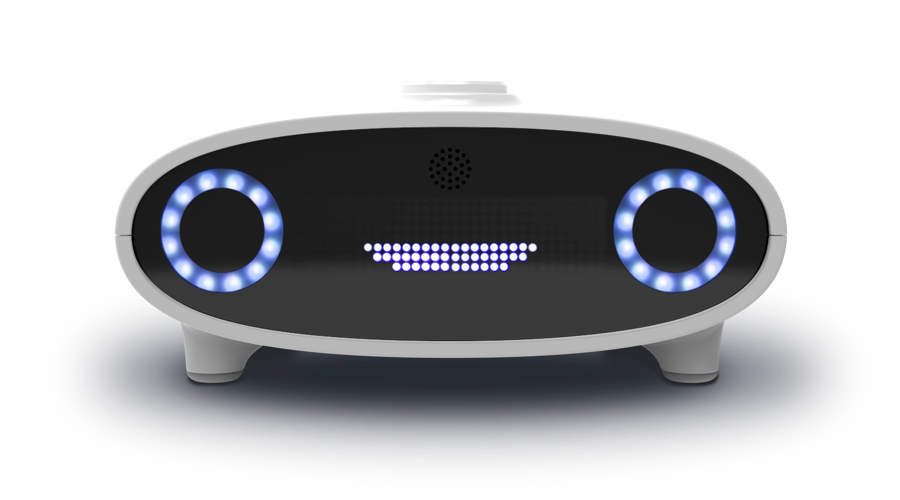


Comments