

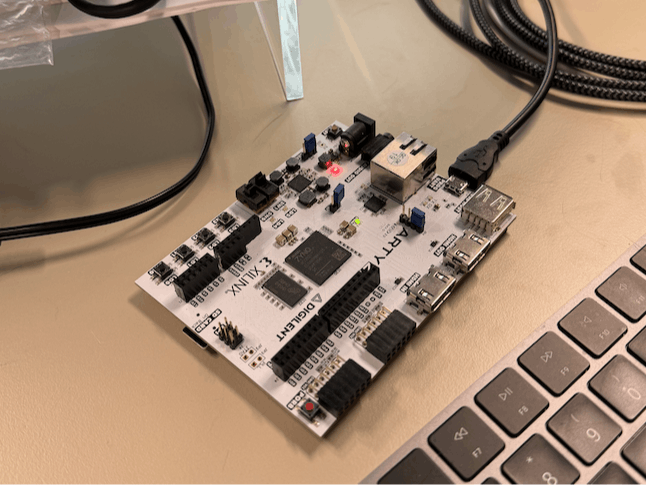
Hardware components | ||||||
 |
| × | 1 | |||
Software apps and online services | ||||||
 |
| |||||
As I mentioned in my tutorial for creating a base hardware design in Vivado 2023.2 for my Arty Z7 development board, there was a major overhaul of the Vitis IDE going from version 2023.1 to 2023.2 in going from the Vitis Classic IDE to the Vitis Unified IDE.
The new Vitis Unified IDE gets its "unified" name from the fact that it combines the functionalities that were previous spread across multiple IDEs into one. So what was the Eclipse Vitis classic IDE, Vitis HLS, and Vitis Analyzer are all combined into the the one overall IDE with a look and feel akin to Visual Studio. And while it looks completely different, I found that the workflow at its core is still somewhat similar. The main differences and some things have been renamed as I'll point out in this tutorial and some things have been shuffled around since everything is all in one IDE now.
This particular tutorial will step through how to create a bare-metal (no-OS) application to run on the ARM-core processor of the Zynq FPGA on an Arty Z7 board. I'll show how to create a blank application ready for user code, and I will show how to create an application from an example template (specifically the Hello World application example). I have other tutorials for the new Vitis IDE coming up for the HLS and accelerated application workflow, check my Hackster profile as they will be posted after this one.
I am using the hardware XSA file exported from the Vivado project for my Arty Z7 board created in my other project post. I also posted installation instructions for Vitis 2023.2 on an Ubuntu host PC in another project post here.
Launch VitisLaunching the new Vitis Unified IDE isn't any different. It can still be launched from Vivado under the menu option of Tools > Launch Vitis IDE:
Or launched straight from the command line:
~$ source /tools/Xilinx/Vitis/2023.2/settings64.sh
~$ vitisThe first step after launching Vitis is to open an existing workspace or create a new one. Creating a new workspace is the first thing I found that might not be immediately obvious as it's just a matter of creating the new empty folder to open as a workspace.
So after clicking the option to Open Workspace in the Get Started section, a file browser window is brought up.
And I simply create a new folder in the desired directory location.
For organization purposes, I like to create a folder titled "vitis_workspace" in the top level directory of the corresponding Vivado project that I exported the hardware XSA file from that I will be using in Vitis.
After opening the workspace in the desired directory, the options in the left-most tab will change to show the option to create different types of components.
One of the biggest changes that I noticed from the Vitis Classic IDE going to the Vitis Unified IDE, is that everything that was previously called a "project" is now called a "component". For example, if you look at my last bare-metal application tutorial for the Arty Z7 in Vitis 2022.1, a platform project is now called a platform component and an application project is now called an application component. The underlying functionality is still the same though, the platform still contains lower level/hardware configuration aspects such as the BSP (board support package) and therefore needs to be created/built first as the application is created to run on top of it.
Create New Platform ComponentAs previously mentioned, the first thing that needs to be created is the platform component. Now you might notice there are three different places where the option Create Platform Component option appears: in the lefthand navigation pane, in the Embedded Development section of the Welcome tab, and in the System Development section of the Welcome tab.
Since a bare-metal/no-OS application is being created, this means that the Embedded Development workflow is being followed. However, since this selection isn't specified until during the creation of the platform component, all three hyperlinks to Create Platform Component are the same thing.
I clicked Create Platform Component in the lefthand navigation pane, which brought up the pop up window to create the platform.
Give the platform the desired name, and the location will default to that of the Vitis workspace.
On the next page, select the option for Hardware Design,
And point to the exported XSA file from the corresponding Vivado project. The emulation option does not apply to bare-metal applications.
On the next page select standalone for the Operating system. The processor will default to the first of the two in the dual-core Zynq that's on the Arty Z7. Be sure that the option to Generate Boot artifacts is checked.
Review the selected options on the summary page and click Finish to generate the platform component.
With the platform component created, the next step is to create the application component. To create a new blank application component, select File > New Component > Application:
Give the application the desired name, and the location will default to that of the Vitis workspace.
On the next page, select the platform created in the previous steps.
Since the platform was configured for standalone on the one core of the Zynq's ARM processor, there is only the one domain to create the application in (the standalone/bare-metal domain on PS0).
Review the selected options on the summary page and click Finish to generate the application component.
Those that are familiar with the Vitis Classic IDE are probably asking "What happened to the application template option?!" And don't worry it's still there, it just moved. It's now more akin to XSDK days where full example application projects (components now) could be created in the workspace.
Switch back to the Welcome tab and click Examples under Get Started.
This will open Embedded Software Examples in the lefthand navigation pane. All of the options that used to appear in application templates plus more are there.
Click the desired example application (Hello World in this case), which will open a new tab with the option to Create Application Component from Template:
This will open open the configuration window again to allow for a custom name to be given to the application component.
Again, select the platform component created in the previous steps. As many applications can be created on a platform as desired, the OS type just has to match (so all have to be bare-metal/no-OS/standalone).
Since the platform was configured for standalone on the one core of the Zynq's ARM processor, there is only the one domain to create the application in (the standalone/bare-metal domain on PS0).
Review the selected options on the summary page and click Finish to generate the application component.
Now another big change that I noticed in the new Vitis Unified IDE compared to Vitis Classic, is that when a build is run on the application component if the platform component either hadn't been built yet or was out-of-date, Vitis Classic would detect that and automatically build the platform component. Vitis Unified does not do this and the build of the application will fail if the underlying platform has not been built yet or is out-of-date.
To build a component, select it in the lefthand navigation pane. Then in the Flow window directly below, single left-click Build. And again, be sure to build the platform component first, before the application component.
Now I did notice that I had what looked like an error with the printf include file in the Hello World example:
It didn't affect the ability to run a successful build of the application, but the red lines bother me so I changed the search from local "" to global <> search and the red lines went away.
To launch an application debug run on the Arty Z7 board, first set the boot jumper JP4 to JTAG on the board:
Connect the PROG UART of the Arty to the host PC:
Again like how the application was built, select the Hello World application component in the lefthand navigation pane. Then in the Flow window directly below, single left-click Debug to launch the debug run.
Unfortunately, there is not a serial terminal built into Vitis Unified 2023.2, so to see the print statements from the Arty stepping through the application, use an external program such as Putty or TeraTerm.
Like I mentioned previously, I will be posting more tutorials for the other workflows for Linux applications, HLS, accelerated applications, etc. in the new Vitis Unified IDE. So stay tuned!


Comments