

Hardware components | ||||||
_ztBMuBhMHo.jpg?auto=compress%2Cformat&w=48&h=48&fit=fill&bg=ffffff) |
| × | 1 | |||
| × | 1 | ||||
Software apps and online services | ||||||
 |
| |||||
ST Micro's L6470 stepper driver is an SPI-based fully micro-step driver with own MOSFET-bridge, PWM generator, and stepper sequencer on chip. It lets you initialize the stepper controller by SPI, then by SPI command operate it for running, stepping, including detection of over-current, under-voltage and step-loss (slip). It includes internal counters that feature relative stepping by saving stepper-set-points and stepping with external switch-interrupt.
The nice thing is that the MCU/Arduino has only to setup the control, and does not need to do the own signal generation. So, very interesting for 3D printers and other precision motor applications: shoot and forget. :-)
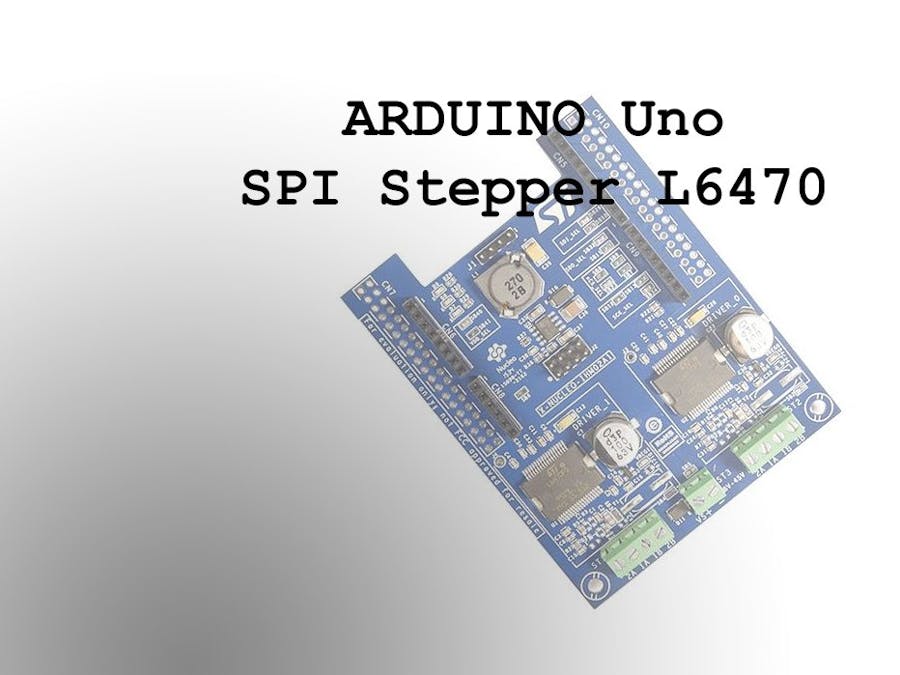
STM Eval Board HardwareThe eval board X-NUCLEO-IHM02A1 has two L6470 mounted in SPI daisy-chain. More boards can be chained up (stacked) by modding some of the open solder-settings -see user manual UM1964. Standard the board is set to 3.3V, so with the use of the Arduino Uno ( 5V ), you have to adapt the power-solders (SB40/SB41). Additionally, the SPI clock of the eval board is on pin D3, you can hardwire the D3 to the SPI-CLK pin (D13). In the software, D3 is set to input (Hi-Z) to keep the clock unforced.
In general, this board is for bipolar stepper motors from 12V-48V (6A), as the under voltage protection is hard set at 7.5-9V, lower voltages are not recommended (but possible to drive).
Driver LibrarySTM has developed their own driver library, but this is specifically for STM32 Nucleo boards. It can be reused, BUT the easiest way is to use the SparkFun Autodrivers. Download the GitHub drivers and install them in your library-directory. The class AutoDriver creates a L6470 motor driver:
AutoDriver YAxis(0, A2, 4);    // Nr, CS, Reset => 0 , D16/A2 (PA4), D4 (PB5)
AutoDriver XAxis(1, A2, 4);    // Nr, CS, Reset => 1 , D16/A2 (PA4), D4 (PB5)
By using the function calls of the class, the L6470 can be set up and controlled. See the code for more examples and take a look in the include file of the SparkFun library <SparkFunAutoDriver.h> for all commands.
De Arduino sketch initiates two drivers, and let you control by serial-keyboard one motor.
Have fun!


Comments