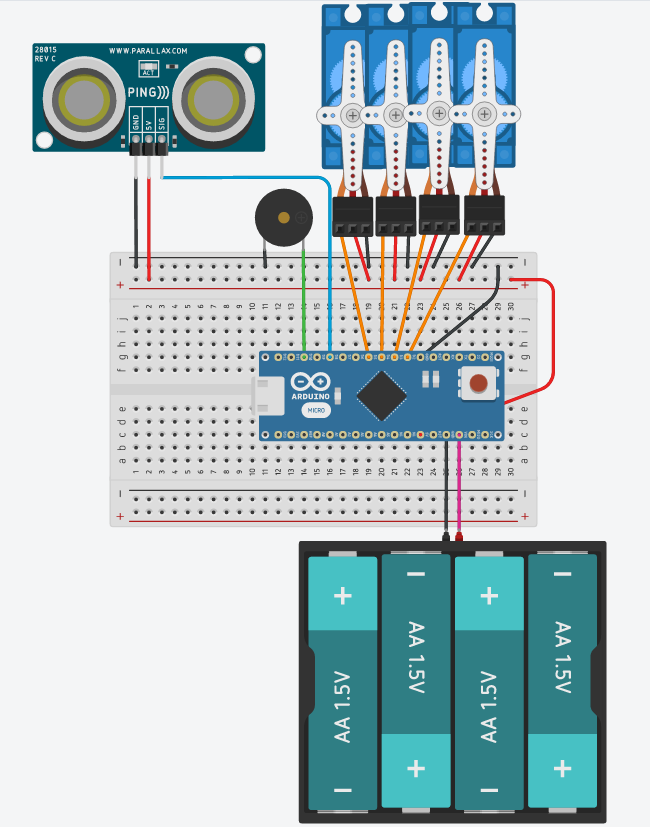
Otto DIY + would be the improved and advanced version of original #OttoDIY, the idea is to have the same base features DIY robot + Bluetooth control and programming + metal gear servo motors + optional rechargeable + changing modes by touch sensor + sound sensor + ...?
main features of this Otto robot
The exciting part is that we are doing open development with makers and hackers around the world so we are open to ideas, not only from experts, you can join us with, feedback, social share, testing or any other contribution that you might think of.
some main moves
follow our live build video!
how to build video part 1
how to build video part 2
Start to play with the APP!
Baud-rate for programming module is 9600 or 19200 or 38400, depends on a module. and the code you are using
The BT code for our APP has 9600 baud-rate so BT module must match that speed to be able to communicate with Arduino Nano via serial interface(UART).
APP control
Main Code:
Upload this code with the Bluetooth module disconnected
After successful upload connect the Bluetooth module and it will be ready for pairing with your phone.
Our web application allows remote control of all movements, gestures and sounds of your Otto robot via BLE Bluetooth.
If the APP didn't work is probably because the Bluetooth module is not BLE or came with a baud rate different, so you need to setup or change in the code.
CodewithBlock
The easiest to code your own Otto is by using one of our Blockly based software.
Otto Blockly makes coding easy
For more advanced coding here there is some basic programming with Arduino IDE:
1 / 11 • arduino programming with Otto DIY+
Post your remix and modifications in the Otto Builder community.
Working as quality control inspector at rail vehicles factory. I'm interested in programming microcontrollers, making toys and learning about everything.


_t9PF3orMPd.png?auto=compress%2Cformat&w=40&h=40&fit=fillmax&bg=fff&dpr=2)


_3u05Tpwasz.png?auto=compress%2Cformat&w=40&h=40&fit=fillmax&bg=fff&dpr=2)


Comments