

Hardware components | ||||||
| × | 1 | ||||
_ztBMuBhMHo.jpg?auto=compress%2Cformat&w=48&h=48&fit=fill&bg=ffffff) |
| × | 1 | |||
 |
| × | 1 | |||
| × | 2 | ||||
| × | 2 | ||||
| × | 2 | ||||
| × | 2 | ||||
| × | 2 | ||||
 |
| × | 2 | |||
| × | 4 | ||||
| × | 22 | ||||
 |
| × | 3 | |||
 |
| × | 1 | |||
Software apps and online services | ||||||
 |
| |||||
http://www.donluc.com/?p=2020
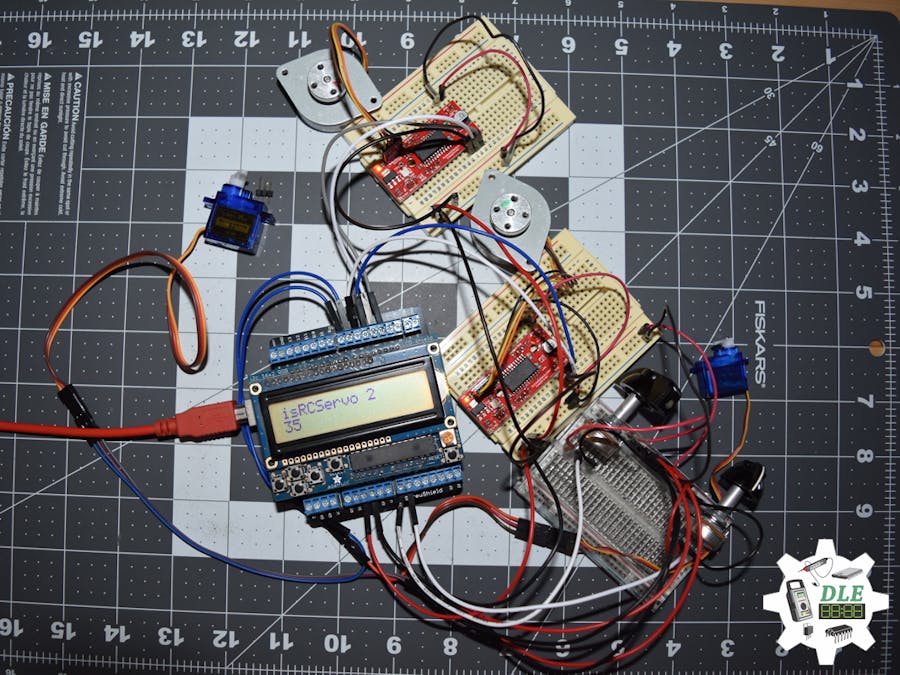
Servo (Radio Control)Servos (also RC servos) are small, cheap, mass-produced servomotors or other actuators used for radio control and small-scale robotics.
Radio control servos are connected through a standard three-wire connection: two wires for a DC power supply and one for control, carrying a pulse-width modulation (PWM) signal. Each servo has a separate connection and PWM signal from the radio control receiver. This signal is easily generated by simple electronics, or by microcontrollers such as the Arduino. This, together with their low-cost, has led to their wide adoption for robotics and physical computing.
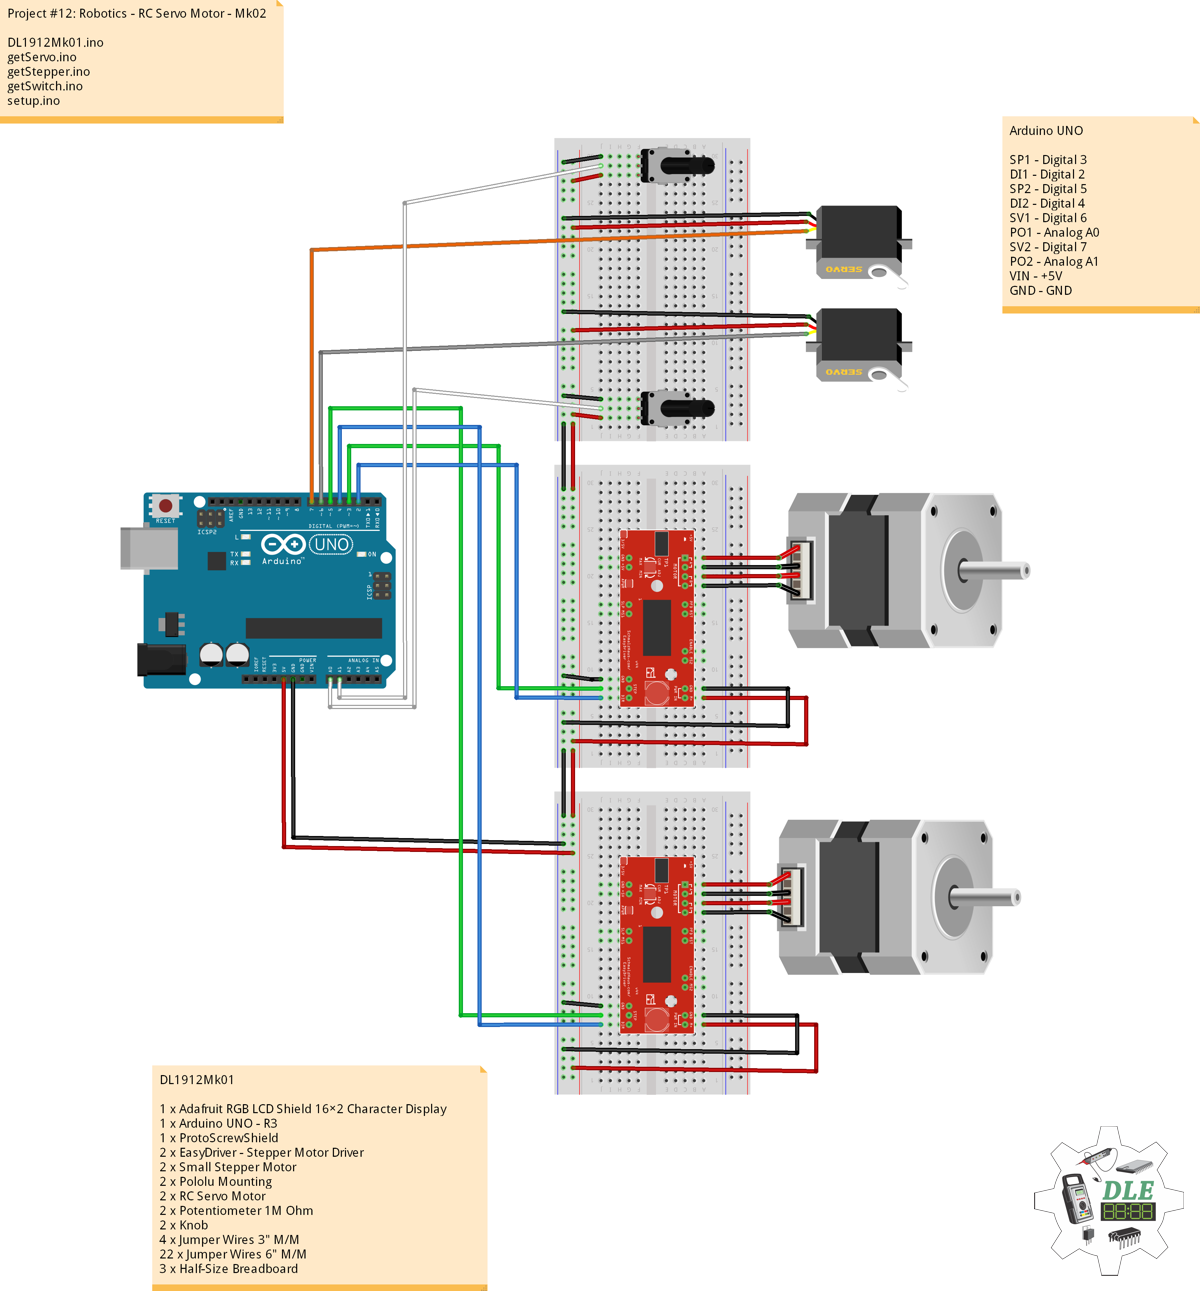
1 x Adafruit RGB LCD Shield 16×2 Character Display
1 x Arduino UNO - R3
1 x ProtoScrewShield
2 x EasyDriver - Stepper Motor Driver
2 x Small Stepper Motor
2 x Pololu Mounting
2 x RC Servo Motor
2 x Potentiometer 100K Ohm
2 x Knob
4 x Jumper Wires 3" M/M
22 x Jumper Wires 6" M/M
3 x Half-Size Breadboard
1 x SparkFun Cerberus USB Cable
SP1 - Digital 3
DI1 - Digital 2
SP2 - Digital 5
DI2 - Digital 4
SV1 - Digital 6
PO1 - Analog A0
SV2 - Digital 7
PO2 - Analog A1
VIN - +5V
GND - GND
http://www.donluc.com/DLHackster/LucPaquinCVEngMk2020a.pdf
Web:http://www.jlpconsultants.com/
Web:http://www.donluc.com/DLHackster/
Web:https://www.hackster.io/neosteam-labs
YouTube:https://www.youtube.com/channel/UC5eRjrGn1CqkkGfZy0jxEdA
Facebook:https://www.facebook.com/neosteam.labs.9/
Instagram:https://www.instagram.com/neosteamlabs/
Pinterest:https://www.pinterest.com/NeoSteamLabs/
Twitter:https://twitter.com/labs_steam
Etsy:https://www.etsy.com/shop/NeoSteamLabs
Don Luc


_3u05Tpwasz.png?auto=compress%2Cformat&w=40&h=40&fit=fillmax&bg=fff&dpr=2)
Comments