



Hardware components | ||||||
| × | 1 | ||||
Hand tools and fabrication machines | ||||||
 |
| |||||
 |
| |||||
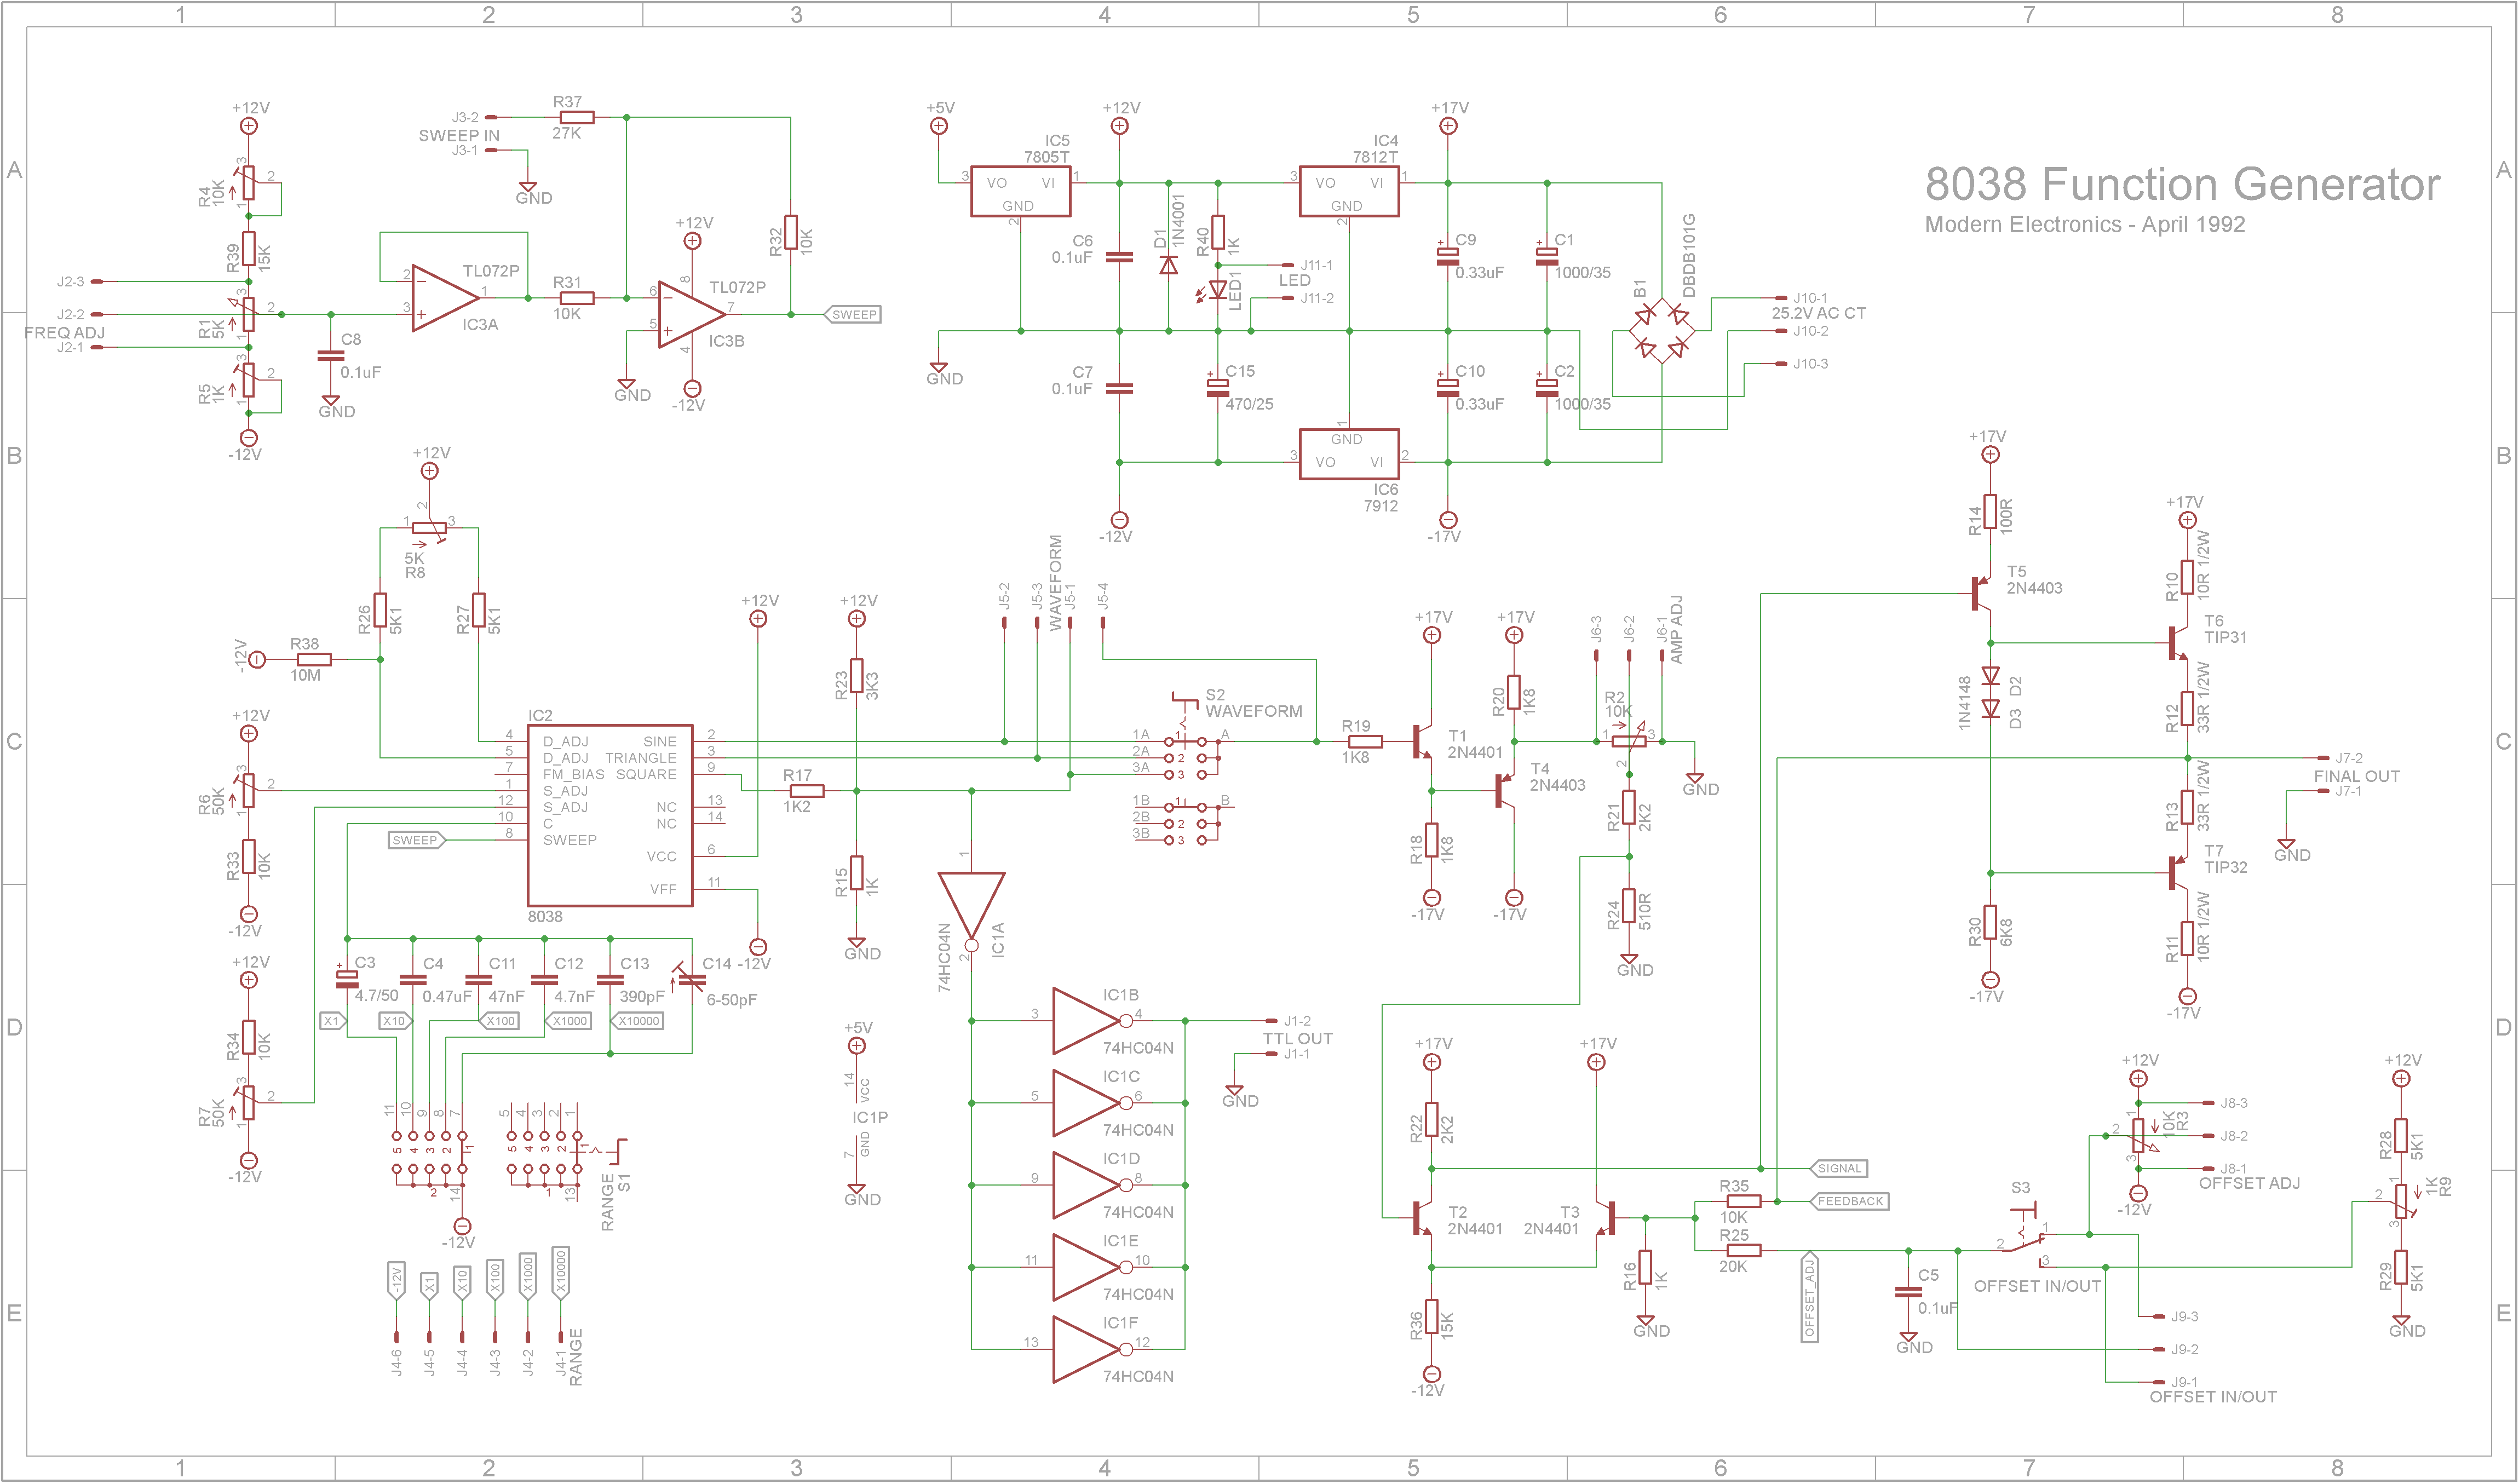
Back in 1992, this Lab-Grade Function Generator appeared in Modern Electronics magazine (Article attached). It is based on the 8038 Function Generator chip from Intersil.
Back in the nineties, 3D printers weren't available so projects were either fitted in a generic commercial case or you had to make one out of steel, aluminum or wood. My first build of this function generator was made from wood.
So I thought it was time to upgrade this project and put it into a 3D printed case.
3D printingThe STL files for the case are attached. All printing is done using a 0.2mm layer height. You may need to orientate the parts on the build plate before slicing.
When printing "Lab-Grade Function Generator V2 - Text.stl", switch to a filament of a contrasting color at the start of layer 4.
Print "Lab-Grade Function Generator V2 - Front.stl" with supports. After printing, remove the supports and add the two potentiometers and two rotary switches to their respective holes. Do not use washers as the nuts need sit below or flush with the front.
Add double-sided tape to the back of "Lab-Grade Function Generator V2 - Text.stl" and stick on the front of "Lab-Grade Function Generator V2 - Front.stl".
Finally add the BNC connector, 5mm LED and miniature toggle switch.
Add 4mm diameter by 3mm high M3 brass inserts into the holes on the tabs for the bottom and top clam-shells.
Add 4mm diameter by 5mm high M3 brass inserts into the PCB mounting holes on the top clam-shell.
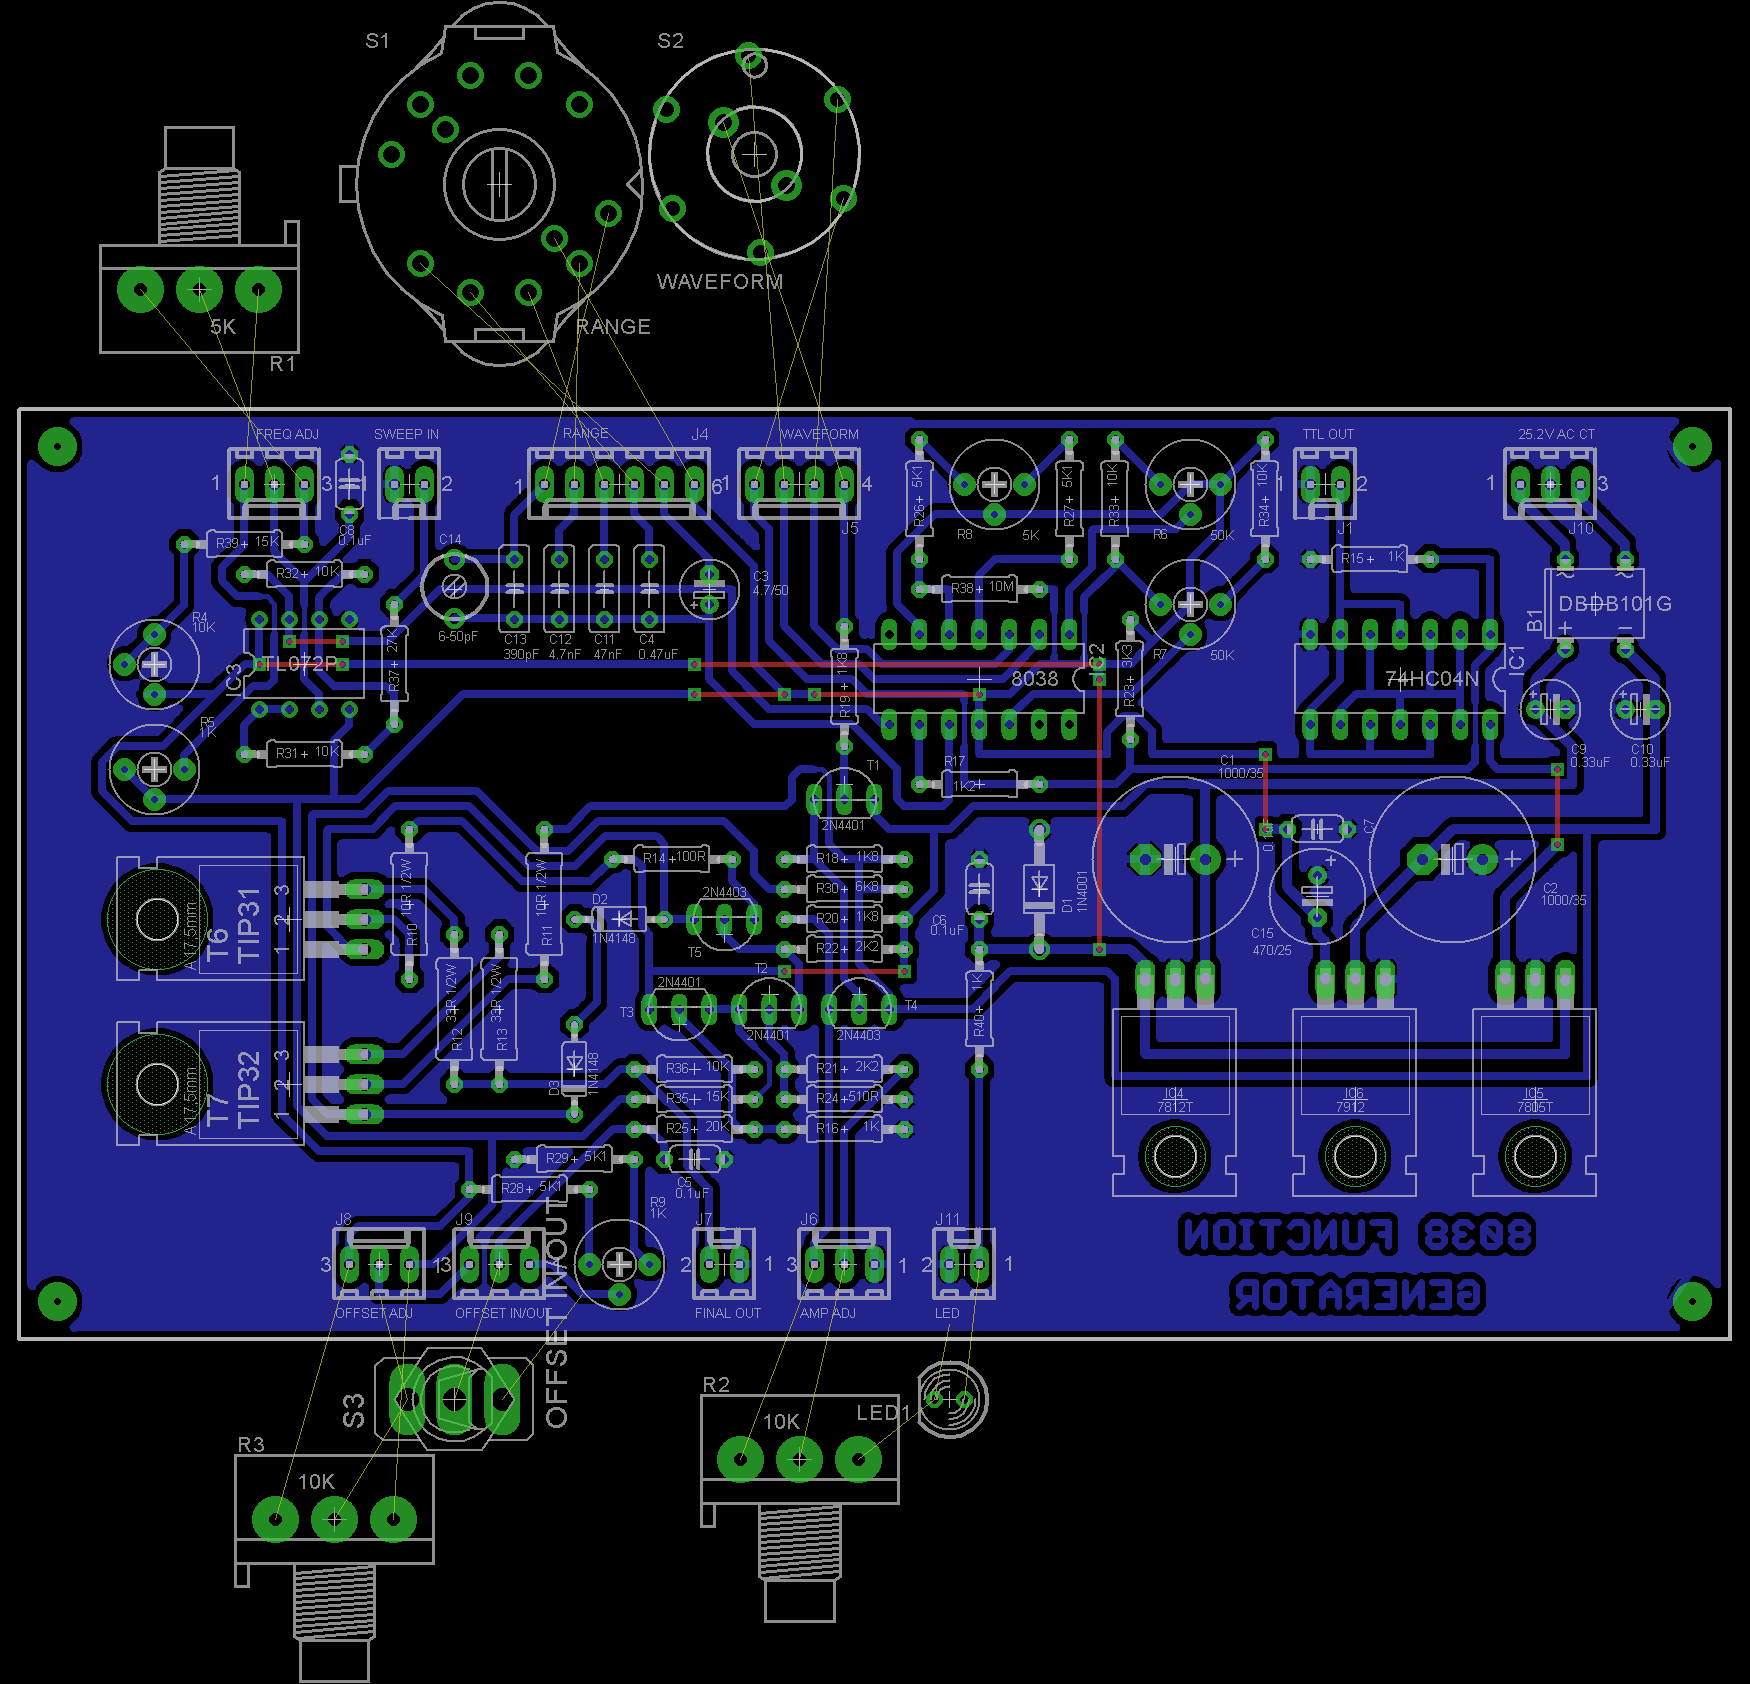
ElectronicsI designed a PCB to hold the components. External connections to the PCB use KF2510 connectors to keep everything tidy.
The Eagle files are attached if you wish to get the board commercially made or you can do as I did and make it yourself. I used the Toner method to make mine.
Although the circuit called for a 25.2 V center-tapped transformer, I only had a 12V + 12V transformer. It is mounted using 10mm female-female pillars with 6mm countersunk screws to hold the pillars to the back and 22mm screws to hold the transformer to the pillars. I added two full wave rectifier bridges on a piece of proto-board and bypassed the full wave rectifier bridge on the PCB with a couple of links.
Note: The PCB is mounted on the top clam-shell.
The 3D printed case is certainly an improvement over my wooden case. Unfortunately projects that are built from individual components are disappearing. Microprocessors and modules are taking over but I do miss the enjoyment of building projects from basic components.





Comments