

Hardware components | ||||||
 |
| × | 1 | |||
| × | 1 | ||||
Software apps and online services | ||||||
 |
| |||||
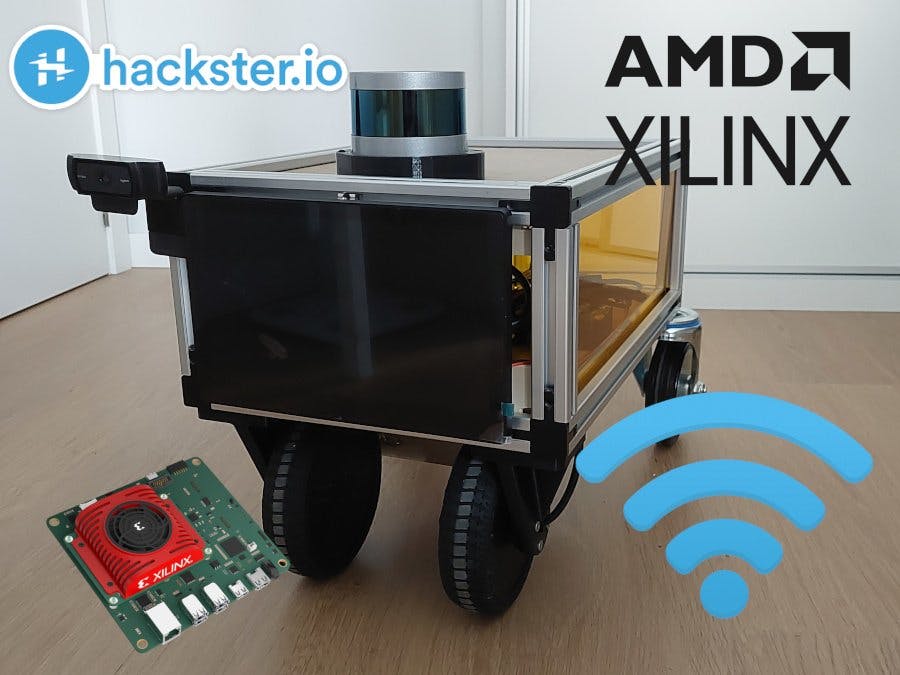
Kria Autonomous Robotic Platform (Karp) uses an Edimax AC6000 USB Realtek 8821au device to create a Wireless network. In this tutorial, we will see how to compile the necessary drivers, connect the Kria board to a WiFi network, and finally create an access point using hostapd in Petalinux.
1. Modifying Petalinux and adding the necessary recipes.First, we need to ensure that we have this checked on the Kernel, with
petalinux-build -c kernel- Networking support, cfg80211 extension compatibility
In Networking support --> wireless --> cfg80211 - wireless configuration API --> cfg80211 wireless extensions compatibility
- Staging drivers
In Device Drivers --> staging drivers
Then, inside the Petalinux project meta-user folder, we need to create a recipes-connectivity folder where we are going to add another two folders, one for the needed driver for our Edimax device called rtl8821au and another one for creating a wifi access point hostapd.
- rtl8821au
Inside rtl8821au we will add the corresponding recipe rtl8821au.bb,
SUMMARY = "Realtek 802.11n WLAN Adapter Linux driver"
LICENSE = "GPLv2"
LIC_FILES_CHKSUM = "file://${WORKDIR}/git/LICENSE;md5=ca671256c791bbbf7c985ca88dc89fc9"

inherit module

SRCREV = "cf05bfaee0f1a811fb165fc2e90465c564774383"
SRC_URI = "git://github.com/jlamperez/8821au-20210708.git;branch=main \
           file://0001-Compile-for-kria-kv26-platform.patch \
           file://0002-Use-modules_install-as-wanted-by-yocto.patch"

S = "${WORKDIR}/git"

export KSRC = "${STAGING_KERNEL_DIR}"
This recipe will download the corresponding driver code located in https://github.com/jlamperez/8821au-20210708 which is a fork of https://github.com/morrownr/8821au-20210708.
For the use of this driver with Kria, we will patch it with the next patches:
- 0001-Compile-for-kria-kv26-platform.patch
- 0002-Use-modules_install-as-wanted-by-yocto.patch
That you can find in the https://www.hackster.io/jlamperez10/karp-petalinux-and-edimax-ac6000-for-wireless-communication-3a2eff#code section. In the first patch, we add some configurations to be able to compile for the Kria board. The second one is for PetaLinux because it needs a modules_install order in the Makefile.
- hostapd
Inside hostapd we will create the next recipe, hostapd_2.9.bbappend
FILESEXTRAPATHS_prepend := "${THISDIR}/${PN}:" SRC_URI += " file://hostapd.conf"
do_install_append () { install -m 0644 ${WORKDIR}/hostapd.conf ${D}${sysconfdir} }
This will copy our hostapd configuration, hostapd.conf into the board
# Basic configuration

interface=wlan0
ssid=kriakv26
#bridge=br0

# WPA and WPA2 configuration

macaddr_acl=0
auth_algs=1
ignore_broadcast_ssid=0
wpa=3
wpa_passphrase=hellokria
wpa_key_mgmt=WPA-PSK
wpa_pairwise=TKIP
rsn_pairwise=CCMP

# Hardware configuration
# 802.11n support
ieee80211n=1
# the channel to use
#channel=40 #5GHz
channel=1 #2.4GHz
# "g" simply means 2.4GHz band
hw_mode=g
# "a" simply means 5GHz band
#hw_mode=a
# limit the frequencies used to those allowed in the country
ieee80211d=1
# the country code
country_code=ES
# QoS support, also required for full speed on 802.11n/ac/ax
wmm_enabled=1
device_name=RTL8821AU
manufacturer=Realtek
Is important to say here that we are using the 2.4Ghz band because when I was using 5Ghz there was a problem when connecting the HDMI monitor and the network was not created.
Third, we need to add wpa-supplicant packages to our Petalinux rootfs (wpa-supplicant,wpa-supplicant-passhphrase and wpa-supplicant-cli ), so
petalinux-config -c rootfsAnd finally to our petalinux-image-minimal.bbappend we need to add
IMAGE_INSTALL_append =
  ...
rtl8821au \Now that we have compiled the necessary driver for our wireless adapter using ifconfig-a we should be able to see wlan0 network interface in the Kria board. Doing,
sudo ifconfig wlan0 upthe wlan0 interface will be up.
For connecting to the internet you need to create a configuration file with the next command,
wpa_passphrase NETWORK_NAME PASSWORD |tee wpa_supplicant.confAnd see that you can connect to your network,
sudo wpa_supplicant -c wpa_supplicant.conf -i wlan0 -BAlthough we are connected to the AP, we still need to get an IP with,
sudo udhcpc -i wlan0This will give us:
udhcpc: started, v1.32.0
udhcpc: sending discover
udhcpc: sending select for 192.168.1.45
udhcpc: lease of 192.168.1.45 obtained, lease time 43200
RTNETLINK answers: File exists
/etc/udhcpc.d/50default: Adding DNS 80.58.61.250
/etc/udhcpc.d/50default: Adding DNS 80.58.61.254
And we can check that the IP address is correctly added to our wlan0 interface,
wlan0: flags=4163<UP,BROADCAST,RUNNING,MULTICAST>  mtu 1500
        inet 192.168.1.45  netmask 255.255.255.0  broadcast 192.168.1.255
        inet6 fe80::76da:38ff:fe8d:ba2  prefixlen 64  scopeid 0x20<link>
        ether 74:da:38:8d:0b:a2  txqueuelen 1000  (Ethernet)
        RX packets 45  bytes 7854 (7.6 KiB)
        RX errors 0  dropped 0  overruns 0  frame 0
        TX packets 12  bytes 2074 (2.0 KiB)
        TX errors 0  dropped 12 overruns 0  carrier 0  collisions 0
Now if you try to do ping with this interface you will see that although you have IP you are not able to do it.
xilinx-k26-starterkit-2021_2:~$ ping -I wlan0 8.8.8.8
PING 8.8.8.8 (8.8.8.8) from 192.168.1.45 wlan0: 56(84) bytes of data.
To be able to do ping you would need to add a new route to the routing table with,
sudo ip route add default via 192.168.1.1 dev wlan0Then the routing table if you have something connected to the ethernet cable will look like this:
xilinx-k26-starterkit-2021_2:~$ route
Kernel IP routing table
Destination     Gateway         Genmask         Flags Metric Ref    Use Iface
default         192.168.1.1     0.0.0.0         UG    0      0        0 wlan0
default         192.168.1.1     0.0.0.0         UG    10     0        0 eth0
192.168.1.0     0.0.0.0         255.255.255.0   U     0      0        0 eth0
192.168.1.0     0.0.0.0         255.255.255.0   U     0      0        0 wlan0
And you should be able to do ping with wlan0 interface.
xilinx-k26-starterkit-2021_2:~$ ping -I wlan0 8.8.8.8
PING 8.8.8.8 (8.8.8.8) from 192.168.1.45 wlan0: 56(84) bytes of data.
64 bytes from 8.8.8.8: icmp_seq=1 ttl=116 time=13.1 ms
64 bytes from 8.8.8.8: icmp_seq=2 ttl=116 time=11.7 ms
If you want to do this permanent and connect using WiFi after booting, you can change /etc/network/interfaces and add the next statements,
auto wlan0
iface wlan0 inet dhcp
      wpa-conf /home/petalinux/wpa_supplicant.conf
where wpa_supplicant.conf is the configuration file created above. Now you should be able to connect by wifi when rebooting.
3. Create an access point using HostAPDFor connecting to Kria when it creates an access point we need to add in /etc/network/interfaces this,
auto wlan0
iface wlan0 inet static
address 10.0.0.1
network 10.0.0.0
netmask 255.255.255.0
broadcast 10.0.0.255
This will add a static address of 10.0.0.1 to the wlan0 interface.
And we need to also change Petalinux busybox recipe a little bit. We need to add a recipe append busybox_1.%.bbappend inside meta-user/recipes-core/busybox with
FILESEXTRAPATHS_prepend := "${THISDIR}/files:"
SRC_URI += " \
file://udhcpd.conf \
"
do_install_append () {
install -m 0644 ${WORKDIR}/udhcpd.conf ${D}${sysconfdir}
}
This will copy our udhcpd.conf configuration file to our Petalinux rootfs.
This configuration file will be something like,
# The start and end of the IP lease block
start       10.0.0.20
end     10.0.0.254
# The interface that udhcpd will use
interface   wlan0
opt dns 10.0.0.1 10.0.0.10
option  subnet  255.255.255.0
opt router  10.0.0.1
#opt    wins    192.168.10.10
#option dns 129.219.13.81   # appended to above DNS servers for a total of 3
option  domain  local
option  lease   864000      # default: 10 days
option  msstaticroutes  10.0.0.0/8 10.127.0.1       # single static route
option  staticroutes    10.0.0.0/8 10.127.0.1, 10.11.12.0/24 10.11.12.1
# Arbitrary option in hex form:
option  0x08    01020304    # option 8: "cookie server IP addr: 1.2.3.4"
This configuration file will give an address space from 10.0.0.20 so we can connect to our board using udhcpd.
It is important to add busybox-udhcpd to petalinux-image-minimal.bbappend. This will allow us to create the corresponding services that will be executed when the board is turned on and will allow us to connect to the board.
If by any chance these services are not created you can create it by copying the next file in /etc/init.d/busybox-udhcpd
#!/bin/sh
DAEMON=/usr/sbin/udhcpd
NAME=udhcpd
DESC="Busybox UDHCP Server"
ARGS="/etc/udhcpd.conf"

test -f $DAEMON || exit 1

set -e

case "$1" in
    start)
        echo -n "starting $DESC: $NAME... "
        if [ ! -f /etc/udhcpd.conf ]; then
                echo "error: /etc/udhcpd.conf is missing."
                exit 1
        fi
        /sbin/start-stop-daemon -S -b -n $NAME -a $DAEMON -- $ARGS
        echo "done."
        ;;
    stop)
        echo -n "stopping $DESC: $NAME... "
        /sbin/start-stop-daemon -K -n $NAME
        echo "done."
        ;;
    restart)
        echo "restarting $DESC: $NAME... "
        $0 stop
        $0 start
        echo "done."
        ;;
    reload)
        echo -n "reloading $DESC: $NAME... "
        killall -HUP $(basename ${DAEMON})
        echo "done."
        ;;
    *)
        echo "Usage: $0 {start|stop|restart|reload}"
        exit 1
        ;;
esac

exit 0
And doing
sudo update-rc.d busybox-udhcpd defaultsYou can find all these files inside https://github.com/jlamperez/meta-karp repository which is the Petalinux meta-user layer for Kria Autonomous Robotic Platform (KARP).


Comments