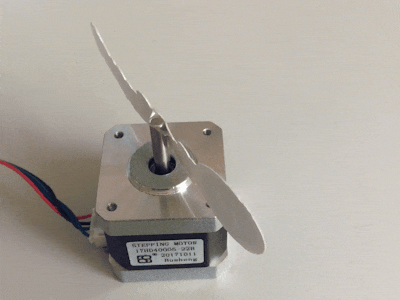

Hardware components | ||||||
 |
| × | 1 | |||
 |
| × | 1 | |||
 |
| × | 1 | |||
 |
| × | 1 | |||
_ztBMuBhMHo.jpg?auto=compress%2Cformat&w=48&h=48&fit=fill&bg=ffffff) |
| × | 1 | |||
 |
| × | 1 | |||
 |
| × | 1 | |||
| × | 1 | ||||
 |
| × | 1 | |||
 |
| × | 1 | |||
Software apps and online services | ||||||
 |
| |||||
| ||||||
I was struggling with the wiring of a stepper motor and so I hope I can take the fear out of you with this article: I use the same PINs to illustrate two different devices driving the Nema 17 stepper motor using an Adafruit TB6612.
Test the Stepper - PreparationIn the beginning, a short test with an LED is worthwhile to find out the correct cable routing of the two coils in the stepper: pick up an LED and insert the two feet into the adapter: move the motor with your hand.
If the LED is lit you have identified the two cable for connection to the MOTORA or MOTORB breakout board.
WiringThe same structure works with the given library "Stepper" examples for both the Uno and the Photon (here only the PINs in the original example have to be replaced by 4, 5, 6 and 7).
Adafruit offers a good step-by-step guide to their break-out board.
Now we are ready to face ambitious projects as well. We already have the right breakout board in our hands: this can up to operate four solenoids, spin two DC motors or step one bi-polar or uni-polar stepper with 1.2A per channel.
Update 03.10.2018 - A4988I found in my component box an alternative Stepper Motor Driver, which I can also recommend: the Stepstick A4988 by Elegoo.
You can read the technical features on the website of the manufacturer.
A nice explanation by video you can find here.
With the knowledge from above, should the adaptation of the wire loop for the A4988 be equally possible? And so it behaves:
Wiring...... using the example of the photon:
Direction <> Device A0
Step <> Device A1
Sleep <> Reset - mandatory!
MS3, MS2, MS1, Enable <> without connection
GND, VDC <> 5V (from Device)
1B, 1A <> coil1
2A, 2B <> coil2
GND, VMOtor <> 12V (from external PowerSupply)
To ensure a drop in performance is still a 47 nF Capacitator when supplying the 12 volts necessary.
Now when I had the structure in front of me, it was now to influence the rotational speed to take: it offers a potentiometer. In the picture you see a blue "U 103" which can be addressed at the side of the notches with GND, signal and 5V. In addition, a black potentiometer, which can be rotated better thanks to its large rotary lever. The wiring is identical and so I have passed the signal to the photon at A2.
The necessary code can be found below.
Control the speed with a software defined potentiometer with BlynkIf you do not have any potentiometers at your disposal, you can also use software-based potentiometers: for this purpose, we integrate the library from Blynk. Blynk offers us several predefined components: I chose a slider and connected it to "virtual 0" in the Blynk app.
The value scale is restricted from 0 to 1023, where 1023 means "slow".
The slightly changed code can be found as usual below. Two additional variables were added and instead of reading out A2, the values arriving from the slider are now linked with "virtual 0".
Pay attention to the use of the function abs (), otherwise it will not work as expected.
BLYNK_WRITE(V0) // // Blynk app WRITES Slider widget
   {
   int PotiValue = param.asInt(); // assigning incoming value from pin V0 to a variable
   absValue = abs(PotiValue); // abs( ) function in C returns the absolute value of an integer. The absolute value of a number is always positive. Only integer values are supported in C.
   // process received value
   }
 // Converts the read values of the potentiometer from 0 to 1023 into desired delay values (300 to 4000)
     int newCustom = map(customDelay, 0, 1023, 300, 4000);
Has the map function noticed? Here he is explained:
Mapping is a way to translate a value from one range of numbers to another. It can be used to create a direct relationship between an input and an output. For instance, the value provide by a potentiometer could control the stepper-rotation. To accomplish this, there is a very useful function called map(). It looks like this:
map(value, fromLow, fromHigh, toLow, toHigh)
value is the value that you would like to map. fromLow and fromHigh is the low and high end of the original data set. toLow and toHigh are the low and high values of the mapped data set. If you were to map the full range of analog input (0 to 1023) to the full range of analog output (0 to 255), you’d use the following line of code
map(value, 0, 1023, 0, 255)
Arduino Map-Reference and Particle Map-Reference
Update 03.11.2018 - PHPoC Blue + PES-2405 R2If you are unfamiliar with PHPoC, I recommend getting familiar with the preparation/introduction first.
Within the product family you will also find an "smart extension board" to use as a shield on the PHPoC Blue/Black (but not for the PHPoC Shield for Arduino). The PES-2405 R2 is piggy-backed onto the PHPoC board with its PINs and the stepper motor is already under the control of PHP. This is possible with a separate library SD_SPC.php via include_once "/lib/sd_spc.php";
I have detailed command usage here and is quite extensive.
Here move and goto are demonstrated.
The examples are set via DIP switch on port 1 (1,2,3 below, 4 above). More information in chapter 3 - Slave ID Switch.
If you have added the library with the help of the PHPoCD application, then the familiar wiring of the motor is sufficient with the aid of a screwdriver on the green terminal (A +, A-, B +, B- and separate voltage of 12 V in GND and VM).
The PHPoC is powered by 5V from the power bank.
Now add the PHP files to the root directory and call the URL to the PHPoC in the browser - like http://192.168.178.55/goto.php.
Already the stepper should move - done.
<?php
include_once "/lib/sd_spc.php";
spc_reset();
spc_sync_baud(115200);
$sid = 1;
spc_request_dev($sid, "set mode 4");
spc_request_dev($sid, "set vref stop 2");
spc_request_dev($sid, "set vref drive 8");
spc_request_dev($sid, "set rsnc 120 250");
spc_request_dev($sid, "set pos -400");
spc_request_dev($sid, "goto +400 200 0");
sleep(1);
spc_request_dev($sid, "goto -400 200 0");
sleep(1);
spc_request_dev($sid, "goto +400 200 0");
while((int)spc_request_dev($sid, "get state"))
   usleep(1);
?>
<?php
include_once "/lib/sd_spc.php";
spc_reset();
spc_sync_baud(115200);
$sid = 1;
spc_request_dev($sid, "set mode 4");
spc_request_dev($sid, "set vref stop 2");
spc_request_dev($sid, "set vref drive 8");
spc_request_dev($sid, "set rsnc 120 250");
spc_request_dev($sid, "move 800 400 800 0");
while((int)spc_request_dev($sid, "get state"))
 usleep(1);
//sleep(1);
spc_request_dev($sid, "move -800 400 0 800");
while((int)spc_request_dev($sid, "get state"))
 usleep(1);
?>


Comments