Sections:
- 1. COST EFFECTIVENESS
- 2. PRINTING CUSTOM PARTS
- 3. 4WD ROBOT CAR
- 4. ECHO DOT & ESP32-WROOM-32
- 5. NEURAL NETWORKS
- 6. PID CONTROLLER
- 7. TESLA COIL & UV LAMP
- 8. TEST
- 9. CONCLUSION
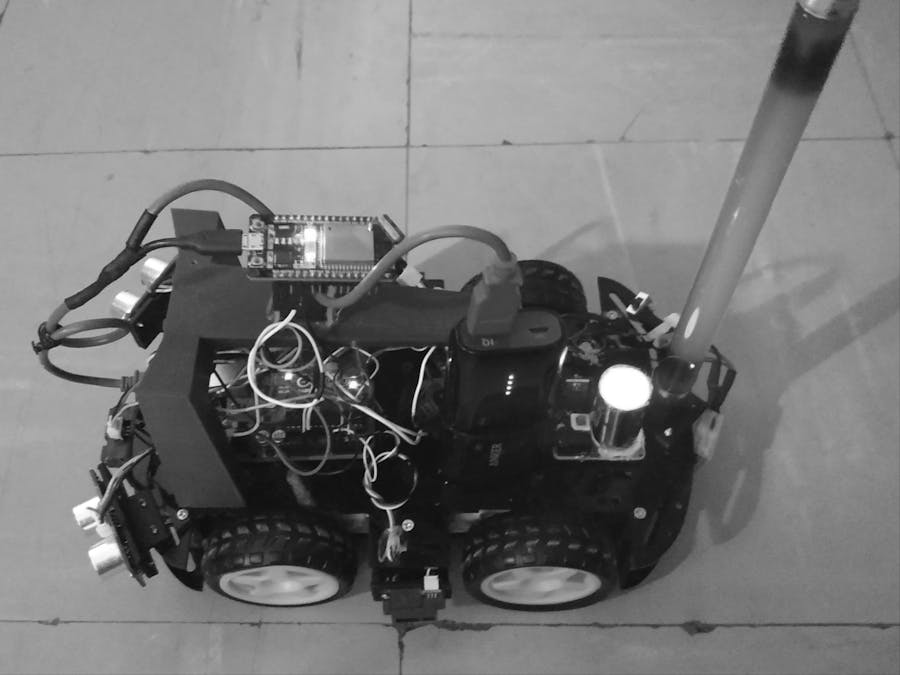
This Autonomous Car has the main goal of desinfecting the rooms of a house.
The particular goals of this project are:
- 3D printing of the list of parts that will be used to assemble the TESLA Robot;
- Mounting the Chassis: "4WD Robot Car";
- "Alexa Echo Dot" connection with the ESP32-WROOM-32 board, to transmit voice commands to the TESLA Robot;
- Calculation of Neural Networks with Python to be used on the Arduino UNO board, and to control the TESLA Robot;
- Use of a PID Controller to control the speed of the TESLA Robot; and
- Use of the Tesla coil to turn on an UV lamp.
To develop this prototype, I was inspired on my project: Self Driving Car Using RedBoard Artemis ATP
Introduction
Ultraviolet germicidal irradiation (UVGI) is a disinfection method that uses short-wavelength ultraviolet (ultraviolet C or UV-C) light to kill or inactivate microorganisms by destroying nucleic acids and disrupting their DNA, leaving them unable to perform vital cellular functions.UVGI is used in a variety of applications, such as food, air, and water purification. The effectiveness of germicidal UV depends on the length of time a microorganism is exposed to UV, the intensity and wavelength of the UV radiation, the presence of particles that can protect the microorganisms from UV, and a microorganism's ability to withstand UV during its exposure. https://en.wikipedia.org/wiki/Ultraviolet_germicidal_irradiation
Recent studies have shown that UV short-wave radiation is capable of eliminating COVID-19, MERS, and SARS viruses at the hospital level, thus improving the cleanliness of the intensive care area, general medicine rooms and individual rooms.
1. COST EFFECTIVENESSAdvantages of this project:
- This project is an open source, cost effective, and energy efficient UV curing tool that can easily be fabricated in remote areas. Cheap, easily built manufacturing tool allow them to provide better aid in poverty.
- The device is an autonomous robot, so we avoid exposing people to unwanted infections in areas that can be sanitized.
- The autonomous robot is small in size and can therefore be used in homes without any problem.
- This robot obeys voice commands, so we can adapt it for people with disabilities.
PRICE:
The price of the hardware components for this project is approximately $ 250 USD. This is a good design that can serve as a model to calculate the price of a larger device or with more lamps or with a reflector.
In the international market, What is the price of these robots?
- UVC hospital sterilizer movable UV sterilizer efficient surface sterilization. Price: $ 3,680 USD, more info click here
- UV sterilizer robot killing germicidal bacteria uvc lamp factory wholesale price. Price: $ 1,390 USD, more info click here
We're going to print several parts that will be used to assemble the sensors and the programming boards on the "4WD Robot Car" chassis. In the figures below I show you the images of these parts, and I comment the use of each one.
Notes:
- In the download section you can get STL files.
- Software used: FreeCAD and Ultimaker Cura.
The chassis I used was the popular "4WD Robot Car", which is economical and practical since it has two platforms, 4 gearmotors, 4 wheels, and enough holes to mount the devices of our design.
How to assemble this kit?
Now, I show you the parts assembled with their sensors mounted on the 4WD Robot Car in the figures below:
Echo Dot is a smart speaker that is controlled by voice and connects you to Alexa via Wi-Fi network. Alexa can play music, answer questions, tell the news, check the weather forecast, set alarms, control compatible Smart Home devices, and much more.
ESP32-WROOM-32 is a powerful, generic Wi-Fi+BT+BLE MCU module that targets a wide variety of applications, ranging from low-power sensor networks to the most demanding tasks, such as voice encoding, music streaming and MP3 decoding. Datasheet: https://circuits4you.com/wp-content/uploads/2018/12/esp32-wroom-32_datasheet_en.pdf
Alexa's voice commands:
- First case: In this project we're going to use and modify an Alexa application to turn on/off a lamp with voices commands. The figure below shows a high-level overview on how the project works to control lamp 1.
- Second case: It works similarly for lamp 2, and we using this command voice to activate the TESLA Robot: start the motion or stop.
How does it work?
To control your ESP32 with Amazon Echo, you need to install the FauxmoESP library. This library emulates a Belkin Wemo device, allowing you to control your ESP32 using this protocol. This way, the Echo Dot instantly recognizes the device, after uploading the code, without any extra skills or third party services.
Installing the FauxmoESP Library
- Click here to download the FauxmoESP library. You should have a .zip folder in your Downloads
- Unzip the .zip folder and you should get xoseperez-fauxmoesp-50cbcf3087fd folder
- Rename your folder from xoseperez-fauxmoesp-50cbcf3087fd to xoseperez_fauxmoesp
- Move the xoseperez_fauxmoesp folder to your Arduino IDE installation libraries folder
- Finally, re-open your Arduino IDE
- More info about FauxmoESP click here
According to our schematic diagram, we make the connections of our ESP32-WROOM-32 device.
Code: esp32-wroom-32.ino
# AUTHOR: GUILLERMO PEREZ GUILLEN
#include <Arduino.h>
#include <NewPing.h> // SRFO4
#define ultrasonic_pin_1 4 // SRF04
#define ultrasonic_pin_2 25 // SRF05
const int UltrasonicPin = 2; // SRFO4
const int MaxDistance = 200; // SRFO4
const unsigned int TRIG_PIN=27; //SRF05
const unsigned int ECHO_PIN=26; //SRF05
NewPing sonar(UltrasonicPin, UltrasonicPin, MaxDistance); // SRFO4
#ifdef ESP32
#include <WiFi.h>
#define RF_RECEIVER 13
#define RELAY_PIN_1 12
#define RELAY_PIN_2 14
#else
#include <ESP8266WiFi.h>
#define RF_RECEIVER 5
#define RELAY_PIN_1 4
#define RELAY_PIN_2 14
#endif
#include "fauxmoESP.h"
#include <RCSwitch.h>
#define SERIAL_BAUDRATE 115200
#define WIFI_SSID "XXXXXXXXXX"
#define WIFI_PASS "XXXXXXXXXX"
#define LAMP_1 "lamp one"
#define LAMP_2 "lamp two"
fauxmoESP fauxmo;
RCSwitch mySwitch = RCSwitch();
// Wi-Fi Connection
void wifiSetup() {
// Set WIFI module to STA mode
WiFi.mode(WIFI_STA);
// Connect
Serial.printf("[WIFI] Connecting to %s ", WIFI_SSID);
WiFi.begin(WIFI_SSID, WIFI_PASS);
// Wait
while (WiFi.status() != WL_CONNECTED) {
Serial.print(".");
delay(100);
}
Serial.println();
// Connected!
Serial.printf("[WIFI] STATION Mode, SSID: %s, IP address: %s\n", WiFi.SSID().c_str(), WiFi.localIP().toString().c_str());
}
void setup() {
pinMode(ultrasonic_pin_1, OUTPUT); // SRF04
digitalWrite(ultrasonic_pin_1, LOW); // SRF04
pinMode(ultrasonic_pin_2, OUTPUT); // SRF05
digitalWrite(ultrasonic_pin_2, LOW); // SRF05
pinMode(TRIG_PIN, OUTPUT); // SRF05
pinMode(ECHO_PIN, INPUT); // SRF05
// Init serial port and clean garbage
Serial.begin(SERIAL_BAUDRATE);
Serial.println();
// Wi-Fi connection
wifiSetup();
// LED
pinMode(RELAY_PIN_1, OUTPUT);
digitalWrite(RELAY_PIN_1, LOW);
pinMode(RELAY_PIN_2, OUTPUT);
digitalWrite(RELAY_PIN_2, LOW);
mySwitch.enableReceive(RF_RECEIVER); // Receiver on interrupt 0 => that is pin #2
// By default, fauxmoESP creates it's own webserver on the defined port
// The TCP port must be 80 for gen3 devices (default is 1901)
// This has to be done before the call to enable()
fauxmo.createServer(true); // not needed, this is the default value
fauxmo.setPort(80); // This is required for gen3 devices
// You have to call enable(true) once you have a WiFi connection
// You can enable or disable the library at any moment
// Disabling it will prevent the devices from being discovered and switched
fauxmo.enable(true);
// You can use different ways to invoke alexa to modify the devices state:
// "Alexa, turn lamp two on"
// Add virtual devices
fauxmo.addDevice(LAMP_1);
fauxmo.addDevice(LAMP_2);
fauxmo.onSetState([](unsigned char device_id, const char * device_name, bool state, unsigned char value) {
// Callback when a command from Alexa is received.
// You can use device_id or device_name to choose the element to perform an action onto (relay, LED,...)
// State is a boolean (ON/OFF) and value a number from 0 to 255 (if you say "set kitchen light to 50%" you will receive a 128 here).
// Just remember not to delay too much here, this is a callback, exit as soon as possible.
// If you have to do something more involved here set a flag and process it in your main loop.
Serial.printf("[MAIN] Device #%d (%s) state: %s value: %d\n", device_id, device_name, state ? "ON" : "OFF", value);
if ( (strcmp(device_name, LAMP_1) == 0) ) {
// this just sets a variable that the main loop() does something about
Serial.println("RELAY 1 switched by Alexa");
//digitalWrite(RELAY_PIN_1, !digitalRead(RELAY_PIN_1));
if (state) {
digitalWrite(RELAY_PIN_1, HIGH);
} else {
digitalWrite(RELAY_PIN_1, LOW);
}
}
if ( (strcmp(device_name, LAMP_2) == 0) ) {
// this just sets a variable that the main loop() does something about
Serial.println("RELAY 2 switched by Alexa");
if (state) {
digitalWrite(RELAY_PIN_2, HIGH);
} else {
digitalWrite(RELAY_PIN_2, LOW);
}
}
});
}
void loop() {
delay(25);
int rf_sensor_left = sonar.ping_cm(); // SRFO4
if (rf_sensor_left<30){digitalWrite(ultrasonic_pin_1, HIGH);} // SRFO4
else {digitalWrite(ultrasonic_pin_1, LOW);} // SRFO4
digitalWrite(TRIG_PIN, LOW); // SRFO5
delayMicroseconds(2); // SRFO5
digitalWrite(TRIG_PIN, HIGH); // SRFO5
delayMicroseconds(10); // SRFO5
digitalWrite(TRIG_PIN, LOW); // SRFO5
const unsigned long duration= pulseIn(ECHO_PIN, HIGH); // SRFO5
int rf_sensor_right = duration/29/2; // SRFO5
if (rf_sensor_right<30){digitalWrite(ultrasonic_pin_2, HIGH);} // SRFO5
else {digitalWrite(ultrasonic_pin_2, LOW);} // SRFO5
Serial.print("Distance1: ");
Serial.println(rf_sensor_left);
Serial.print("Distance2: ");
Serial.println(rf_sensor_right);
Serial.println(" ");
// fauxmoESP uses an async TCP server but a sync UDP server
// Therefore, we have to manually poll for UDP packets
fauxmo.handle();
static unsigned long last = millis();
if (millis() - last > 5000) {
last = millis();
Serial.printf("[MAIN] Free heap: %d bytes\n", ESP.getFreeHeap());
}
if (mySwitch.available()) {
if (mySwitch.getReceivedValue()==6819768) {
digitalWrite(RELAY_PIN_1, !digitalRead(RELAY_PIN_1));
}
if (mySwitch.getReceivedValue()==9463928) {
digitalWrite(RELAY_PIN_2, !digitalRead(RELAY_PIN_2));
}
delay(600);
mySwitch.resetAvailable();
}
}
You need to modify the following lines to include your network credentials.
#define WIFI_SSID "XXXXXXXXXX"
#define WIFI_PASS "XXXXXXXXXX"
What are the functions of ultrasonic sensors?
- These sensors measure distances that will be useful for calculating the neural networks on the Arduino UNO board. These sensors can't be directly connected to the Arduino UNO board, because they have time delays in calculating distances and therefore, the neural network calculations would not be in real time.
- With the SRF05 ultrasonic sensor we have created the necessary code that doesn't need any library. However, you need to install the NewPing library in order to control the HC-SR04 Ultrasonic Sensor. The NewPing library provides additional functions, such as the option of making a median filter to eliminate noise, or using the same pin as trigger and echo, which allows us to save many pins in case of having multiple ultrasound sensors. Here you can download the NewPing library.
Alexa, Discover Devices
With the circuit ready, and the code uploaded to your ESP32-WROOM-32, you need to ask alexa to discover devices. Say: “Alexa, discover devices”. It should answer as shown in the figure below.
Alternatively, you can also discover devices using the Amazon Alexa app, by following the steps shown in the figure below. Now you can do tests with your device.
You can download the App here: Amazon Alexa
5. NEURAL NETWORKSIn this project we will create a neural network with Python and copy its weights to a network with forward propagation on the Arduino UNO board, and that will allow the TESLA Robot to drive alone and without hitting the walls.
For this exercise we will make the neural network have 4 outputs: two for each motor pair, since to the L298N driver we will connect 2 digital outputs of the board for each car motor pair (the two motors on the left are electrically linked, the same case with the two motors on the right.). In addition the outputs will be between 0 and 1 (depolarize or polarize the motor).
We will have seven inputs:
- First input is the activation of the TESLA Robot that we saw on section 4 (Second case of Alexa's voice commands).
- The next five inputs correspond to the infrarred and ultrasound sensors; and
- The seventh input is for the BIAS, the values will be 0 and 1.
The inputs are assigned with the following logic:
- The GP2Y0A51SK0F IR sensors on the left and right sides will have a value of 1 if the distance is less than 15 cm, and will have a value of 0 if the distance is greater than 15 cm;
- The GP2Y0A41SK0F IR center sensor will have a value of 1 if the distance is less than 30 cm, and will have a value of 0 if the distance is greater than 30 cm;
- The same case, HC-SR04 and the SRF05 ultrasound sensors will have a value of 1 if the distance is less than 30 cm, and will have a value of 0 if the distance is greater than 30 cm; and
- The BIAS will have a value of 1.
Here we see the changes in the table below:
To create our neural network, we will use this code developed with Python 3.7.3: neural-network.py
import numpy as np
# We create the class
class NeuralNetwork:
def __init__(self, layers, activation='tanh'):
if activation == 'sigmoid':
self.activation = sigmoid
self.activation_prime = sigmoid_derivada
elif activation == 'tanh':
self.activation = tanh
self.activation_prime = tanh_derivada
# Initialize the weights
self.weights = []
self.deltas = []
# Assign random values to input layer and hidden layer
for i in range(1, len(layers) - 1):
r = 2*np.random.random((layers[i-1] + 1, layers[i] + 1)) -1
self.weights.append(r)
# Assigned random to output layer
r = 2*np.random.random( (layers[i] + 1, layers[i+1])) - 1
self.weights.append(r)
def fit(self, X, y, learning_rate=0.2, epochs=100000):
# I add column of ones to the X inputs. With this we add the Bias unit to the input layer
ones = np.atleast_2d(np.ones(X.shape[0]))
X = np.concatenate((ones.T, X), axis=1)
for k in range(epochs):
i = np.random.randint(X.shape[0])
a = [X[i]]
for l in range(len(self.weights)):
dot_value = np.dot(a[l], self.weights[l])
activation = self.activation(dot_value)
a.append(activation)
#Calculate the difference in the output layer and the value obtained
error = y[i] - a[-1]
deltas = [error * self.activation_prime(a[-1])]
# We start in the second layer until the last one (A layer before the output one)
for l in range(len(a) - 2, 0, -1):
deltas.append(deltas[-1].dot(self.weights[l].T)*self.activation_prime(a[l]))
self.deltas.append(deltas)
# Reverse
deltas.reverse()
# Backpropagation
# 1. Multiply the output delta with the input activations to obtain the weight gradient.
# 2. Updated the weight by subtracting a percentage of the gradient
for i in range(len(self.weights)):
layer = np.atleast_2d(a[i])
delta = np.atleast_2d(deltas[i])
self.weights[i] += learning_rate * layer.T.dot(delta)
if k % 10000 == 0: print('epochs:', k)
def predict(self, x):
ones = np.atleast_2d(np.ones(x.shape[0]))
a = np.concatenate((np.ones(1).T, np.array(x)), axis=0)
for l in range(0, len(self.weights)):
a = self.activation(np.dot(a, self.weights[l]))
return a
def print_weights(self):
print("LIST OF CONNECTION WEIGHTS")
for i in range(len(self.weights)):
print(self.weights[i])
def get_weights(self):
return self.weights
def get_deltas(self):
return self.deltas
# When creating the network, we can choose between using the sigmoid or tanh function
def sigmoid(x):
return 1.0/(1.0 + np.exp(-x))
def sigmoid_derivada(x):
return sigmoid(x)*(1.0-sigmoid(x))
def tanh(x):
return np.tanh(x)
def tanh_derivada(x):
return 1.0 - x**2
########## CAR NETWORK
nn = NeuralNetwork([6,3,4],activation ='tanh')
X = np.array([[0,0,0,0,0,0],
[0,0,0,0,0,1],
[0,0,0,0,1,0],
[0,0,0,0,1,1],
[0,0,0,1,0,0],
[0,0,0,1,0,1],
[0,0,0,1,1,0],
[0,0,0,1,1,1],
[0,0,1,0,0,0],
[0,0,1,0,0,1],
[0,0,1,0,1,1],
[0,0,1,1,0,0],
[0,0,1,1,0,1],
[0,0,1,1,1,1],
[0,1,0,0,0,0],
[0,1,0,0,0,1],
[0,1,0,0,1,0],
[0,1,0,1,0,0],
[0,1,0,1,0,1],
[0,1,0,1,1,0],
[0,1,1,0,0,0],
[0,1,1,0,1,0],
[0,1,1,1,0,0],
[0,1,1,1,1,0],
[1,0,0,0,0,0],
[1,0,0,0,0,1],
[1,0,0,0,1,0],
[1,0,0,0,1,1],
[1,0,0,1,0,0],
[1,0,0,1,0,1],
[1,0,0,1,1,0],
[1,0,0,1,1,1],
[1,0,1,0,0,0],
[1,0,1,0,0,1],
[1,0,1,0,1,1],
[1,0,1,1,0,0],
[1,0,1,1,0,1],
[1,0,1,1,1,1],
[1,1,0,0,0,0],
[1,1,0,0,0,1],
[1,1,0,0,1,0],
[1,1,0,1,0,0],
[1,1,0,1,0,1],
[1,1,0,1,1,0],
[1,1,1,0,0,0],
[1,1,1,0,1,0],
[1,1,1,1,0,0],
[1,1,1,1,1,0],
])
# the outputs correspond to starting (or not) the motors
y = np.array([[0,0,0,0], # stop
[0,0,0,0], # stop
[0,0,0,0], # stop
[0,0,0,0], # stop
[0,0,0,0], # stop
[0,0,0,0], # stop
[0,0,0,0], # stop
[0,0,0,0], # stop
[0,0,0,0], # stop
[0,0,0,0], # stop
[0,0,0,0], # stop
[0,0,0,0], # stop
[0,0,0,0], # stop
[0,0,0,0], # stop
[0,0,0,0], # stop
[0,0,0,0], # stop
[0,0,0,0], # stop
[0,0,0,0], # stop
[0,0,0,0], # stop
[0,0,0,0], # stop
[0,0,0,0], # stop
[0,0,0,0], # stop
[0,0,0,0], # stop
[0,0,0,0], # stop
[1,0,1,0], # forward
[1,0,1,0], # forward
[0,1,1,0], # turn-left
[0,1,1,0], # turn-left
[0,1,0,1], # back
[0,1,1,0], # turn-left
[0,1,1,0], # turn-left
[0,1,1,0], # turn-left
[1,0,0,1], # turn-right
[0,1,1,0], # turn-left
[0,1,1,0], # turn-left
[1,0,0,1], # turn-right
[0,1,1,0], # turn-left
[1,0,0,1], # turn-right
[1,0,1,0], # forward
[1,0,1,0], # forward
[1,0,0,1], # turn-right
[1,0,0,1], # turn-right
[0,1,0,1], # back
[1,0,0,1], # turn-right
[1,0,0,1], # turn-right
[1,0,0,1], # turn-right
[1,0,0,1], # turn-right
[1,0,0,1], # turn-right
])
nn.fit(X, y, learning_rate=0.03,epochs=550001)
def valNN(x):
return (int)(abs(round(x)))
index=0
for e in X:
prediccion = nn.predict(e)
print("X:",e,"expected:",y[index],"obtained:", valNN(prediccion[0]),valNN(prediccion[1]),valNN(prediccion[2]),valNN(prediccion[3]))
index=index+1
We can see the next data:
The code we add to see the graph, as it trains after 550,000 iterations is as follows: graphic.py
########## WE GRAPH THE COST FUNCTION
import matplotlib.pyplot as plt
deltas = nn.get_deltas()
valores=[]
index=0
for arreglo in deltas:
valores.append(arreglo[1][0] + arreglo[1][1])
index=index+1
plt.plot(range(len(valores)), valores, color='b')
plt.ylim([0, 1])
plt.ylabel('Cost')
plt.xlabel('Epochs')
plt.tight_layout()
plt.show()
And now we can see the weights obtained from the connections, and which will be the ones we will use in the Arduino code: generate-arduino-code.py
########## WE GENERATE THE ARDUINO CODE
def to_str(name, W):
s = str(W.tolist()).replace('[', '{').replace(']', '}')
return 'float '+name+'['+str(W.shape[0])+']['+str(W.shape[1])+'] = ' + s + ';'
# We get the weights trained to be able to use them in the arduino code
pesos = nn.get_weights();
print('// Replace these lines in your arduino code:')
print('// float HiddenWeights ...')
print('// float OutputWeights ...')
print('// With trained weights.')
print('\n')
print(to_str('HiddenWeights', pesos[0]))
print(to_str('OutputWeights', pesos[1]))
The Arduino code with the configuration of the neural network is loaded on the Arduino UNO board: tesla-robot.ino
// AUTHOR: GUILLERMO PEREZ GUILLEN
// Project: TESLA Robot
#define ENA 3
#define ENB 5
#define IN1 8
#define IN2 9
#define IN3 10
#define IN4 11
/******************************************************************
NETWORK CONFIGURATION
******************************************************************/
const int ESP32_pin_1= 6; // ESP32 input pin 1 - starting
const int ESP32_pin_2 = 7; // ESP32 input pin 2 - SRF04
const int ESP32_pin_3 = 12; // ESP32 input pin 3 - SRF05
const int InputNodes = 7; // includes BIAS neuron
const int HiddenNodes = 4; //includes BIAS neuron
const int OutputNodes = 4;
int i, j;
double Accum;
double Hidden[HiddenNodes];
double Output[OutputNodes];
float HiddenWeights[7][4] = {{-4.618963658666277, 4.3001137618883325, 7.338055706191847, 2.7355309007172375}, {2.599633307446623, -7.649705724376986, -14.69443684121685, -3.65366992422193}, {-0.7777191662679982, 1.9860139431844053, 5.914809078303235, 0.03170277380327093}, {-2.309653145069323, 6.8379997039119775, 8.892299055796917, 0.6046238076393062}, {1.3276547120093833, 5.085574619860947, 2.384944264717347, 0.05753178068519734}, {-2.7696264005599858, 6.797226565794283, 3.5374247269984713, 0.5475825968169957}, {0.8118152131237218, -1.9324229493484606, -5.264294920291424, -0.036800281071245555}};
float OutputWeights[4][4] = {{-1.6342640637903814, 0.006920937706630823, -5.179205882976105, -0.40268984302793936}, {-1.0162353344988182, 1.3405072244655225, -4.241619375014734, 0.6682851389512594}, {1.3692632942485174, -1.3884291338648505, -0.9245235380688354, 2.246128813012694}, {-1.9802299382328057, 0.06512857708456388, -0.030302930346753857, -3.314024844617794}};
int error=0;
int dif,difAnt=0;
const float Kp=0.1;
const float Kd=0.1;
void setup() {
Serial.begin(9600);
pinMode(A0, INPUT); //left sensor
pinMode(A1, INPUT); //center sensor
pinMode(A3, INPUT); //right sensor
pinMode(IN1, OUTPUT);
pinMode(IN2, OUTPUT);
pinMode(IN3, OUTPUT);
pinMode(IN4, OUTPUT);
pinMode(ENA, OUTPUT);
pinMode(ENB, OUTPUT);
pinMode(ESP32_pin_1, INPUT);
pinMode(ESP32_pin_2, INPUT);
pinMode(ESP32_pin_3, INPUT);
}
void loop()
{
double TestInput[] = {0, 0, 0};
double input1=0,input2=0,input3=0,input4=0,input5=0,input6=0;
float volts0 = analogRead(A0)*0.0048828125; // value from sensor * (5/1024)
float volts1 = analogRead(A1)*0.0048828125; // value from sensor * (5/1024)
float volts2 = analogRead(A3)*0.0048828125; // value from sensor * (5/1024)
dif = analogRead(A3) - analogRead(A0); // PID CONTROLLER
error = floor(Kp*(dif)+Kd*(difAnt-dif)); // PID CONTROLLER
difAnt=dif; // PID CONTROLLER
int d0 = constrain(150 - error, 0, 150);//left speed - PID CONTROLLER
int d1 = constrain(150 + error, 0, 150);//right speed - PID CONTROLLER
float ir_sensor_left = 6*pow(volts0, -1); // worked out from datasheet graph //GP2Y0A51SK0F - 2 a 15 cm
float ir_sensor_center = 12.4*pow(volts1, -1); // worked out from datasheet graph //GP2Y0A41SK0F - 4 a 30 cm
float ir_sensor_right = 5.2*pow(volts2, -1); // worked out from datasheet graph //GP2Y0A51SK0F - 2 a 15 cm
if(digitalRead(ESP32_pin_1) == HIGH){input1=1;} // START TO MOVE
else {input1=0;} // STOP
if (ir_sensor_left<15){input2=1;} // IR SENSOR LEFT
else {input2=0;}
if(digitalRead(ESP32_pin_2) == HIGH){input3=1;} // RF SENSOR LEFT
else {input3=0;}
if (ir_sensor_center<30){input4=1;} // IR SENSOR CENTER
else {input4=0;}
if(digitalRead(ESP32_pin_3) == HIGH){input5=1;} // RF SENSOR RIGHT
else {input5=0;}
if (ir_sensor_right<15){input6=1;} // IR SENSOR RIGHT
else {input6=0;}
/******************************************************************
WE CALL THE FEEDFORWARD NETWORK WITH THE INPUTS
******************************************************************/
Serial.print("Input1:");
Serial.println(input1);
Serial.print("Input2:");
Serial.println(input2);
Serial.print("Input3:");
Serial.println(input3);
Serial.print("Input4:");
Serial.println(input4);
Serial.print("Input5:");
Serial.println(input5);
Serial.print("Input6:");
Serial.println(input6);
Serial.println(" ");
//THESE ARE THE THREE INPUTS WITH VALUES OF 0 TO 1 ********************
TestInput[0] = 1.0;//BIAS UNIT
TestInput[1] = input1;
TestInput[2] = input2;
TestInput[3] = input3;
TestInput[4] = input4;
TestInput[5] = input5;
TestInput[6] = input6;
// THIS FUNCTION IS TO GET THE OUTPUTS **********************************
InputToOutput(TestInput[0], TestInput[1], TestInput[2], TestInput[3], TestInput[4], TestInput[5], TestInput[6]); //INPUT to ANN to obtain OUTPUT
int out1 = round(abs(Output[0]));
int out2 = round(abs(Output[1]));
int out3 = round(abs(Output[2]));
int out4 = round(abs(Output[3]));
Serial.print("Output1:");
Serial.println(out1);
Serial.print("Output2:");
Serial.println(out2);
Serial.print("Output3:");
Serial.println(out3);
Serial.print("Output4:");
Serial.println(out4);
Serial.println(" ");
/******************************************************************
DRIVE MOTORS WITH THE NETWORK OUTPUT
******************************************************************/
analogWrite(ENA, d0);
analogWrite(ENB, d1);
digitalWrite(IN1, out1 * HIGH);
digitalWrite(IN2, out2 * HIGH);
digitalWrite(IN3, out3 * HIGH);
digitalWrite(IN4, out4 * HIGH);
delay(20);
}
void InputToOutput(double In1, double In2, double In3, double In4, double In5, double In6, double In7)
{
double TestInput[] = {0, 0, 0, 0, 0, 0, 0};
TestInput[0] = In1;
TestInput[1] = In2;
TestInput[2] = In3;
TestInput[3] = In4;
TestInput[4] = In5;
TestInput[5] = In6;
TestInput[6] = In7;
/******************************************************************
CALCULATE ACTIVITIES IN HIDDEN LAYERS
******************************************************************/
for ( i = 0 ; i < HiddenNodes ; i++ ) { // We go through the four columns of the hidden weights
Accum = 0;
for ( j = 0 ; j < InputNodes ; j++ ) { // Three values of the entry line and each column of hidden weights
Accum += TestInput[j] * HiddenWeights[j][i] ;
}
Hidden[i] = tanh(Accum) ; // We obtain a matrix of a line with four values
}
/******************************************************************
CALCULATE ACTIVATION AND ERROR IN THE OUTPUT LAYER
******************************************************************/
for ( i = 0 ; i < OutputNodes ; i++ ) {
Accum = 0;
for ( j = 0 ; j < HiddenNodes ; j++ ) {
Accum += Hidden[j] * OutputWeights[j][i] ;
}
Output[i] = tanh(Accum) ;//tanh
}
}
6. PID CONTROLLERA proportional–integral–derivative controller (PID controller) is a control loop mechanism employing feedback that is widely used in industrial control systems and a variety of other applications requiring continuously modulated control. A PID controller continuously calculates an error value e(t) as the difference between a desired setpoint (SP) and a measured process variable (PV) and applies a correction based on proportional, integral, and derivative terms (denoted P, I, and D respectively). https://en.wikipedia.org/wiki/PID_controller
In my case I used "PID Example By Lowell Cady" to simulate the behavior of the PID controller and in the figure below you can see the graph, which has a stable behavior as time goes by: https://www.codeproject.com/Articles/36459/PID-process-control-a-Cruise-Control-example
The TESLA robot is equipped with 3 analog infrared sensors, which detect the distance at which the walls are, one in front and two on the left and right sides. To calibrate the distances of the infrared sensors GP2Y0A41SK0F and GP2Y0A51SK0F, you can see the post and my code below: https://www.instructables.com/id/How-to-Use-the-Sharp-IR-Sensor-GP2Y0A41SK0F-Arduin/
float ir_sensor_left = 6*pow(volts0, -1); // worked out from datasheet graph //GP2Y0A51SK0F - 2 a 15 cm
float ir_sensor_center = 12.4*pow(volts1, -1); // worked out from datasheet graph //GP2Y0A41SK0F - 4 a 30 cm
float ir_sensor_right = 5.2*pow(volts2, -1); // worked out from datasheet graph //GP2Y0A51SK0F - 2 a 15 cm
Also the TESLA robot is equipped with 2 ultrasound sensors: 1) The HC-SR04 is on the left side and oriented in the direction of 45 degrees; and 2) SRF05 is on the right hand side and oriented 45 degrees. Thus we use the two GP2Y0A51SK0F sensors to control the speed of the TESLA Robot. The robot uses PID controller to maintain a central distance between the left and right walls. If the robot is near the left wall, then it can decrease the speed of the right motor and increase the speed of the left motor, to make the robot move to the right, and moving away from the left wall, and vice versa.
The speeds d0 of the left engine, and d1 of the right engine are calculated with the following code:
dif = analogRead(A3) - analogRead(A0); // PID CONTROLLER
error = floor(Kp*(dif)+Kd*(difAnt-dif)); // PID CONTROLLER
difAnt=dif; // PID CONTROLLER
int d0 = constrain(150 - error, 0, 150);//left speed - PID CONTROLLER
int d1 = constrain(150 + error, 0, 150);//right speed - PID CONTROLLER
However, the robot's movement may be unstable due to the error caused by a small time error, we have added a second correction factor to make the movement smoother. That is to say: difAnt= dif; now the speeds are applied by means of PWM signals to the two gearmotors:
analogWrite(ENA, d0);
analogWrite(ENB, d1);
digitalWrite(IN1, out1 * HIGH);
digitalWrite(IN2, out2 * HIGH);
digitalWrite(IN3, out3 * HIGH);
digitalWrite(IN4, out4 * HIGH);
delay(20);
Tesla Coil
A Tesla coil is an electrical resonant transformer circuit designed by inventor Nikola Tesla in 1891. It is used to produce high-voltage, low-current, high frequency alternating-current electricity. Tesla experimented with a number of different configurations consisting of two, or sometimes three, coupled resonant electric circuits. Tesla used these circuits to conduct innovative experiments in electrical lighting, phosphorescence, X-ray generation, high frequency alternating current phenomena, electrotherapy, and the transmission of electrical energy without wires. Reference: https://en.wikipedia.org/wiki/Tesla_coil
This project is named "TESLA Robot", because I'm using this principle to transmit electrical energy to the UV lamp by means of a Tesla mini coil. Thanks to this great invention I have the following advantages:
- I have saved money on the purchase of a ballast, and an AC converter;
- The robot is less heavy and less big;
- I'm not using UV LEDs, which have very low power, and I'm not simulating UV radiation. This is real.
Where can I get this device? example: https://www.elecrow.com/mini-diy-tesla-coil-kit.html
UV Lamp
I'm using a UV lamp. UV light helps detect the records and watermarks that are included in bills and important documents. This lamp has a power of 6 watts and a life time of approximately 8000 hours.
UV Meter
The World Health Organization publishes a practical guide on the UV index in which it explains the health risks of ultraviolet radiation and proposes some protective measures depending on their intensity.
This is optional, to measure UV radiation I've developed this device, and using the UVM30A sensor. I show you the electrical diagram in the figure below:
Code: uv-meter.ino
//AUTHOR: GUILLERMO PEREZ GUILLEN
#include <MCUFRIEND_kbv.h>
MCUFRIEND_kbv tft;
#include <TouchScreen.h>
int16_t BOXSIZE;
uint16_t ID, currentcolor;
uint8_t Orientation = 0; //PORTRAIT
String UVIndex = "0";
String Index = " ";
// Assign human-readable names to some common 16-bit color values:
#define BLACK 0x0000
#define BLUE 0x001F
#define RED 0xF800
#define GREEN 0x07E0
#define CYAN 0x07FF
#define MAGENTA 0xF81F
#define YELLOW 0xFFE0
#define WHITE 0xFFFF
void setup()
{
while (!Serial);
Serial.begin(57600);
uint16_t tmp;
tft.reset();
ID = tft.readID();
tft.begin(ID);
tft.setRotation(Orientation);
tft.fillScreen(BLACK);
}
void loop()
{
float sensorVoltage;
float sensorValue;
sensorValue = analogRead(A8);
sensorVoltage = (sensorValue * (5.0 / 1023.0))*1000; //Voltage in miliVolts
////////////////////////// UV Index
if(sensorVoltage<50.0)
{
UVIndex = "0";
Index = "LOW";
}
else if (sensorVoltage>=50.0 && sensorVoltage<227.0)
{
UVIndex = "0";
Index = "LOW";
}
else if (sensorVoltage>=227 && sensorVoltage<318)
{
UVIndex = "1";
Index = "LOW";
}
else if (sensorVoltage>=318 && sensorVoltage<408)
{
UVIndex = "2";
Index = "LOW";
}else if (sensorVoltage>=408 && sensorVoltage<503)
{
UVIndex = "3";
Index = "MEDIUM";
}
else if (sensorVoltage>=503 && sensorVoltage<606)
{
UVIndex = "4";
Index = "MEDIUM";
}else if (sensorVoltage>=606 && sensorVoltage<696)
{
UVIndex = "5";
Index = "MEDIUM";
}else if (sensorVoltage>=696 && sensorVoltage<795)
{
UVIndex = "6";
Index = "HIGH";
}else if (sensorVoltage>=795 && sensorVoltage<881)
{
UVIndex = "7";
Index = "HIGH";
}
else if (sensorVoltage>=881 && sensorVoltage<976)
{
UVIndex = "8";
Index = "VERY HIGH";
}
else if (sensorVoltage>=976 && sensorVoltage<1079)
{
UVIndex = "9";
Index = "VERY HIGH";
}
else if (sensorVoltage>=1079 && sensorVoltage<1170)
{
UVIndex = "10";
Index = "VERY HIGH";
}
else if (sensorVoltage>=1170)
{
UVIndex = "11";
Index = "THE HIGHEST"; // EXTREMELY HIGHEST
}
/////////////////////////////////////
Serial.print("sensor reading = ");
Serial.print(sensorValue);
Serial.println("");
Serial.print("sensor voltage = ");
Serial.print(sensorVoltage);
Serial.println(" V");
Serial.print("UV Index = ");
Serial.print(UVIndex);
tft.setCursor(0, 5);
tft.setTextSize(3);
tft.setTextColor(MAGENTA, BLACK);
tft.println(" UV METER");
tft.println(" ");
tft.setTextColor(YELLOW, BLACK);
tft.println("mV: " + String(sensorVoltage) + " ");
tft.println(" ");
tft.println("UVIndex: " + String(UVIndex) + " ");
tft.setTextColor(WHITE, BLACK);
tft.println(" ");
tft.println(String(Index) + " ");
delay(1000);
}
8. TESTYou can see the tests with the robot in the video below:
9. CONCLUSIONAt the end of this project, I can say that I achieved all my goals and that it was not easy to work with this entire project:
- 1) I had to connect the ultrasonic sensors on the ESP32-WROOM-32 board because the Arduino board couldn't do everything and it would troubles;
- 2) I made several attempts to achieve a stable neural network; even I removed 14 combinations of possible 64 in table of the five section; these removed combinations were difficult to happen, for example when all entries are 1.
- 3) I had to reduce the speed of the gearmotors experimentally so that the robot had time to predict the best decision; and even I couldn't reduce the speed of the gearmotors too much because they get stuck;
- 4) I had to find the right distance for the Mini Tesla coil to light the UV lamp; I also had to move the Tesla coil away from the programming boards so that it wouldn't induce voltages;
- 5) I had to make use of two batteries, the first battery was used to power the programming boards and sensors, and the second battery was to power the L298N driver, gear motors and Tesla coil.
This is a good prototype that can be upgraded to new versions.
- TESLA Robot version 2 -Sections:
- 10. REFLECTOR
- 11. OPENCV
The goals of this project are:
- Develop a Reflector to concentrate the energy of UV lamp on an object: backless stool;
- Make the Cascade Classifier of a backless stool; and
- Using of OpenCV on the TESLA Robot to locate the correct position of the backless stool, and aim the reflector on this object.
Note: Since the robot's camera is 10 cm from the ground surface, we reduce the location error of the backless stool by doing the following: I printed images of backless stools to stick these onto a real backless stool. In this way, the TESLA Robot will see the images in front of it and will immediately recognize the backless stool.
We're going to print several parts that will be used to assemble Reflector with the "4WD Robot Car" chassis. In the figures below I show you the images of these parts, and I comment the use of each one.
Now, I show you the parts assembled on the 4WD Robot Car in the figures below:
A good tutorial for installing and optimizing OpenCV on our Raspberry Pi is: https://pimylifeup.com/raspberry-pi-opencv/
The steps to follow to make the classifier are as follows:
- A --> Collecting Image Database
- B --> Arranging Negative Images
- C --> Crop & Mark Positive Images
- D --> Creating a vector of positive images
- E --> Haar-Training
- F --> Creating the XML File
Notes:
- In my next tutorial you can find detailed information and learn how to work with these steps: https://www.hackster.io/guillengap/deep-learning-covid-19-detection-with-opencv-d654ef
- I made a classifier called: backless_stool.XML , and you can get it in the download section.
How to test the classifier on our Raspberry Pi?
First we must assemble our schematic diagram that I show in the figure below:
I also made my own cable for connections:
On my Raspberry Pi board, I must run the following code: tesla_robot.py
# import the necessary packages
from picamera.array import PiRGBArray
from picamera import PiCamera
import time
import cv2
import serial
import struct
a=0
b=0
x1=0
y1=0
ser = serial.Serial('/dev/ttyUSB0',9600)
# initialize the camera and grab a reference to the raw camera capture
camera = PiCamera()
camera.resolution = (640, 480)
camera.framerate = 32
rawCapture = PiRGBArray(camera, size=(640, 480))
#Load a cascade file for detecting faces
backless_stool_cascade = cv2.CascadeClassifier('backless_stool.xml')
# allow the camera to warmup
time.sleep(0.1)
count = 0
# capture frames from the camera
for frame in camera.capture_continuous(rawCapture, format="bgr", use_video_port=True):
image = frame.array
gray = cv2.cvtColor(image, cv2.COLOR_BGR2GRAY)
backless_stool = backless_stool_cascade.detectMultiScale(gray, 1.3, 5)
for (x,y,w,h) in backless_stool:
a=int((2*x+w)/2)
b=int((2*y+h)/2)
x1=int(a/3.66)
y1=int(b/2.55)
ser.write(struct.pack('>BB', x1,y1))
cv2.rectangle(image, (x,y), (x+w,y+h), (255,0,0), 2)
count += 1
# show the frame
cv2.imshow("Frame", image)
key = cv2.waitKey(1) & 0xFF
# clear the stream in preparation for the next frame
rawCapture.truncate(0)
# if the `q` key was pressed, break from the loop
if key == ord("q"):
break
This code finds the horizontal and vertical position of the first vertex of the object (backless stool). Then I send the data through the serial port (ttyUSB0) to the Arduino board. On my Arduino Pro Mini board, I must load the following code: arduino_pro_mini.ino
#include <Servo.h>
int data_x = 0;
int data_y = 0;
int data[1];
Servo myservo_x;
Servo myservo_y;// create servo object to control a servo
void setup() {
Serial.begin(9600);
myservo_x.attach(9); // attaches the servo on pin 9 to the servo object
myservo_y.attach(10);
myservo_x.write(90);
myservo_y.write(90);
}
void loop() {
while (Serial.available() >= 2) {
for (int i = 0; i < 2; i++) {
data[i] = Serial.read();
}
myservo_x.write(data[0]);
myservo_y.write(data[1]);
Serial.println(data[0]);
Serial.println(data[1]);
}
}
This code uses only the horizontal coordinate, and by means of a servo connected to pin 9 we move the reflector towards the backless stool.
Note: Remember that the backless_stool.XML file must be in the same folder as the tesla_robot.py code.
In the video below I show you the tests carried out:
As you can see, the reflector follows the movement of the image of the backless stool. In this way we make sure that it concentrates the ultraviolet radiation on the desired object. A single 5V 2A battery discharges very fast to power the four programming boards, suggestion:
- A 5V 2A battery is needed to feed the Arduino UNO and ESP32-WROOM-32 boards;
- A 5V 2A battery is needed to feed the Raspberry Pi 3B + and Arduino Pro Mini boards.
As we did in section 1 of this project, the price of the hardware components is approximately $ 369 USD.
Comments