

Hardware components | ||||||
| × | 1 | ||||
| × | 1 | ||||
 |
| × | 1 | |||
| × | 1 | ||||
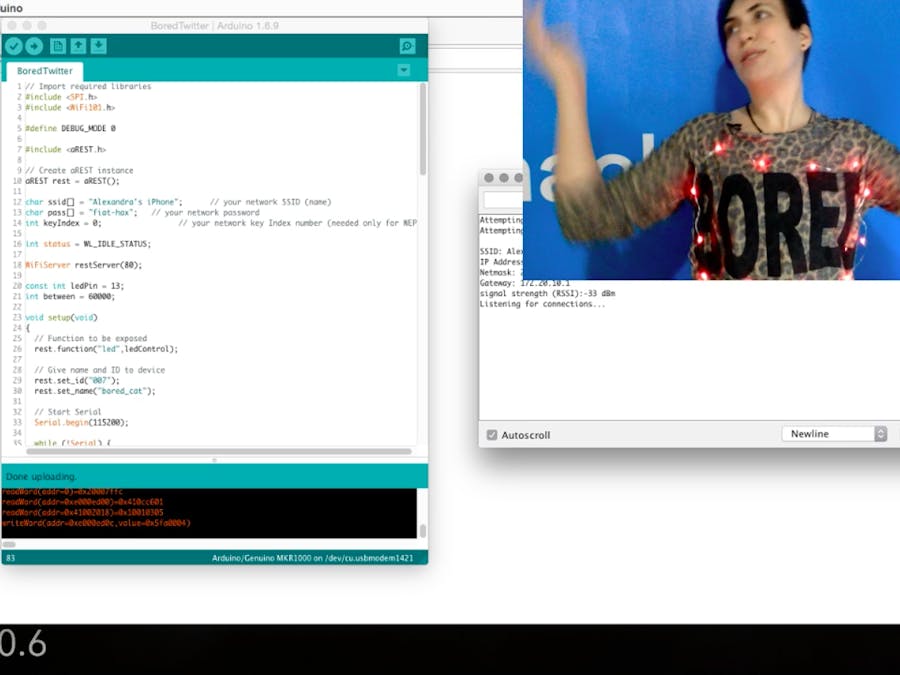
This sweater likes to have stuff going on around it! Right now, anyone can give it a "poke" – and if it hasn't heard anything in a while, it starts flashing its red LEDs around the "BORED" text, faster and faster.
I bought this sweater two years ago as a potential victim for my first holiday hack. I saw the BORED sign and thought: This truly is the ugliest sweater of all. This year, it's back with a vengeance. And we're going to banish boredom!
The CircuitThis is based on a MKR1000, the small, WiFi-enabled Arduino.
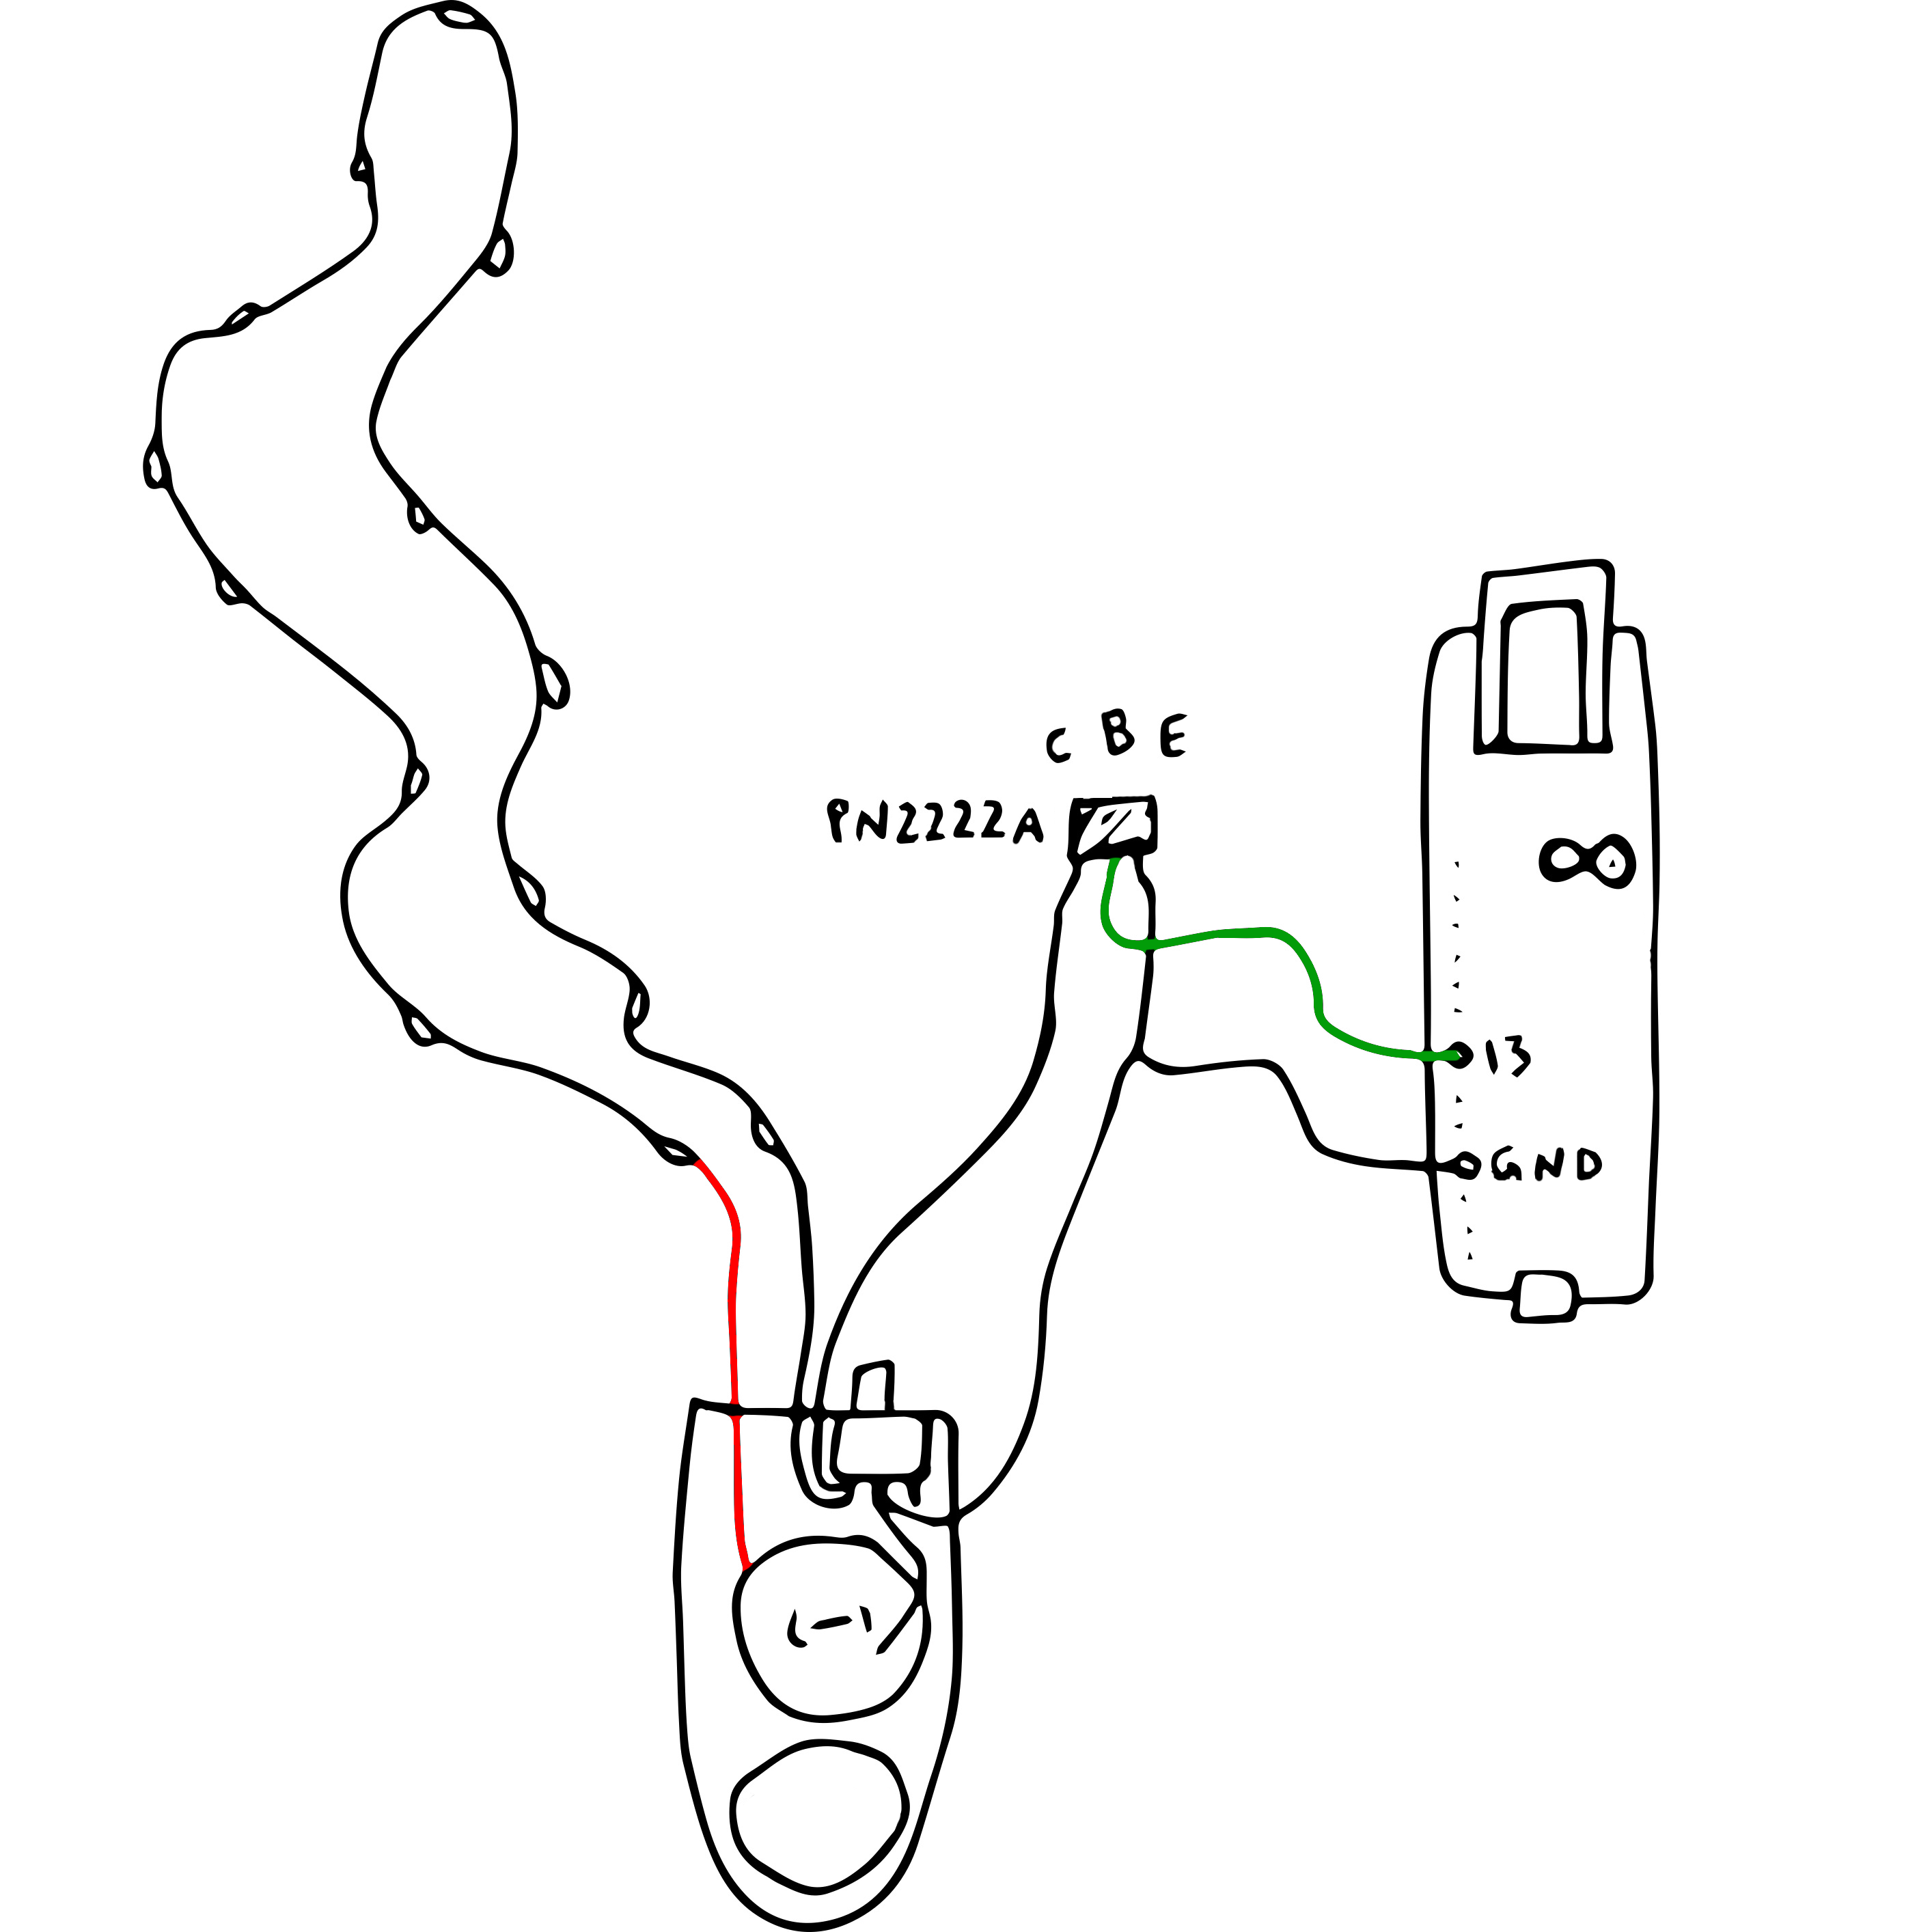
The sweater uses a PNP transistor to toggle power to a string of cheap, generic red LEDs. I mounted them on the outside because it's supposed to be ugly, right? Plus, I wanted the lights as bright as possible :) Since the wires are insulated, I safety-pinned them to the shirt, which will also enable me to remove them on laundry day.
The LEDs run on a pair of CR2032 coin cells, with a power switch spliced into the ground wire (the power wire runs directly to the LEDs). I soldered the transistor's Collector and Emitter legs to the same two pins that are connected when the switch is on. So, you can still turn the lights on with the switch, or toggle them by closing the same connection with the transistor. The Base leg is wired to pin 13 on my MKR1000, and the Emitter is also routed to the Arduino's GND pin.
For the Arduino, I started with Vincent Wong's MKR1000 + REST API project and adapted it with my own janky blinker code. I did what I had to do so that it flashes once, then delays for 60 seconds, then divides the delay by 3 and loops back around. Eventually, it pretty much stays on. When it receives the poke, it resets the delay back to 60 seconds.
Note that Vincent was using version 2.1.1 of the Arduino aREST library, which you can download here: https://github.com/marcoschwartz/aREST/releases
I found a simple web page with an AJAX button on StackOverflow and modified it to "poke" the sweater. It's simply a button that sends a command to the Arduino's REST API. You do have to be on the same network as the sweater. First, though, I built a simple test page with "on" and "off" buttons.
I opted to download jquery-2.1.1.js and place it in the same directory as the HTML files – which is probably bad practice, but I have a problem with coming back to old software projects and having them die on me. :) So I'm a little paranoid, and this way it should work even if only your LAN is up.
Check out the Code section for the .ino and .html files!
Next StepsThere are a few ways I could take this; right now, I'm planning to use it with the Hackster API to prevent boredom. It will (hopefully) flash and post a link whenever a new Hackster project appears!
I'd like to rebuild this on a MKR1000 that doesn't have headers; this one had them soldered on from a meetup, but they come with the headers unattached. That will make it smaller, less spiky, more durable, and easier to insulate: I'll probably just smother all the pins in hot glue.
TroubleshootingI had this working perfectly one night; and the next day, it completely failed to connect to the same office WiFi network. I think it's because of the load on the network from my colleagues. I managed to get it working just fine by tethering to my phone instead – of course, this means you have to have your computer with the browser on the same network, and it will probably be inaccessible to that phone.


Comments