

DISCLAIMER: I am not a doctor. Build or use this device AT YOUR OWN RISK.
See the new version (and more info about the LED safety) here!
You've probably heard of SAD lamps or light boxes: blue-toned lamps that help people cope with seasonal affective disorder. To simplify it (a lot), your brain seems to use this as a cue for "daylight"; it's the same reason why you're not supposed to look at screens at night: they produce a lot of blue light, which can profoundly affect your sleep cycle.
I was thinking about how hardware hackers are producing lots of PCB badges and "shitty add-ons"; they're wonderful art pieces, but most end up tossed in a drawer somewhere. What if I could design something with lasting utility?
I hit on this idea because:
- I wanted to make something seasonal that wasn't an ornament,
- This project could be immediately useful for those with SAD, and
- It is also immediately useful to conference-goers, who may be traveling long distances (at the time I came up with it, I was in Europe for what I thought was a one-week stay).
- I love mind-altering gadgets! If I can use this as a stimulant in the morning, without taking any pills or drinking caffeine, sign me up!
So, I started researching SAD lamps, and how to make them as small and efficient as possible. DIY solutions often recommend an entire bank of CFL bulbs – wow! But according to research, you really only need a certain frequency band of blue light, and this is still effective when provided by LEDs.
Another hurdle: the lamps are supposed to provide around 10,000 lumens! However, if you place the light source much closer to the eye, you can use much less light at the source to achieve the same effect.
Prior art: I Googled around and found a brand called Re-timer, who produce a headset that shines the light right into your eyes. Later, in a shmancy airport spa shop on the way to London, I noticed a similar product called Propeaq. They claim to achieve the same effect as 10k lumens with just 40, aimed at your eyes. Finally, when I reached London and hung out with my friend Rainycat, I mentioned the project and she said she'd seen something similar on display at Selfridges. We took a field trip and found that it was a whole other brand, Ayo!
This is fantastic! Three products on the market already, eager to prove that their science is sound... I could hijack all their research for my own design.
IMPORTANT: All of these products shine the light INDIRECTLY. It has to hit your retina, but should NOT be directed straight into the eye! This is not only pretty convenient, but also prevents retina damage. BE CAREFUL WHERE YOU AIM and do not look directly at the LEDs! DO NOT USE LEDS WITH ULTRAVIOLET FREQUENCIES! Somewhere in the green-blue range is recommended.
Precise wavelengths and recommended durations vary, so I won't give any definite info here, but I welcome you to check out those companies' sites and draw up your own plans.
...And if it doesn't work, at least you get to look like an alien!
Choosing componentsLike most of my wearable/mind-altering projects, this one is designed for simplicity. It plugs into a 5V power source, which in my case is just an adapter plugged in next to the bed – but if I'm on the go, it could also be a phone charger tucked into a pocket.
I thought about using a rechargeable LiPo battery, but that would have made it more complicated. Also, realistically, I spend at least half an hour in bed before getting up. I've decided not to fight nature and block in some time to sit there and catch up with the world, while drinking warm water or tea from a thermos prepared the night before. So, being wired isn't a huge deal.
Visually, I wanted these to look cool and cyborg-y – either like exaggerated cheekbones, or smooth chevrons. I know I've seen cyberpunk characters with this kind of design before, but also Kida from Disney's Atlantis comes to mind.
But also, this could be compact enough to work like those little fold-up reading glasses you see in drugstores. Someday, I'd like to make this out of a springy material that can be folded and then return to its shape.
The circuitI happened to have some blue LEDs on hand from my Charmware prototypes, which clock in at around 560 nm – right in the target wavelength, with no UV (very important!!! DO NOT SHINE UV IN YOUR EYES). And they run on 2.6 volts!
So, under each eye goes one chevron, which has two LEDs in series, running from the front (power) to back (ground). Then, the two chevrons are hooked up in parallel. Thus, I can easily run all four LEDs directly off of 5 volts! They aren't quite at full brightness, but I'd rather have that than require resistors for my prototype. Plus, "5V" sources can vary a little. (Yes, yes, current limiting blah blah blah...)
First, I drew the shape I wanted for my chevrons with a pen on paper.
I used Adobe Capture to capture that and turn it into a smooth shape:
I milled out that file with the Desktop PCB Mill lent to us by Bantam Tools. I used double-sided FR-1 substrate, so that this simple shape would become two planes: ground and power.
I used some thick, solid-core hookup wire to connect the two pieces, since that's also the "nose bridge" of the wearable. It needs to be adjustable as I figure out how to put this on my face, but also durable.
Then, I added little solid-core hookup wire "bridges" with my surface-mount LEDs in place. I covered all these connections in hot glue, so as to insulate them electrically and make sure I wasn't getting poked in the face with wire ends.
Finally, I added a 5V Micro USB adapter to the other end of the cable. I can use a standard Micro USB - USB A cable to connect this to a portable power bank if I want to move around and do stuff, or plug it directly into my computer in the morning.
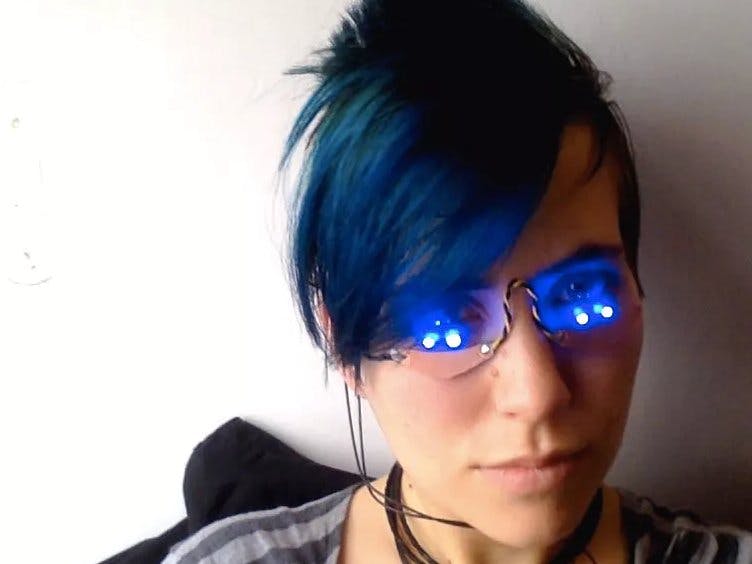
On November 28, I had an audio-only work call at 9am, so I took it from bed (my job is pretty great). I woke up at 8:40, fetched some water, fired up the call, made sure my camera was off, and plugged in my new alien glasses. (And took the cover photo above.)
I was surprised by how not-annoying the light is! Of course, that might just mean that it isn't bright enough. I didn't have any spots in my vision, though, or any abnormalities even when I took them off 30 minutes later. I also made sure not to look down into the lights. (Most commercial glasses place the lights above the eyes, or above and below – I might test that out as well.)
I've been back from a 2-week Europe trip (8 hours difference) for about 4 days, and have been waking up in the night, but I felt like getting up and starting my day. Me! In the cold!! In the morning!!!
The future#BadgeLove: Blue LEDs can take a loooot of power, because they're so high-energy (which is what makes them work for this purpose). Next up, I plan to get some 3.3V blue LEDs so that I can run them all in parallel off of a badge. That would also mean that I can solder them directly to either side of a double-sided PCB, across the edge.
That was my original plan, and it should only require a resistor in series to run off of a 3.7V rechargeable battery.
Wider audience: Like I mentioned, these could be manufactured more securely, with a comfortable and springy middle section, so they could even be stuffed into a pocket when you're running to make an international flight. It's such a simple and versatile design.
Testing: Obviously, but it has to be said – before productizing this, I'd want to make sure it's safe, then ask people who actually have SAD to test it. Same goes for jet lag; I'm not exactly flying to Europe every other weekend, so others could use this with Re-timer's jet lag calculator to see if it helps them adjust.
Diffusion: All the options on the market right now have at least some diffusion, which is something I'd like to add as well.
Glasses mount: Might make some cheapo, lightweight glasses frames out of lasered wood and mount these in different configurations. There are a bunch of templates for those on Thingiverse and other places.
Flexible PCBs: OSH Park allows you to order flex PCBs, and that could be a cool way to attach them to your face – I'm thinking to use side-mounted LEDs for this, which can face out from the side of the circuit board plane.

Comments