


Hardware components | ||||||
_baVEVgguW1.jpg?auto=compress%2Cformat&w=48&h=48&fit=fill&bg=ffffff) |
| × | 1 | |||
 |
| × | 1 | |||
 |
| × | 1 | |||
 |
| × | 1 | |||
 |
| × | 1 | |||
Hand tools and fabrication machines | ||||||
 |
| |||||
Time to learn some sweet programming tricks! These will help you write elegant code, whether you're customizing examples or building something from scratch.
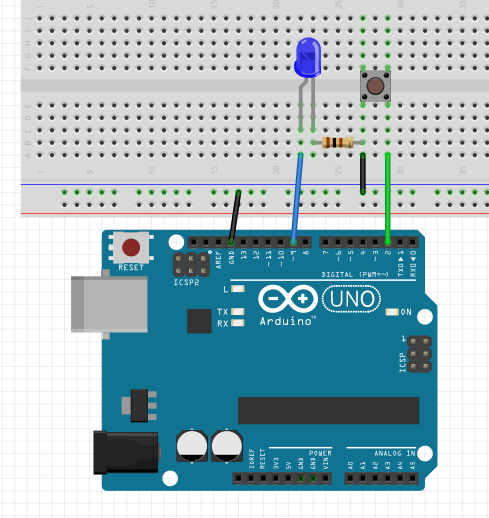
1. Streamline your Button sketchUpgrade the example Button sketch, and become a lean, mean, extreme coding machine.
[Note that the code included below has removed the "buttonState" variable declaration in the beginning – since it's no longer used.]
2. Counting with variablesManipulate numbers without actually using numbers. Skill++ :)
Also, try the other method mentioned in our Servo tutorial (coming soon)! We can also write: clicks += 1
Learn a bit more about writing to variables with functions and their opposites, while building a circuit that stays on or off until you push the button again. This is a super useful sketch that was requested at one of our meetups!
See the whole series of Hackster 101 tutorials on Hackster and YouTube


_3u05Tpwasz.png?auto=compress%2Cformat&w=40&h=40&fit=fillmax&bg=fff&dpr=2)
Comments