This badge was developed due to my need for a board to learn about MicroPython with an ESP8266. Although it's easy to test using a breadboard, I needed a more robust board that I could bring with me outside the lab and for a demonstration at a event.
I didn't have time to make a layout, send to manufacture, and assemble the board. And for now, I only need one board.
So, I decided to make a DIY dev board, using the components that I have in my lab. As I had to present a talk on MicroPython at Campus Party Brasil, I chose to build it in badge format so that I could easily show it to the public.
Below, you find all the details of badge hardware.
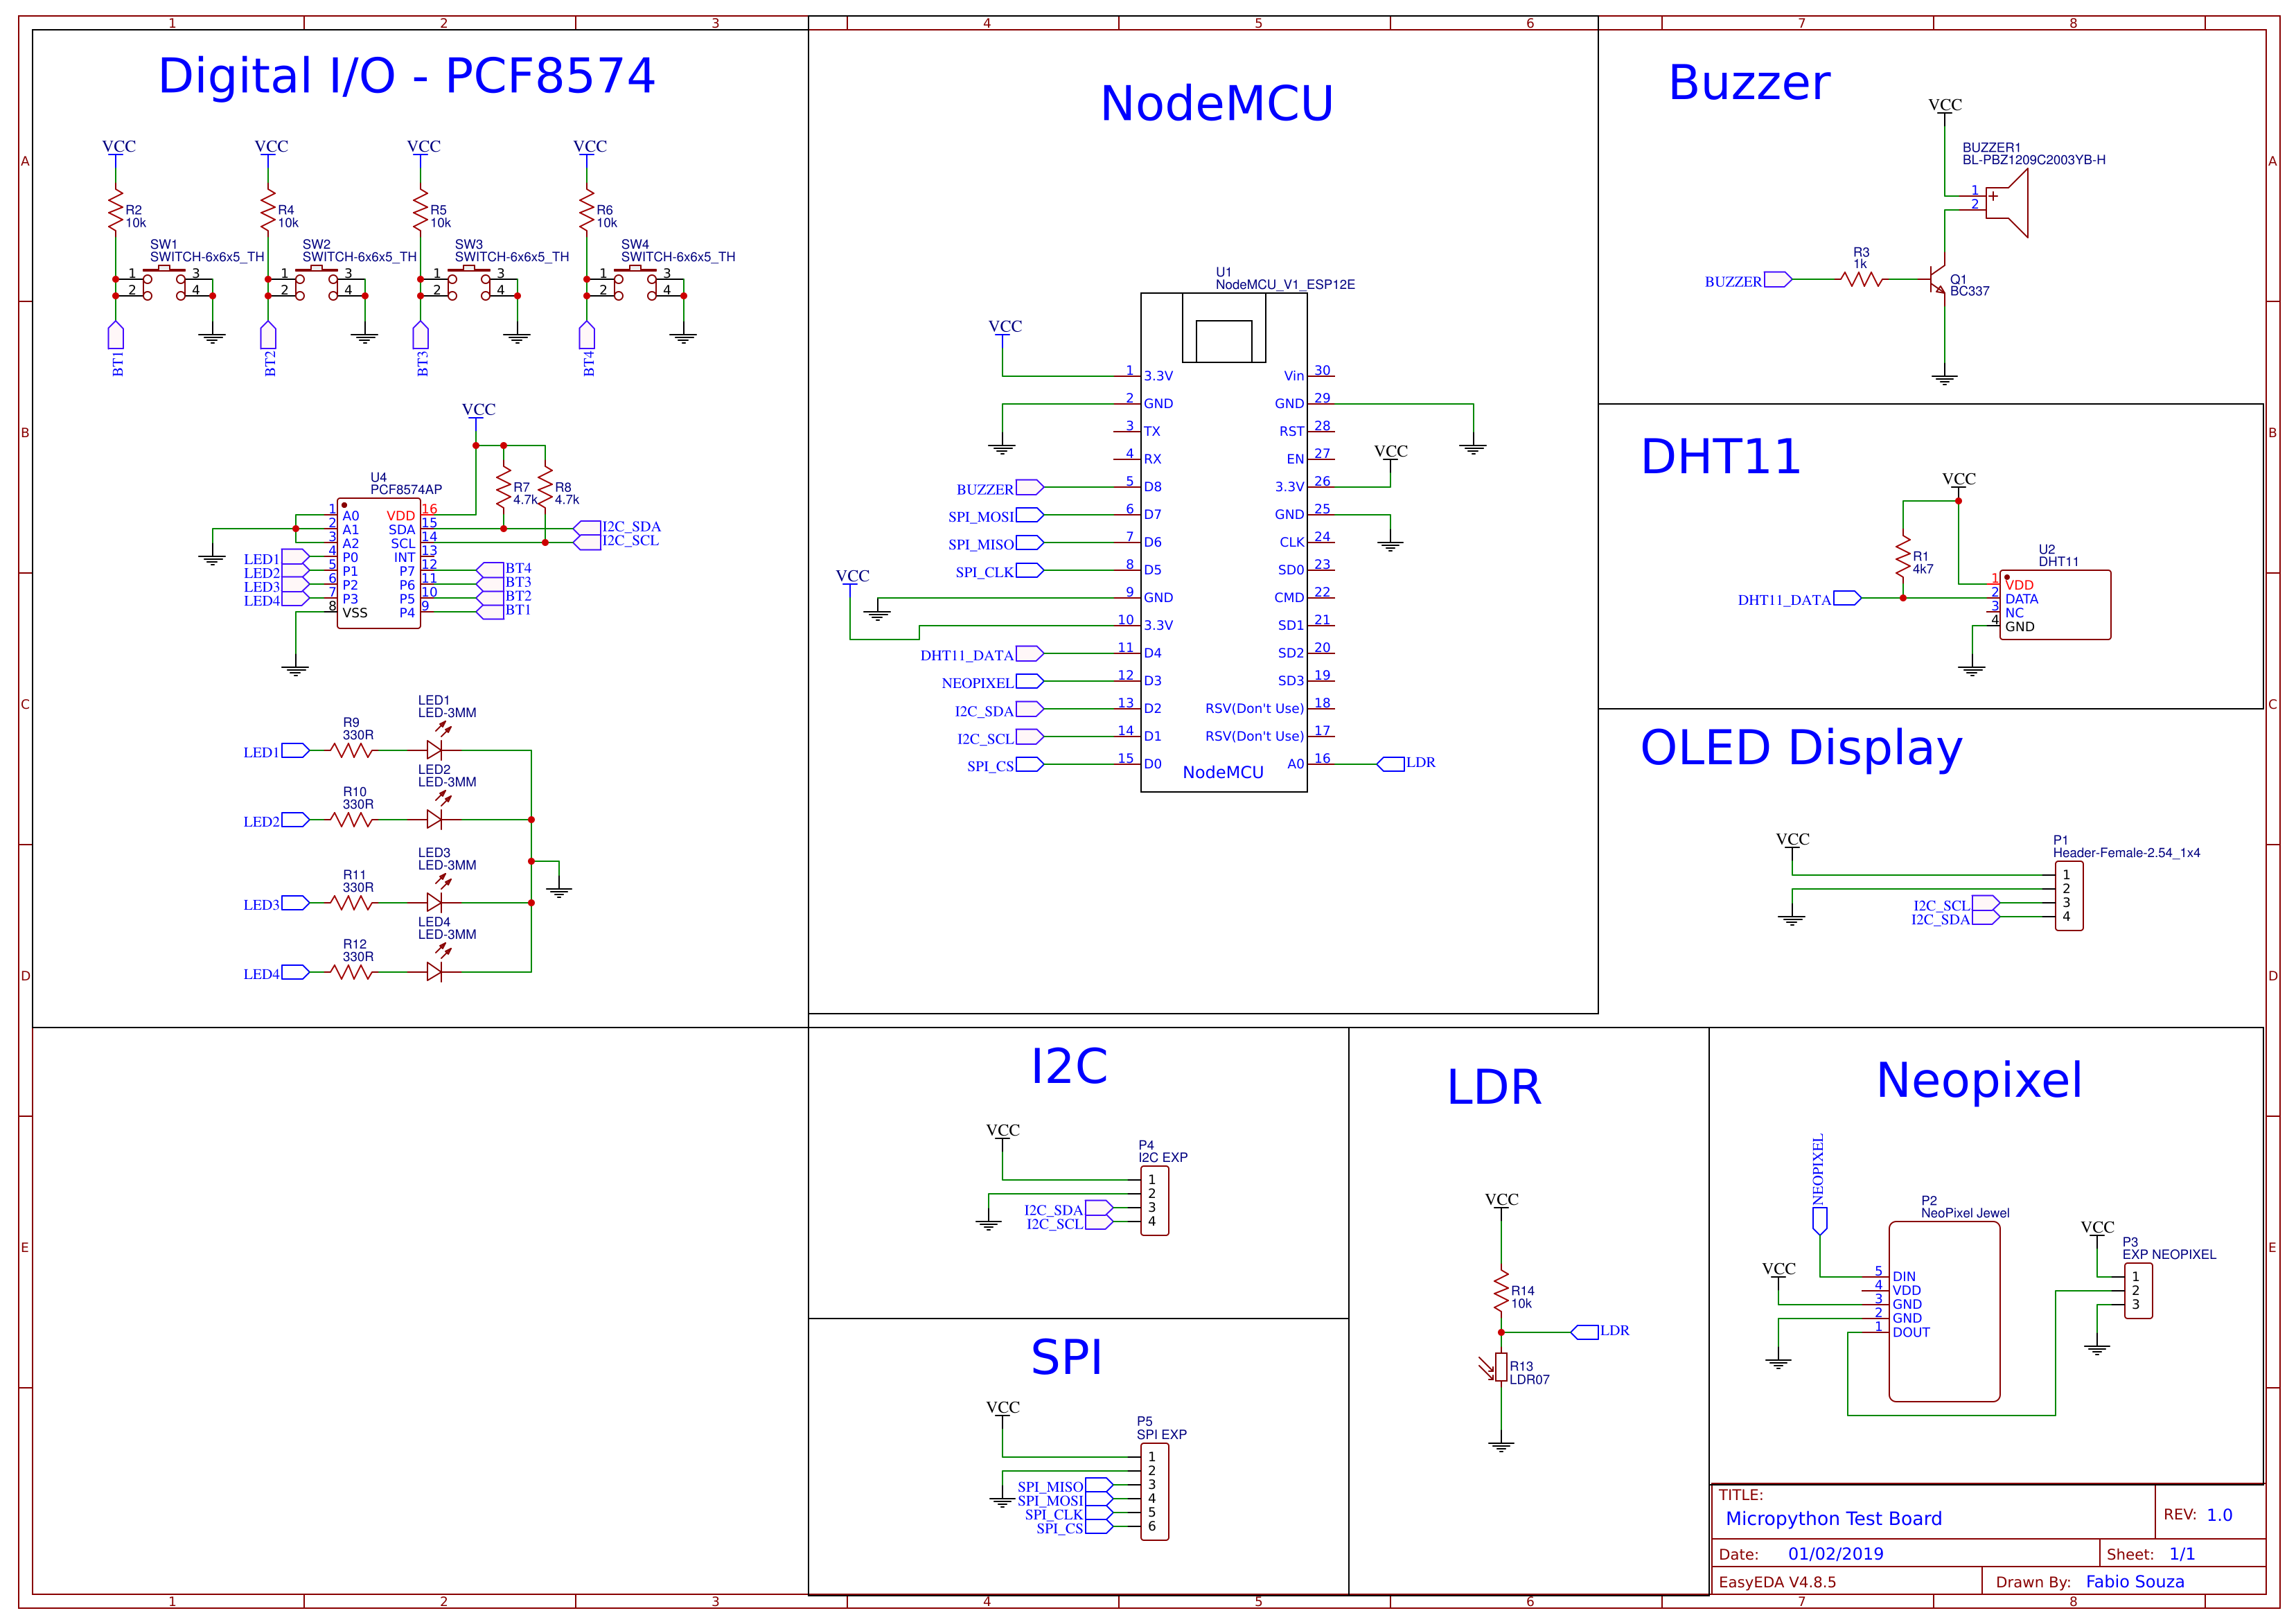
SchematicTo explore the features of MicroPython, I decided to put a variety of modules. The schematic was drawn in EasyEDA:
Board Features- NodeMCU
- DHT11
- OLED display
- Buzzer
- LDR
- NeoPixel with expander connector
- PCF8574AP (4 Entradas e 4 Saídas)
- I2C expander
- SPI expander
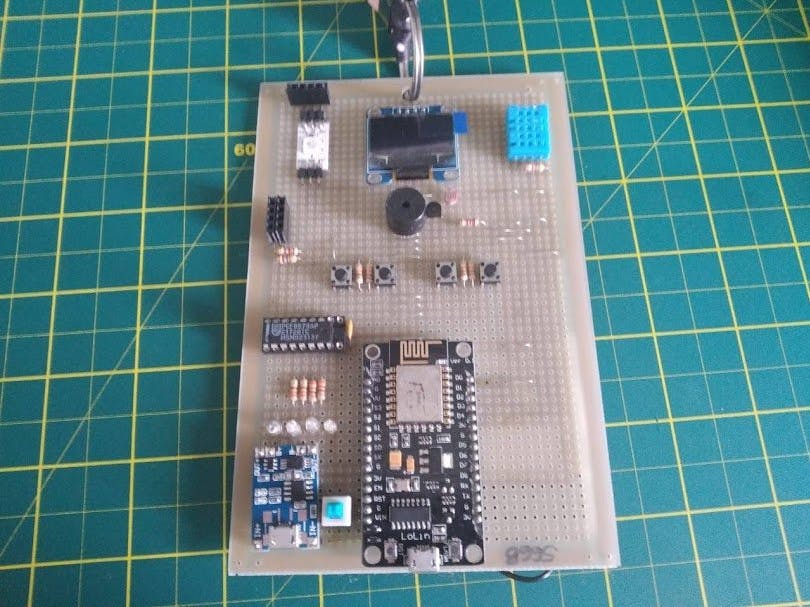
AssemblyFor assembly the board the soldering was done on prototyping perfboards. Following the schematic, I fixed the components and made the tracks with solder wire.
In some cases jumpers were required. They were made with terminals of the components used.
Board TestingThe video shows a test of all peripherals with MicroPython:


_3u05Tpwasz.png?auto=compress%2Cformat&w=40&h=40&fit=fillmax&bg=fff&dpr=2)
Comments