Robotic arms are used in many applications, ranging from heavy-duty assembly lines and warehouse logistics to precise equipment for fine operations. There are many types of such machinery, based on the application, they can be operated with hydraulics, pneumatics, electrical or mechanical power sources.
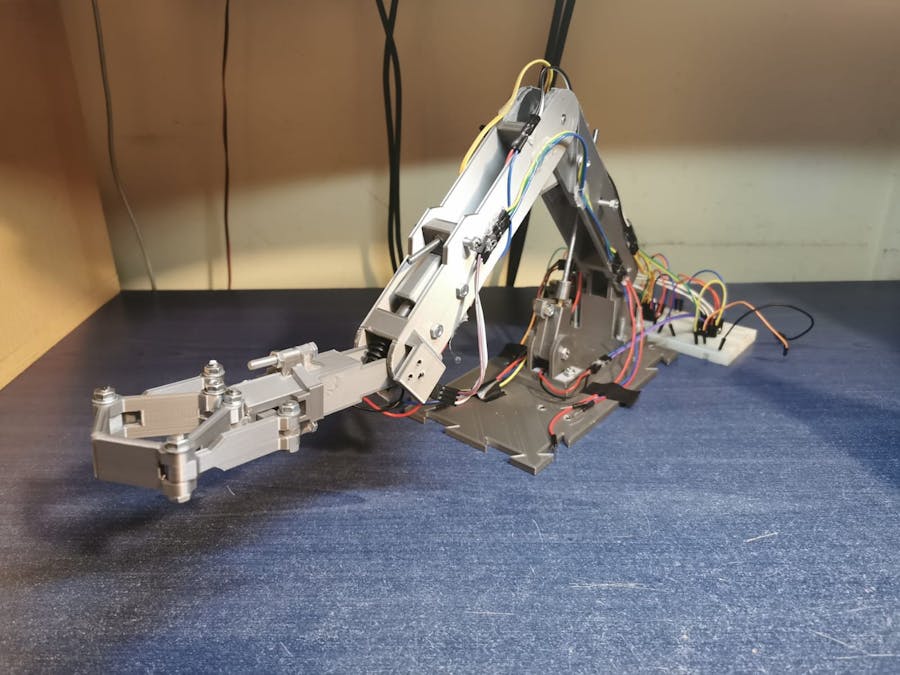
About this projectThis project is rather a concept in which I combined a side of mechanics (linear actuators) with a simple robot - a robotic arm. This model is far from perfect, but it is a robot that is flexible and can lift weights to 100 grams. Therefore, any improvement of this project is welcome. :)
Linear ActuatorsIn this project, I've made a unique design of this type of robot, which is based on a form of movement using linear actuators. An actuator transforms circular motion into linear motion. So, the motor is connected to a threaded rod that screws or unscrews a nut. As a result, the nut moves on a linear trajectory alongside the thread.
Figure 1 - linear actuator
The advantage of using a threaded rod and nut is that it locks in position when applied force stops. It significantly reduces the stress on the motor, resulting in less energy consumption.
The downside is the need for mobility. During operation, the angle between rod, arm and support varies, meaning that both nut support and motor must be put on joints. Also, the movement is very slow.
3D Modelling & Design
As seen in Figure 2, most elements are connected with mobile constraints. For the actuator to work, the motor and nut must be on two separate components. Motor 1 is fixed in Joint A on the lower support. The nut is fixed in Joint C on the arm’s frame while the arm itself and support are connected in Joint B. The same thing happens with arm-boom articulation (Joint E) and its Motor 2 (Joint D) with corresponding nut (Joint F).
Figure 3 - Robotic Claw Gripper
The claw’s components (figure 3) are entirely designed by us. Similar to the other two actuators, the difference is that the motor is fixed and the nut can move only along the thread. Nut support, arms and forearms are connected with articulated joints too, resulting in a parallel movement that widens the gap between the arms’ tips if the nut unscrews and vice versa. It is designed to hold anything from 1 to 60 millimetres.
1 / 3 • Figure 4 - LEGO worm gear
Moving on, to control the overall claw’s inclination I added another DC motor. Considering the small space at the top of the boom, another actuator wasn’t practical. So I implemented a LEGO worm gear (figure 4), mounted on the motor’s shaft, which turns a spur gear fixed on the Motor4 Bracket, having the same effect of locking in place once the motor stops. This gearing has a 1:8 ratio, it takes 8 turns for the worm to fully revolve the spur gear once.
3D PrintingIn total, there are 27 elements. It required me 43 hours to print them. I have used PLA as filament, and the total cost of all printing, if you use your 3D printer, should be around 6 € (where the filament roll costs 20 €). So even if the printing time takes too long, the price is much better than if you print it at your 3D printer.
Joystick Android AppFigure 5 - User interface
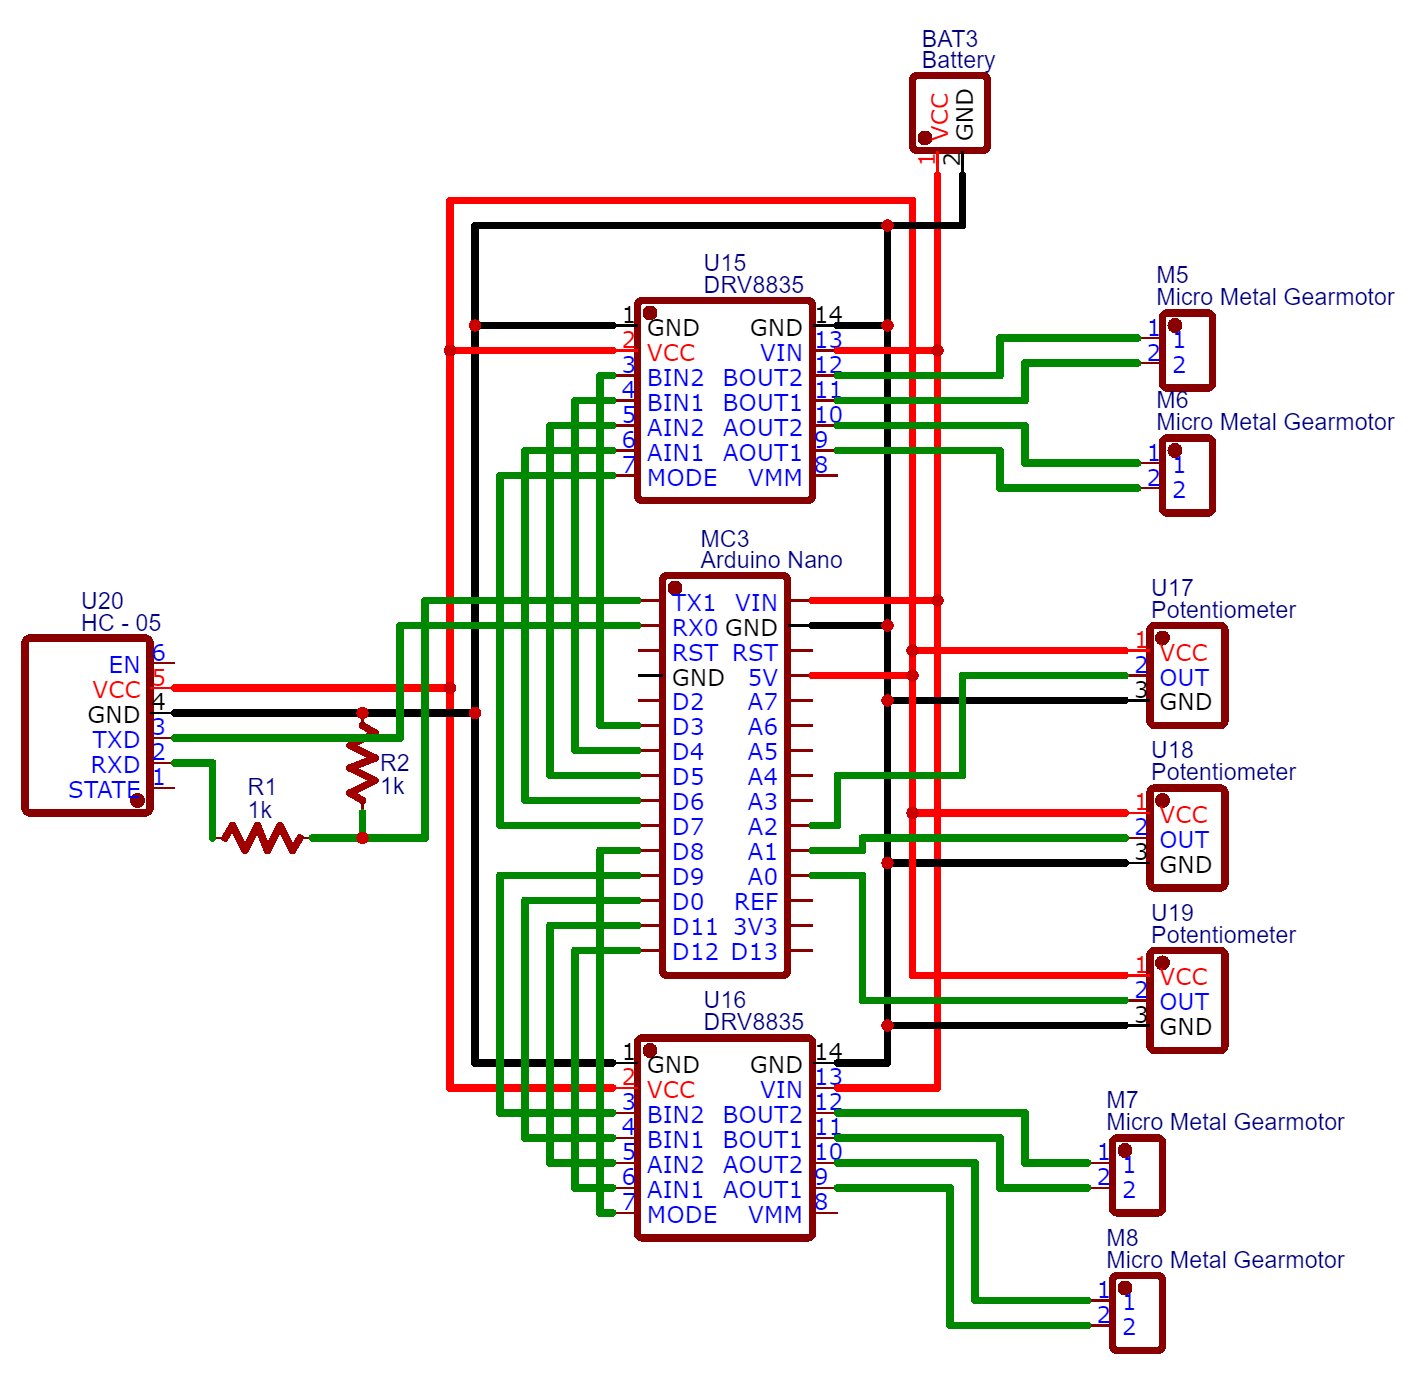
As for the software, I designed an Android app (figure 5) with two joysticks, each with its XY axis. Every axis controls the direction and the speed of one motor. When the user moves the joysticks, the app sends the instructions to the Arduino, which interprets them and sends the correspondent signal to the motor drivers.
if (val > 100) { //if val on the OX/OY axis has a positive value ≈ val > 100
    int x = map(val, 100, 200, 0, 255); //motor spins forward
}
else {
    int x = map(val, 100, 0, 0, 255); //motor spins backward
}
In other words, depending on the position of the joystick, it sends a value for each axis from 0 (down) to 200 (up). Thus, the position with the value 100 represents the value of the centre. The Arduino receives these values and sends an analog signal (from 0 to 255, backward and forward) to the motor via the motor driver.
Optional - potentiometersThis model was originally intended to be implemented with object detection, but I abandoned the idea due to a long time it would have taken for this project. Thus, supports for a linear potentiometer module remained implemented (figure 6). These potentiometers have the role of rendering the value of the angle formed by the components, to be able to implement a program that makes the claw gripper parallel to the ground. In addition to this, they also have the role of stopping the engines if the moving parts do not move.
I also implemented a button when opening the claw gripper so that the engine does not rotate when the device arms reach the maximum angle.


Comments