

Hardware components | ||||||
 |
| × | 1 | |||
_ztBMuBhMHo.jpg?auto=compress%2Cformat&w=48&h=48&fit=fill&bg=ffffff) |
| × | 1 | |||
 |
| × | 1 | |||
Software apps and online services | ||||||
 |
| |||||
| ||||||
Find about how ESP8266 works and then learn to control the built-in LED of ESP8266 from my previous Hackster article.
https://www.hackster.io/Niv_the_anonymous/esp8266-beginner-tutorial-project-6414c8
Please follow the tutorial before moving to this project (link above).
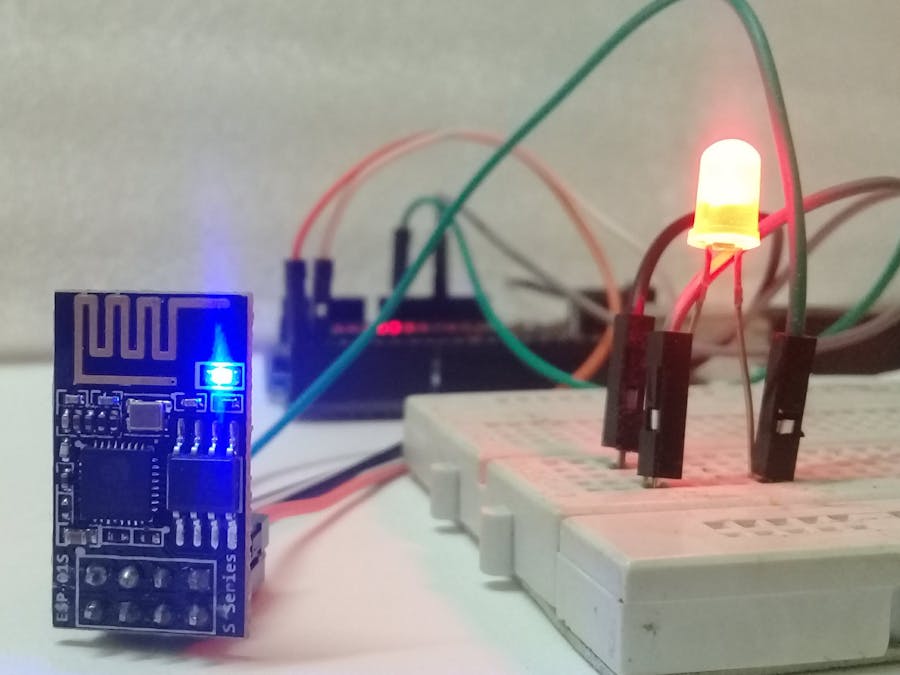
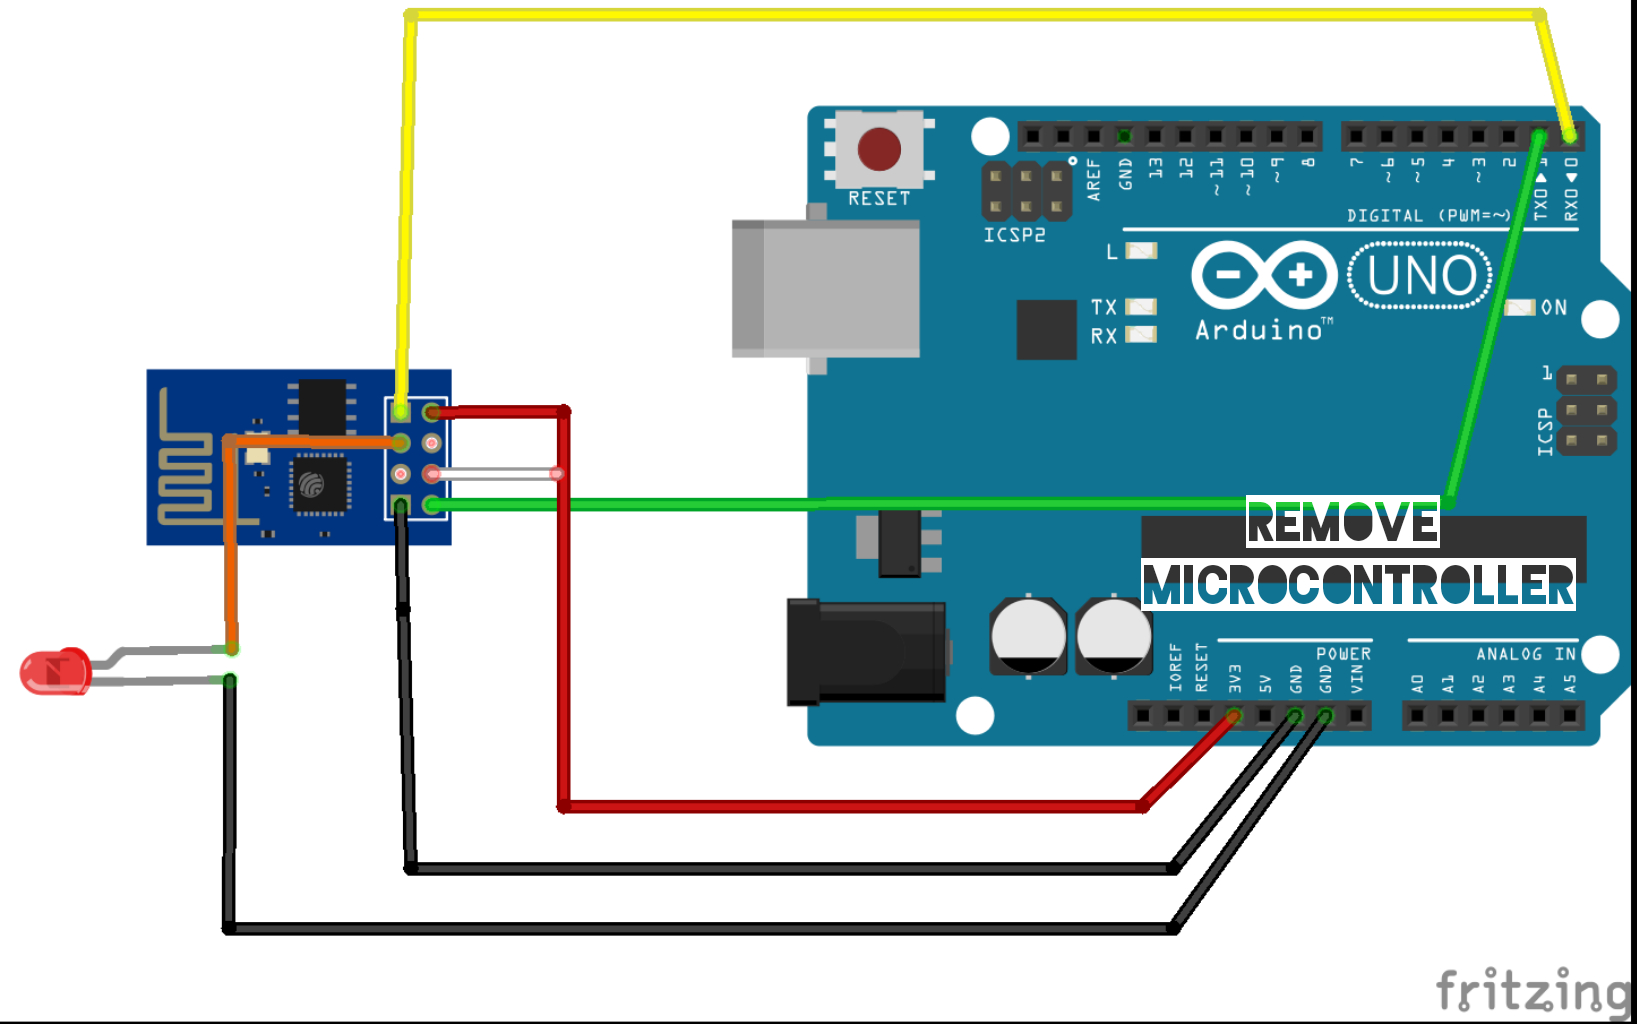
The GPIO pinTo control the LED, GPIO 0 pin of the ESP8266 is being used. ESP8266 (version ESP-01) has only four GPIO pins. GPIO_1 is a Tx pin and the GPIO_3 is an Rx pin which is connected to Arduino for uploading program to the ESP8266 board.
In the previous ESP8266 tutorial, the GPIO_0 pin is connected to GND while uploading the program to ESP8266. After that, it is removed (see the previous tutorial - https://www.hackster.io/Niv_the_anonymous/esp8266-beginner-tutorial-project-6414c8).
Connecting the LED to ESP8266So the GPIO_0 pin should be connected to the LED. Connect the circuit according to the connection given below in the schematics column. GPIO_0 pin should be connected to GND while uploading the code. After the code has been uploaded, remove the GPIO_0 pin from the GND and connect it to the positive terminal of LED and the negative terminal should be connected to GND. The code is given below. Copy the code and paste it in your Arduino IDE software. Don't forget to select the right board manager type( see the tutorial -.https://www.hackster.io/Niv_the_anonymous/esp8266-beginner-tutorial-project-6414c8).
The Blynk appConfiguring the Blynk app to connect with ESP8266 has been explained detailed in my previous ESP8266 tutorial: https://www.hackster.io/Niv_the_anonymous/esp8266-beginner-tutorial-project-6414c8
Open the Blynk app and add a button in it.
Now click on the button and tap the PIN tab. Set the digital pin to gp0 PWM.
You have set the button to control the LED.
Turn ON the WiFi and ESP266, it will automatically get sync with it.
Press the button and you are ready to control the LED over the Internet. Watch the video in the beginning.


Comments