
![LogicTronix [FPGA Design + Machine Learning Company]](https://hackster.imgix.net/uploads/attachments/1123066/_SyVIfEqFUU.blob?auto=compress%2Cformat&w=40&h=40&fit=min&dpr=2)
Hardware components | ||||||
 |
| × | 1 | |||
Software apps and online services | ||||||
| ||||||
Download the latest Petalinux 2021.1 from Xilinx download page available at following link.
This is the standalone installer compared to special Petalinux 2020.2.2 for KV260 starter kit.
Download consist of Petalinux installer. Install the petalinux by running the executable installer in terminal.
This will install the petalinux at the directory path followed by -d option. In above case Petalinux is installed in../petalinux/petalinux_v2021_1 folder
Get BSPNext download the BSP for KV260 starter kit, available in the Xilinx download page available at following link.
It is available in Kria K26 SOM Board Support Package Update 1 section in the download page.
Sourcing the Petalinux build toolBefore running the Petalinux build tool, source the environment variables for Petalinux in working directory by running the following command:
source <petalinux installed directory>/settings.sh
This will provide the petalinux build tool command available in terminal.
Create the Petalinux project from BSPRun the following command to create a new Petalinux project from downloaded BSP for KV260 starter kit.
- Run the following command to create a new Petalinux project from downloaded BSP for KV260 starter kit.
$ petalinux-create -t project -s xilinx-k26-starterkit-v2021.1-final.bsp -n kv260_smartcam- After completion of above command kv260_smartcam folder is created. So further steps, switch to this folder.
$ cd kv260_smartcamDefault Petalinux project from BSP is configured for K26 SOM and to include KV260 starter kit specific packages, BOARD_VARIANT variable need to be set in config. For this, set the variable using following command:
$ echo 'BOARD_VARIANT = "kv"' >> project-spec/meta-user/conf/petalinuxbsp.confNow, add the application packagegroup into the rootfs config such that it is listed in menuconfig and necessary library required for custom application is installed.
$ echo 'CONFIG_packagegroup-kv260-smartcam' >> project-spec/meta-user/conf/user-rootfsconfigAlso enable the smartcam packagegroup by running following command in terminal
$ echo 'CONFIG_packagegroup-kv260-smartcam=y' >> project-spec/configs/rootfs_configAfter configuring the rootfs, next build the image using following commands:
$ petalinux-buildThis will take a while and builds the Petalinux image.
Create a Petalinux SD card image
After build, required files for creating petalinux image is availabe at <working_dir>/kv260_smartcam/images/linux directory. Next, run the command below to create the SD card image.
$ petalinux-package --wic --bootfiles "ramdisk.cpio.gz.u-boot boot.scr Image system.dtb"The generated image file will be located at images/linux/petalinux-sdimage.wic.
Now this wic image is 6.4GB by size. Now flash the image into SD card using Balena Etcher.
Setup the KV260 for testing
For testing the petalinux build with smartcam application on KV260 board, USB camera, Display monitor and serial USB port is attached to the device. Here is the test setup.
Starting the Petalinux in KV260 board
After burning the SD card with petalinx image with balena etcher. Insert the SD card into SD card slot of KV260 board and power on the board. In serial terminal, boot log is loaded and ends with login prompt.
Now login using username: petalinux, If you are running the new petlainux build, it will ask to setup the password. After setting up the password, petalinux shell starts.
Now you are ready to run the application in the KV260 board.
Running SmartCam ApplicationTo run the SmartCam application, first need to load the device overlay. Use following xmutil command to load the kv260-smartcam overlay.
To view the available device overlay:
$ sudo xmutil listappsUnload the default app:
$ sudo xmutil unloadappLoad the kv260-smartcam overlay
$ sudo xmutil loadapp kv260-smartcamThis makes KV260 ready to run the smartcam application.
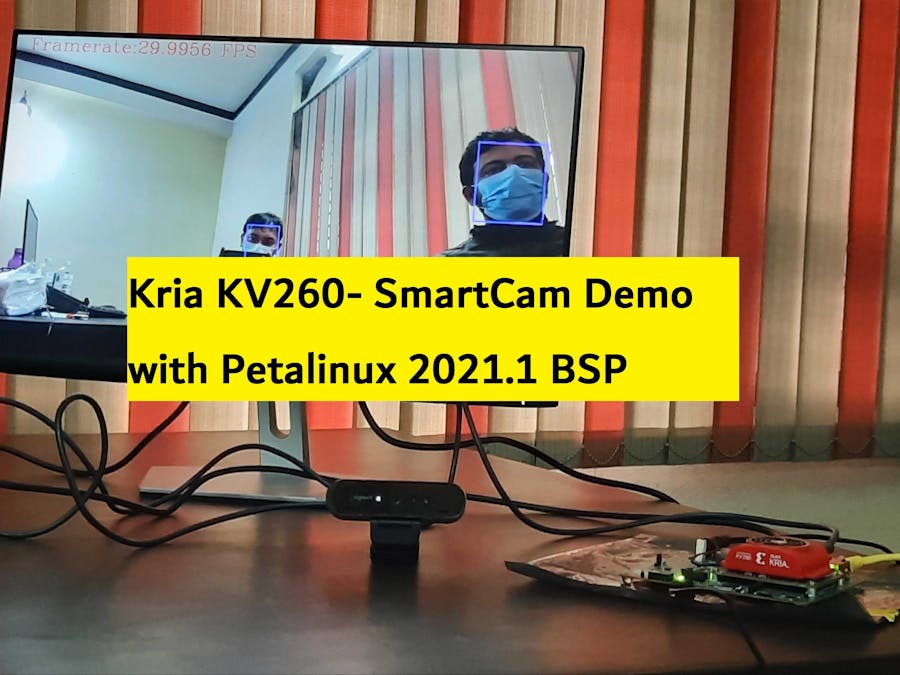
Now, next smartcam application is used to detect the faces in the USB cam feed. For this run the following command in the terminal:
$ sudo smartcam -u 0 -t dp -a facedetect -sThis will run the face detection mode of smartcam application and outputs the blue bounding box around detected faces. Here is the sample output:
Resources [Links]:
- xilinx.github.io/kria-apps-docs/2021.1/build/html/docs/build_petalinux.html
- xilinx.github.io/kria-apps-docs/2021.1/build/html/docs/smartcamera/docs/app_deployment.html
if you get confusion over this development steps then you can contact for support at info@logictronix.com.
LogicTronix is "Design Service Partner of Xilinx Kria SoM for AI/ML", we have expertise on "accelerating ML applications and developing ML solutions based on Kria SoM or K26 SoM Family or KV260 Board, for more information please visit: https://www.xilinx.com/products/som/kria.html#ai2
![LogicTronix [FPGA Design + Machine Learning Company]](https://hackster.imgix.net/uploads/attachments/1123066/_SyVIfEqFUU.blob?auto=compress%2Cformat&w=60&h=60&fit=min&dpr=2)


Comments