

Hardware components | ||||||
| × | 1 | ||||
| × | 2 | ||||
 |
| × | 2 | |||
 |
| × | 1 | |||
 |
| × | 1 | |||
Software apps and online services | ||||||
 |
| |||||
Adafruit's rubber cord stretch sensor provides an easy way to measure stretch forces. Today, I'm going to show you how you can get output using your NodeMCU ESP 8266, but it's also useful for other prototyping tools like Arduino as well. We'll also see how we can translate that output to an JSON string so you can do something with that data.
Rubber stretch cords are actually used for EMF gasketing, but they may come in handy for your NodeMCU projects as well. Rubber stretch cords are for example useful to measure changes in circumference. You may even use it as a game controller.
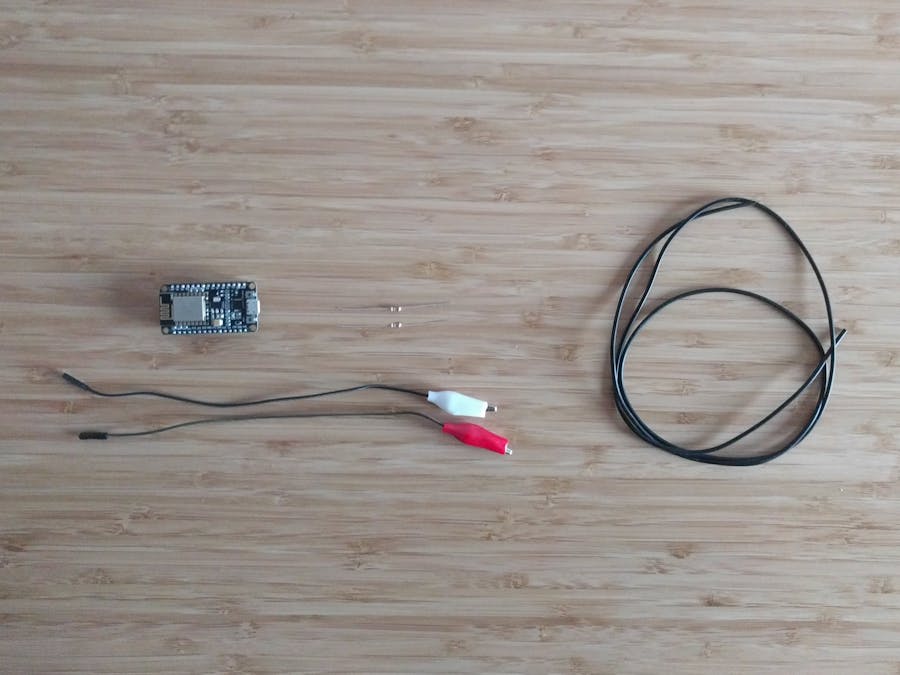
About the hardware- The rubber stretch cord: You can get the Adafruit rubber cord stretch sensor as I suggested earlier, but you can also grab one from sites such as Alibaba. I've used the Adafruit rubber cord because I've found their products to be very well-crafted. Mind that the resistance of other cords may be different. Adafruit's cord is 1 meter (39 inches) long and costs about 10 dollars.
- The alligator clips: I've used two alligator test clips with jumper wires attached. The Adafruit cord comes with two alligator clips as well. I've found it convenient to attach the clips directly to the board.
- Resistor: Don't forget to order two 10K Ohm resistors if you don't have them.
- NodeMCU ESP8266: I've used an ESP8266. This board is only 10 dollars and has Wi-Fi integrated. You can use other prototyping boards like Arduino or Raspberry Pi as well.
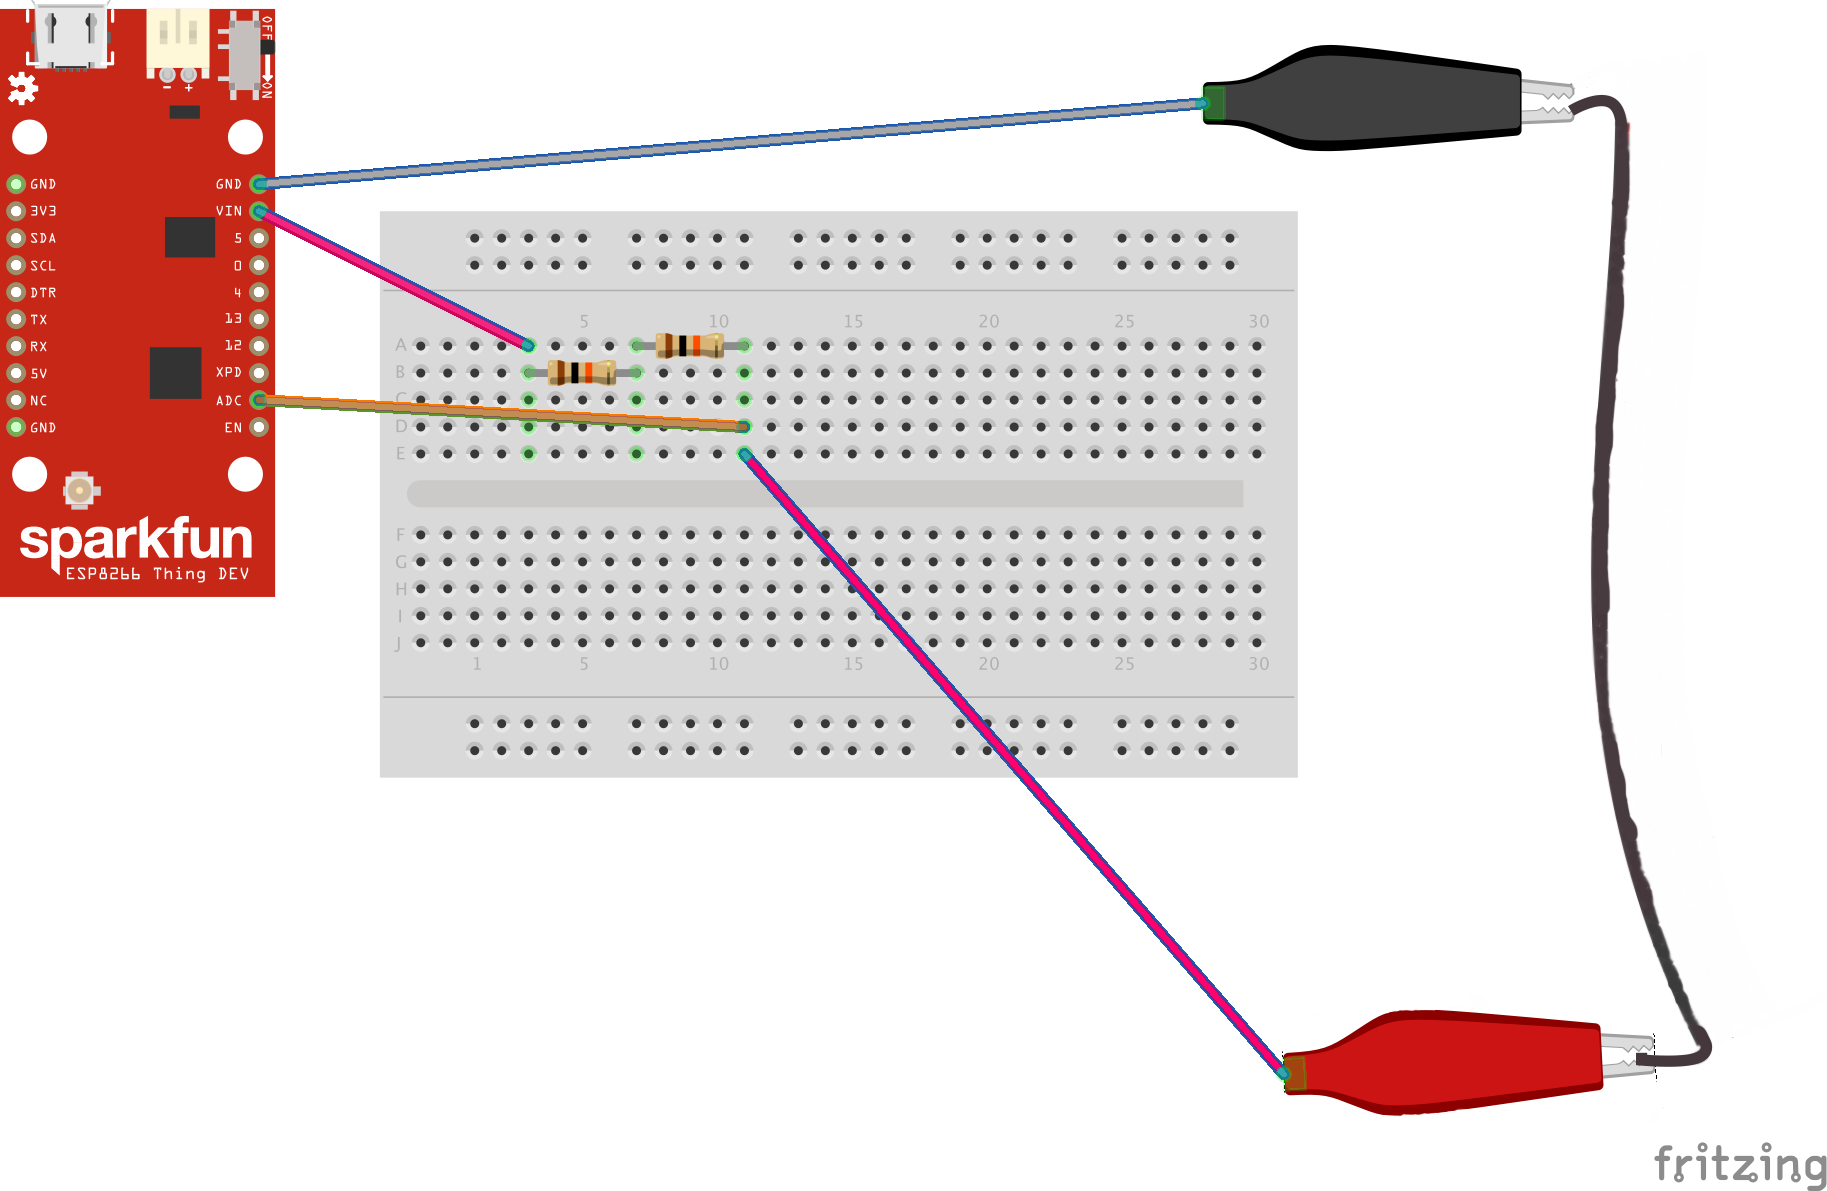
Connecting the cord to the board is really simple. Connect one side of the rubber cord to the first alligator clip. Connect this alligator clip to a ground port.
Attach the other side of the rubber cord to the resistor. Connect the jumper to the analogue port - in this case A0. Attach another wire to the Vin port (or if you're using another board the 5V port).
#define RESISTOR 10000 //This should be the same value of the used resistor
   #define RUBBERCORDPIN A0  //This is the pin where the cord is connected tp
   void setup(void) {
     Serial.begin(9600);
   }
   void loop(void) {
     int value;
     value = analogRead(RUBBERCORDPIN);     //Read value
     Serial.print("Analog reading ");
     Serial.println(value);                 //Print value
     delay(1000);
   }
Our conductive length of rubber is connected to a voltage divider circuit. The resistance or the rubber changes as it stretches or relaxes to its original state. A voltage divider circuit sounds more complicated than it is. It is a circuit which turns a large voltage into a smaller one. The divide-down ratio is determined by two resistors. That's why we are using two resistors in step 1. We'll will get a number between 0 and 1024 representing 0V to 5V.
Step 4: Calculate the voltage and resistanceOf course we want to have values that makes sense to use as humans, so lets calculate the voltage - that's the difference in charge between two points. After that, we want to know the resistance - the rubber cords’s tendency to resist the flow of charge (current). There is more resistance as you pull harder. Adafruit explains in it's website how that works:
"In a 'relaxed' state, the resistance is about 350 ohms per inch. As you pull on it, the resistance increases (the particles get further apart). As you stretch it out, the resistance increases. So lets say you have a 6" piece - thats about 2.1 Kohms. Stretch it to 10" long and now it is 10"/6"*2.1K = 3.5 Kohms. You can stretch the rubber about 50-70% longer than the resting length, so a 6" piece shouldn't be stretched more than 10"." - Adafruit
Please note that Adafruit states that the resistance may vary from batch to batch, so your output might be slightly different.
How does this translate into code?
void loop(void) {
      int value;
      int raw = 0;          // Raw input value
      int vin = 5;          // Store input voltage, this should be 5
      float vout = 0;        // Store output voltage
      float refresistor1 = 10;  // Variable to store the R1 value
      float refresistor2 = 0;  //  Value is determined by the voltage
                              //that falls across after it has been measured.
      float buffer = 0;      // Buffer variable for calculation
      value = analogRead(RUBBERCORDPIN);     //Read the value
                                             //Just like we did earlier
      vout = (5.0 / 1023.0) * value;         // Calculates the voltage
      buffer = (vin / vout) - 1;
      refresistor2 = refresistor1 / buffer;
      Serial.print("Voltage: ");
      Serial.println(vout);                  // Outputs the information
      Serial.print("Resistance: ");
      Serial.println(refresistor2);
      delay(1000);
   }
Please see for more in-depth information about calculating voltages and resistances this website.
Let's make our new data ready to send to a server. We'll use this brilliant library ArduinoJson for that.
Don't forget to include the library in the header.
#include <ArduinoJson.h>As you might know, we need objects in JSON, so we're converting our output to a JSON object here. This library provides an easy way to create nested JSON arrays and objects as well, so if you need that for your project I'd definitely recommend to look into this library further.
void loop(void) {  //place it inside our loop
      //We need to reserve memory space first.
      //It is preferred to use DynamicJsonBuffer and not StaticJsonBuffer
      //for boards like ESP8266
      DynamicJsonBuffer jsonBuffer;
      // Next we build our object tree in the reserved memory
      // You can also add strings, integer, booleans, etc:
      JsonObject& root = jsonBuffer.createObject();
      root["voltage"] = vout;
      //Generate the JSON string
      //prettyPrint gives us nice indention in the serial monitor.
      //Use printTo in production, that's smaller.
      root.prettyPrintTo(Serial);
}Well done! You've connected your rubber stretch cord stretch sensor, calculated the values and encoded the output to JSON. You can find the full code below.


Comments