


Like many developers, I once had that cool vision: using the powerful Raspberry Pi 5 as a brain, coupled with a camera, to build a robot that could see and understand the world in real time. However, when you actually start trying to build an AI vision development environment from scratch on a Pi 5, that beautiful vision is often quickly replaced by a cold, harsh reality.
You don't encounter a single technical problem; you face a towering wall built from countless fragmented challenges. From camera drivers and compiling OpenCV with its myriad dependencies, to converting and accelerating AI models for the ARM architecture, and finally integrating recognition results with a robot control system... Each step can consume days, often ending in the frustratingly low frame rates (typically below 1 FPS) that make projects feel useless. Throughout this process, almost 95% of your energy is spent just "getting the environment to run, " not on what you actually wanted to do: "bringing your ideas to life."
Today, I want to share a completely different experience. Using the Hiwonder MentorPi M1 — an all-in-one robotics platform — I compressed that weeks- or even months-long exploration process into an incredible 10 minutes. Let's break down the core struggles and the solution that bypasses them entirely.
Stuck in the Mud: The "Hidden" Cost of Native AI Vision on Pi 5First, we must acknowledge why achieving usable native AI vision on a Raspberry Pi 5 is so notoriously difficult. Its core computing power is indeed strong, but as a general-purpose single-board computer, it doesn't provide a ready-made path for the complex task of "robotic vision."
The real challenge begins with the most basic hardware selection and connection. Do you choose a CSI camera or a USB camera? Their driver compatibility, power requirements, and CPU load are worlds apart. Even if the hardware connects, setting up the software environment is where the true nightmare begins. Manually compiling OpenCV with GPU acceleration and GStreamer support can take hours and will likely get stuck on some version conflict of a dependency library.
After overcoming countless hurdles and finally getting OpenCV to read a camera feed, the next obstacle appears: the AI model. How do you convert a PyTorch or TensorFlow model trained on your PC into a format (like TFLite or ONNX) that runs efficiently on the Pi's ARM chip? Even if the conversion succeeds, how do you call the inference engine and achieve real-time processing? In the end, an unoptimized model running on the Pi often delivers a slideshow-like frame rate that's enough to extinguish any enthusiasm.
And this is just an isolated "vision demo." To make it a true robotics application, you need to package the recognition results (e.g., "a person detected ahead") into ROS2 topics or service messages and write additional nodes to subscribe to these messages and control the robot's chassis. This requires knowledge not only of computer vision but also of robotics middleware and control systems.
Even more frustrating is the lack of a stable, end-to-end testing platform. A recognition program that works perfectly on your desk, once mounted on a moving, vibrating robot car, can see its performance plummet due to changing light, motion blur, and complex backgrounds. You find yourself constantly solving isolated, local problems without ever validating your ideas on a complete, reliable system.
The Express Lane: How MentorPi M1 Delivers a "Turnkey" SolutionIt is precisely to free developers from the endless "environment engineering" described above that the MentorPi M1 was designed as a "turnkey, " full-stack robotics development platform. It doesn't offer a bare board; it provides a deeply integrated, pre-optimized, and immediately usable complete system.
Its solution is simple and powerful: provide everything pre-integrated, pre-configured, and pre-optimized.
On the hardware side, it comes pre-integrated with a high-quality 3D depth camera and a TOF LiDAR. The camera connects to the Raspberry Pi 5 via a stable CSI interface, with power and data flow optimized to avoid the common pitfalls of external USB cameras like power shortages or bandwidth bottlenecks.
On the software side, the official SD card system image is the heart of this convenience. This card comes pre-installed with Ubuntu, ROS2 Humble, and drivers for all sensors. More importantly, it includes the AI stack—like OpenCV, PyTorch, and TensorFlow Lite—optimized for the hardware, along with pre-trained weights and ready-to-run inference programs for classic vision models like YOLOv5. You don't need to worry about model conversion because these programs offer ready-to-use "model-as-a-service" interfaces.
The most critical integration is this: all these vision functions are provided as standard ROS2 nodes. This means that once the recognition program is launched, it directly publishes the results (like object class, confidence, and position in the image) to designated ROS topics. Your control program simply needs to subscribe to this topic to immediately get structured information and trigger corresponding robot actions. The path from "seeing" to "acting" is shortened to the extreme.
👉Free get MentorPi Tutorials here. Go Hiwonder GitHub for more repositories.The Ten-Minute Miracle: From Unboxing to Visual Following
Theory might sound abstract, so let's walk through a practical, reproducible ten-minute process to experience this firsthand.
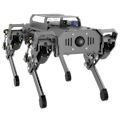
Minutes 1-3: Unboxing and Powering Up. Open the package and take out the fully assembled MentorPi M1 car. Its chassis is sturdy, and all cables are neatly managed. The only thing you need to do is insert the pre-loaded microSD card into the Raspberry Pi 5 and flip the power switch.
Minutes 4-5: Connecting and Verifying. Once the car boots, connect to its system via Wi-Fi using SSH. Run a simple launch command to open the ROS2 RVIZ2 visualization tool on your laptop. Instantly, you'll see both the environment point cloud from the LiDAR scan and the high-definition color image from the depth camera. This step confirms the entire perception system is working.
Minutes 6-8: Launching AI Vision. Via SSH, run another command to launch the pre-configured object detection node. Almost simultaneously, your terminal will start scrolling with real-time recognition results, e.g., person: 0.87, desk: 0.92. This shows the deep learning model is running smoothly and already "understanding" the scene in front of the camera.
Minutes 9-10: Closing the Behavior Loop. Finally, run an example script called vision_follower.launch.py. This script does one simple yet magical thing: it subscribes to the topic published by the object detection node, and when it detects the "person" class, it sends motion commands to the car's chassis control node. You'll immediately see the car start to follow you slowly and steadily. In just ten minutes, a complete "perception-decision-control" loop is up and running.
From Quick Start to Unlimited CreativityThis ten-minute demo is far more than a gimmick. It proves the existence of an efficient path: you can bypass all the low-level trivia and start creating directly on top of a working system.
The value of the MentorPi M1 is that it rebuilds the positive feedback loop for learning and development. Based on this perfectly functional baseline, your creativity can be ignited immediately:
- You can fine-tune the YOLO model with your own dataset to make the car recognize specific items, like your lost keys or different soda cans.
- You can easily modify the behavioral logic, turning "visual following" into "object search": having the car patrol a room until it finds a target object and alerts you.
- You can even fuse multimodal interaction, combining it with the built-in ChatGPT voice module to achieve complex interactions like "commanding the car with your voice to complete a visual task."
For developers, educators, and makers eager to enter the field of robotic vision and AI, the MentorPi M1 doesn't offer a rough "uncut gem" you need to polish. Instead, it provides a "steering wheel" with the engine already running, waiting for you to enter your destination. It lets you become a "commander" focused on algorithm logic and behavioral design from the very first minute, not a "troubleshooter" trapped in the quagmire of environment configuration. This might just be the ideal way to start any robotics project.


Comments