

Hardware components | ||||||
| × | 1 | ||||
| × | 3 | ||||
| × | 1 | ||||
 |
| × | 1 | |||
 |
| × | 3 | |||
 |
| × | 1 | |||
Software apps and online services | ||||||
 |
| |||||
| ||||||
Hand tools and fabrication machines | ||||||
 |
| |||||
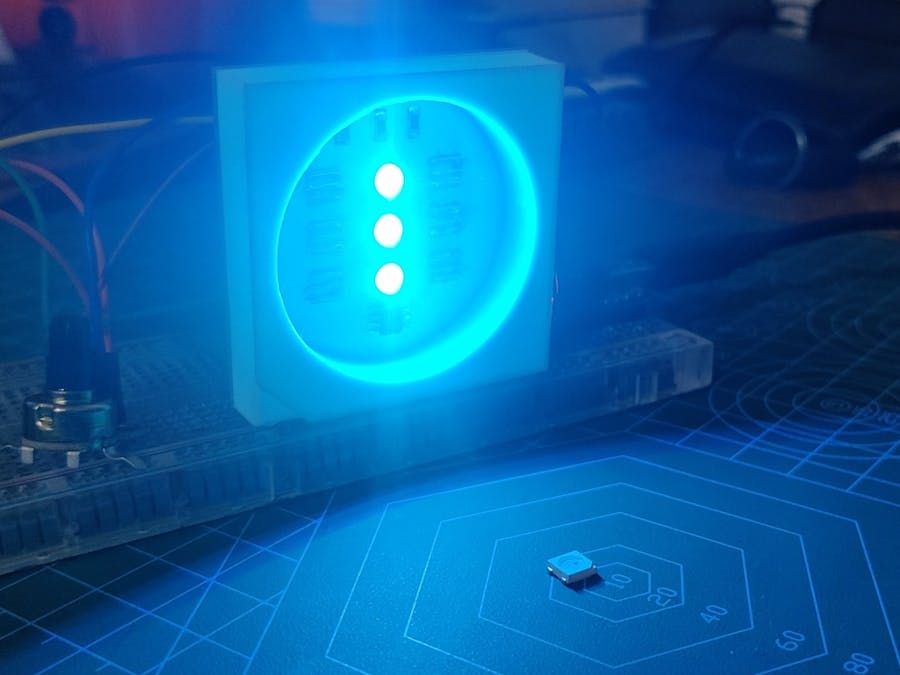
Hey what's up you guys, So here's something super cool.
A Huge WS2812 Addressable LED that is 10 times bigger than an average WS2812B LED.
This Huge LED Pixel is made by combining a few 5050 RGB LEDs with the WS2811 Addressable LED IC on a custom PCB with a 3D printed Enclosure.
A small chip of WS2811 is also present inside the WS2812 that is connected to R, G, and B.
My goal here was to make a magnified version of WS2812 LED that I will use in a future matrix Project.
This article is gonna be about the whole built process of this Huge Pixel so let's get started!
Material RequiredFollowing are the materials I used in this built-
- 5050 RGB LEDs
- Custom PCB which was provided by PCBWAY
- 100nF 1206 Capacitor
- 24R Resistor
- 3D Printed Enclosure
- WS2811 Addressable LED Driver IC
- Solder paste
- Arduino Nano for controlling the Pixel
- Pots
The most commonly used WS2812 LED dimension is around 5mm x 5mm.
I wanted to make a Pixel that is 10 times bigger which means my version should be around 50mm x 50mm in size.
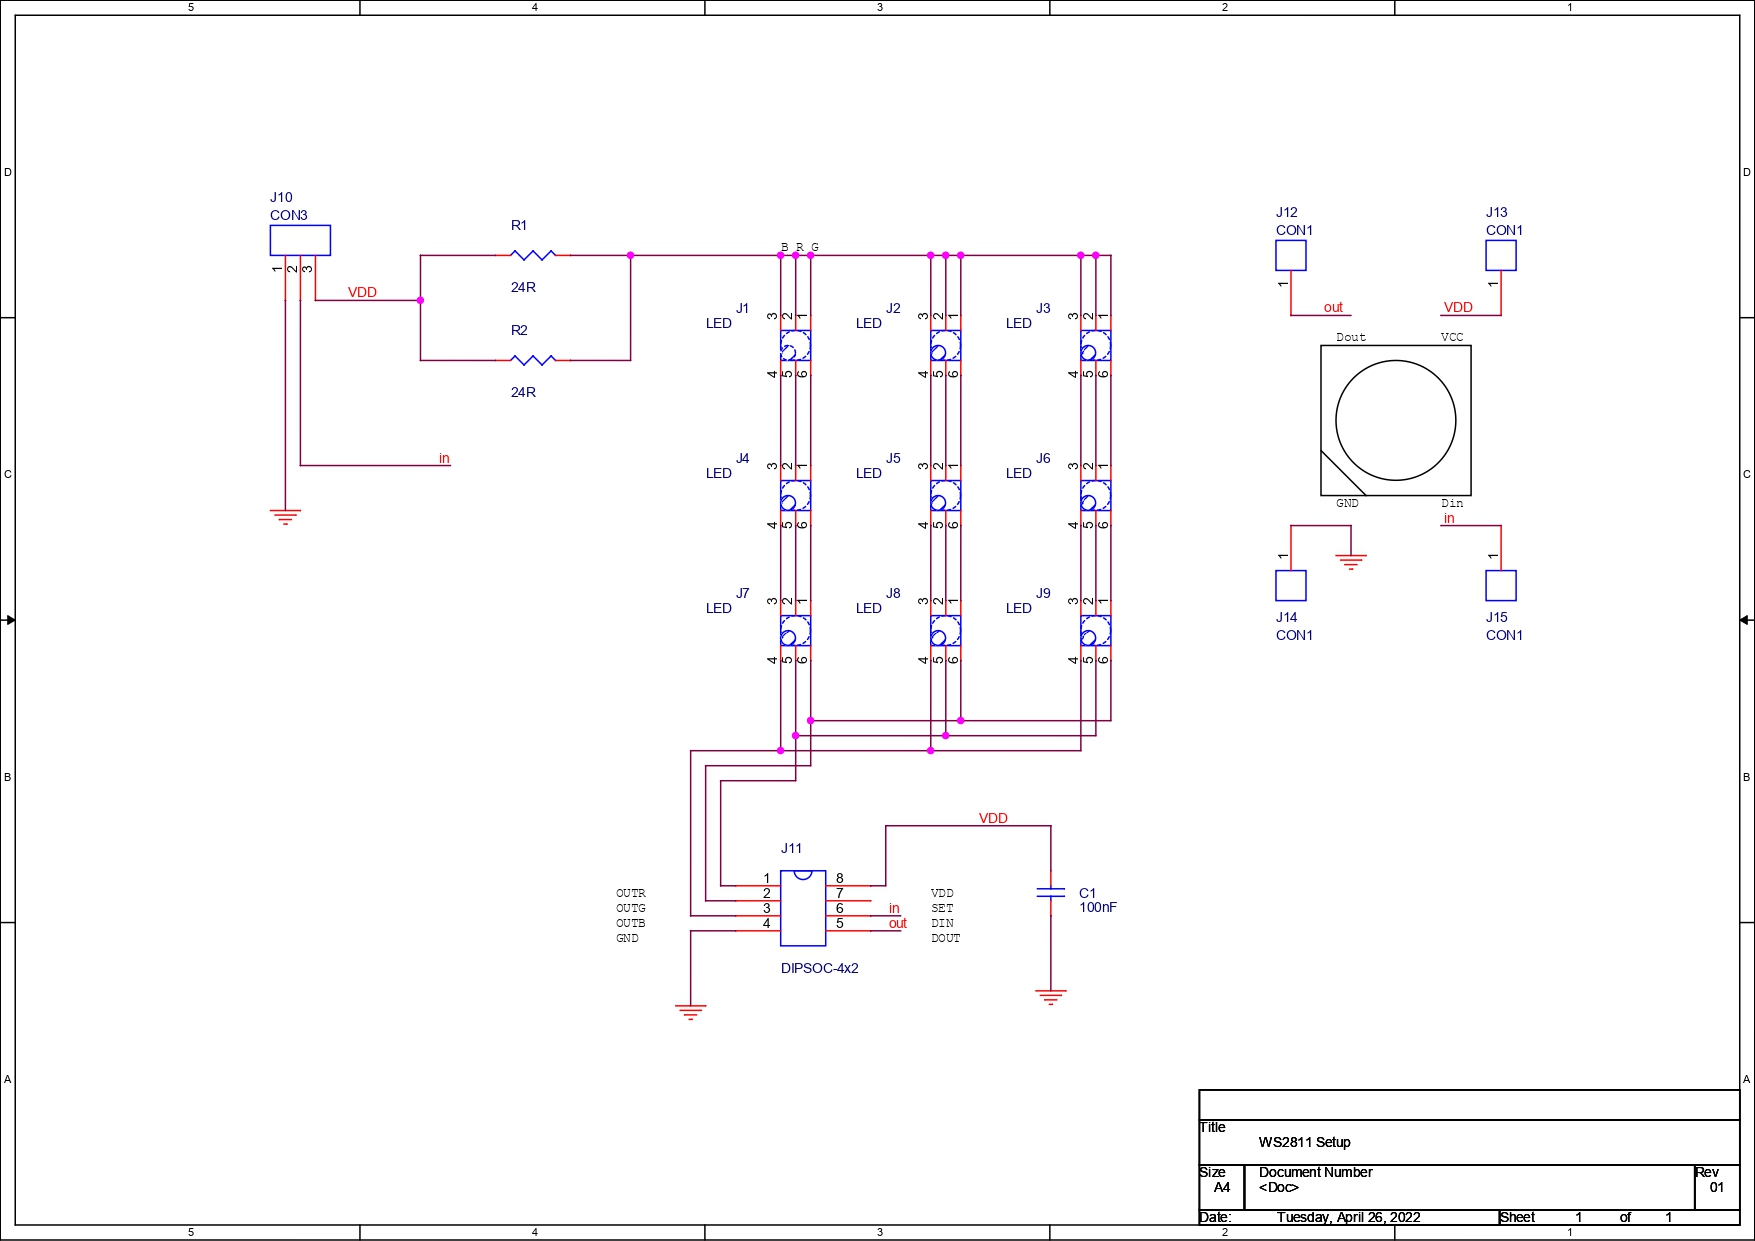
To Get started, I first search for WS2811 IC's Datasheet and used one of its given example layouts to prepare a simple schematic that has 3 LEDs in series and 3 in parallel.
After finalizing this schematic, I converted it into a Board file and prepared a simple square PCB with a dimension of 50mm.
I placed LEDs and all componenets in a circle of dia 40mm.
The reason for doing this was, I plan to add an enclosure on this PCB which will cover the whole board except for the circular part.
I connected all the componenets with a 1mm width track and then exported the Gerber data before checking it one last time.
PCBWAYAfter finalizing the PCB, I sent it to PCBWAY for samples.
I choose white Soldermask for this project as WS2812B is white in color and white soldermask looks great in general.
I received the PCBs in a week which was super fast.
As for the overall quality, it was truly awesome. I ordered 20 boards and each board was perfect.
Been using their service for a while now and I have to say, PCBs that I got was great as expected!
Check out PCBWAY for getting great PCB service for an economic price and high quality!
PCB ASSY PROCESSThese are the steps for the main assembly of this Board.
- Solder paste Dispensing Process
- Pick & Place Process
- Hotplate Reflow
- Adding Connector
The first step is to add solder paste to each component pad one by one.
To Apply solder paste, I'm using a Solderpaste Dispensing Needle with a Wide syringe, and the solder paste I'm using is a regular solder paste consisting of 63% Tin and 37% Lead.
PICK & PLACE PROCESSAfter carefully applying Solderpaste we move on to the next step which is to add componenets to their assigned location.
This one is simple, we lift each component and place them in their assigned location with the right polarity, this is crucial in the case of IC and LEDs.
HOTPLATE REFLOWAfter the "Pick & Place Process", I carefully lifted the whole circuit board and place it on my DIY SMT Hotplate.
I made this Hotplate especially for making projects like these which require SMD soldering. hotplate available in the market were not exactly cheap so I made a minimal version of that which you can check out from here- https://www.hackster.io/Arnov_Sharma_makes/diy-smt-hotplate-project-8157a5
the hotplate heats the PCB from below up to the solder paste melting temp, as soon as the PCB reaches that temp, solder paste melts and all the components get soldered to their pads.
ADDING CONNECTORAt last, I added a CON3 male header pin at the backside of this board so I could use it to connect this Pixel on a breadboard.
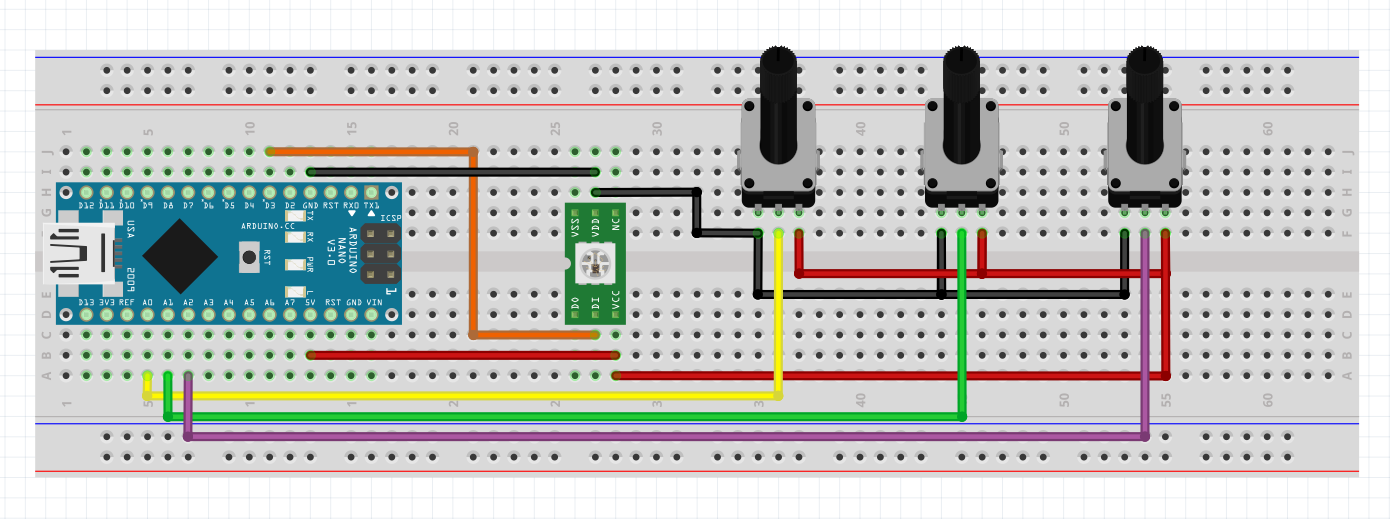
WIRING DIAGRAMAfter adding the connector, I added this Pixel with an Arduino Nano by following the above wiring diagram.
I powered this setup with a 12V Supply but ran into some problems afterward.
Problem 101Apparently, I didnt see the WS2811 IC Datasheet properly and it stated in it that it can only drive LEDs up to 20mA which totally exceeds my setup which was over the 20mA threshold.
Because of this issue, the IC caught fire and burn out as soon as I supplied it with 12V input.
To rectify this issue, I removed the LEDs that were in series so I could power this setup from 5V instead of 12V.
I added jumper wires to connect tracks for each led that has been removed to complete the circuit and then tested this board again with the same wiring diagram and this time it did work.
Test SketchHere's the sketch that I used.
#include <Adafruit_NeoPixel.h>
#ifdef __AVR__
  #include <avr/power.h>
#endif
#define PIN 6
Adafruit_NeoPixel strip = Adafruit_NeoPixel(60, PIN, NEO_GRB + NEO_KHZ800);
void setup() {
  #if defined (__AVR_ATtiny85__)
    if (F_CPU == 16000000) clock_prescale_set(clock_div_1);
  #endif
  strip.begin();
  strip.show(); // Initialize all pixels to 'off'
}

void loop() {

  colorWipe(strip.Color(255, 0, 0), 50); // Red
  colorWipe(strip.Color(0, 255, 0), 50); // Green
  colorWipe(strip.Color(0, 0, 255), 50); // Blue
  theaterChase(strip.Color(127, 127, 127), 50); // White
  theaterChase(strip.Color(127, 0, 0), 50); // Red
  theaterChase(strip.Color(0, 0, 127), 50); // Blue

  rainbow(20);
  rainbowCycle(20);
  theaterChaseRainbow(50);
}

// Fill the dots one after the other with a color
void colorWipe(uint32_t c, uint8_t wait) {
  for(uint16_t i=0; i<strip.numPixels(); i++) {
    strip.setPixelColor(i, c);
    strip.show();
    delay(wait);
  }
}

void rainbow(uint8_t wait) {
  uint16_t i, j;

  for(j=0; j<256; j++) {
    for(i=0; i<strip.numPixels(); i++) {
      strip.setPixelColor(i, Wheel((i+j) & 255));
    }
    strip.show();
    delay(wait);
  }
}

// Slightly different, this makes the rainbow equally distributed throughout
void rainbowCycle(uint8_t wait) {
  uint16_t i, j;

  for(j=0; j<256*5; j++) { // 5 cycles of all colors on wheel
    for(i=0; i< strip.numPixels(); i++) {
      strip.setPixelColor(i, Wheel(((i * 256 / strip.numPixels()) + j) & 255));
    }
    strip.show();
    delay(wait);
  }
}

//Theatre-style crawling lights.
void theaterChase(uint32_t c, uint8_t wait) {
  for (int j=0; j<10; j++) {  //do 10 cycles of chasing
    for (int q=0; q < 3; q++) {
      for (uint16_t i=0; i < strip.numPixels(); i=i+3) {
        strip.setPixelColor(i+q, c);    //turn every third pixel on
      }
      strip.show();

      delay(wait);

      for (uint16_t i=0; i < strip.numPixels(); i=i+3) {
        strip.setPixelColor(i+q, 0);        //turn every third pixel off
      }
    }
  }
}

//Theatre-style crawling lights with rainbow effect
void theaterChaseRainbow(uint8_t wait) {
  for (int j=0; j < 256; j++) {     // cycle all 256 colors in the wheel
    for (int q=0; q < 3; q++) {
      for (uint16_t i=0; i < strip.numPixels(); i=i+3) {
        strip.setPixelColor(i+q, Wheel( (i+j) % 255));    //turn every third pixel on
      }
      strip.show();

      delay(wait);

      for (uint16_t i=0; i < strip.numPixels(); i=i+3) {
        strip.setPixelColor(i+q, 0);        //turn every third pixel off
      }
    }
  }
}

// Input a value 0 to 255 to get a color value.
// The colours are a transition r - g - b - back to r.
uint32_t Wheel(byte WheelPos) {
  WheelPos = 255 - WheelPos;
  if(WheelPos < 85) {
    return strip.Color(255 - WheelPos * 3, 0, WheelPos * 3);
  }
  if(WheelPos < 170) {
    WheelPos -= 85;
    return strip.Color(0, WheelPos * 3, 255 - WheelPos * 3);
  }
  WheelPos -= 170;
  return strip.Color(WheelPos * 3, 255 - WheelPos * 3, 0);
}After making sure that the pixel is working, I then move on to the next step which was to prepare and print an enclosure for this board.
3D EnclosureAs for the Main Body of this Project, I prepared a body based on the existing WS2812 Design which is a Square shape body with a circle in the middle and a notch at the ground pin side.
I prepared the model in fusion360 and exported its mesh file so I could print it on my ender 3 with a 0.3mm Nozzle at 0.2mm layer height.
I then 3D printed the body and added it to the main PCB with super glue.
Controlling color of LED with three pots
#include <Adafruit_NeoPixel.h>
#define NEOPIXELS 1
#define LEDsPin 3
const int redPotPin = A0;
const int greenPotPin = A1;
const int bluePotPin = A2;
int redValue = 0;
int greenValue = 0;
int blueValue = 0;
int redPotValue = 0;
int greenPotValue = 0;
int bluePotValue = 0;

Adafruit_NeoPixel pixels = Adafruit_NeoPixel(NEOPIXELS, LEDsPin, NEO_GRB + NEO_KHZ800);
void setup() {
  pinMode(LEDsPin, OUTPUT);
  pinMode(redPotPin, INPUT);
  pinMode(greenPotPin, INPUT);
  pinMode(bluePotPin, INPUT);
}
void loop() {
  redPotValue = analogRead(redPotPin);
  delay(5);
  greenPotValue = analogRead(greenPotPin);
  delay(5);
  bluePotValue = analogRead(bluePotPin);
  redValue = map(redPotValue, 0, 1023, 0, 255);
  greenValue = map(greenPotValue, 0, 1023, 0, 255);
  blueValue = map(bluePotValue, 0, 1023, 0, 255);;

   for (int i = 0; i < NEOPIXELS; i++) {

    pixels.setPixelColor(i, pixels.Color(redValue, greenValue, blueValue));
    pixels.show();
    delay(50);
  }
}I connected Three Pots with the Arduino Nano by wiring their VCC and GND to the 5V and GND of Arduino. I then connected the Middle Pins of each pot to A0, A1, and A2.
LED is connected with D3.
As for the size comparison between this Huge Pixel and the existing small one, the Huge one is 50mm x 50mm and the small one is 5mm x 5mm. Both of these pixels look and work identically except for the LED intensity which is in my case more because I've used more than one RGB LED in my design.
Changes and further improvementsThis version isn't the final one as I messed up in setting up the basic schematic which leads to the edit I did earlier which was to remove 6 LEDs and keep only three that are in parallel.
Here's the changed Schematic that is correct and by using it I will make a new board that will have more leds.
This is it for today folks, leave a comment if you need any help in this project.
Special thanks to PCBWAY for supporting this project, you can check them out if you need great PCB service for less cost.
Thanks for reading this article and I will be back with its V2 soon!
Peace.


_t9PF3orMPd.png?auto=compress%2Cformat&w=40&h=40&fit=fillmax&bg=fff&dpr=2)


_3u05Tpwasz.png?auto=compress%2Cformat&w=40&h=40&fit=fillmax&bg=fff&dpr=2)
Comments