

Hardware components | ||||||
 |
| × | 1 | |||
 |
| × | 1 | |||
 |
| × | 1 | |||
 |
| × | 1 | |||
 |
| × | 1 | |||
Software apps and online services | ||||||
 |
| |||||
| ||||||
Hand tools and fabrication machines | ||||||
 |
| |||||
 |
| |||||
I would love to thanks Richard90 and poblocki1982 whose contact I listed below for sharing the amazing CAD files and design
This project was done for several reasons. First, it helps students learn about the solar system through a hands-on model. Second, it’s a great way to practice using Arduino and stepper motors. Finally, it encourages interest in STEM by making learning fun and creative.
It also has many benefits. Students understand better when they can see and touch the model. It can inspire new ideas and help build useful skills in coding, electronics, and building things.
Overall, it was a fun and valuable experience. We learned how to control a stepper motor with Arduino and solved small problems along the way. Seeing the planets move was exciting and made me more confident in programming and electronics.
Theory of OperationWe researched the sizes, orbital periods, and self-rotation times of various exoplanets, and designed a base structure to accommodate all components, including the planets supporting pillars. After finalizing the design, we used a 3D printer to fabricate the planetary models.
First, the Arduino Nano was integrated with a ULN2003 buffer circuit and connected to a stepper motor to control the rotational speed of the exoplanets proportionally. We utilized gears with varying numbers of teeth to simulate the different orbital periods of each planet. For example, Earth and Venus were connected to gears with 24 and 18 teeth, respectively, allowing them to rotate at scaled speeds that closely match their real orbital cycles.
Second, we selected stepper motors due to their affordability, reliable performance, accessibility, and suitable rotation speed for this simulation.
Hardware AssemblyFirst, 3D print all the CAD files found in the GitHub link under the CAD section. Once everything is printed, you can begin assembling the parts.
Start by attaching the motor to the driver gear using hot glue. Then, glue the sun holder to the base, and also glue the sun globe to the sun holder.
Insert the axis into its placeholder, and begin stacking the planet drive gears on top of each other. Next, connect the drive arm to the drive gear. Be careful during this step—once the arm and gear are connected, they are very difficult to separate if there's a mistake.
Make sure the gear connecting the drive gear and the planet drive gears is properly aligned. If it doesn’t fit well, you may need to trim the planet drive gear slightly. You can do this by carefully cutting off any excess with a cutter.
The planets are made from clay, so feel free to shape and design your own. Get creative and make them as beautiful as you like.
Finally, connect the components as shown in the schematic below.
Programming the FirmwareThe firmware is written in C++, and the stepper motor is manually coded without using any libraries. This is because using libraries significantly reduces the motor’s torque—almost cutting it in half—which may prevent it from turning the gear properly. The code is developed and flashed using PlatformIO in Visual Studio Code. You can refer to our code in the code section below.
Demonstration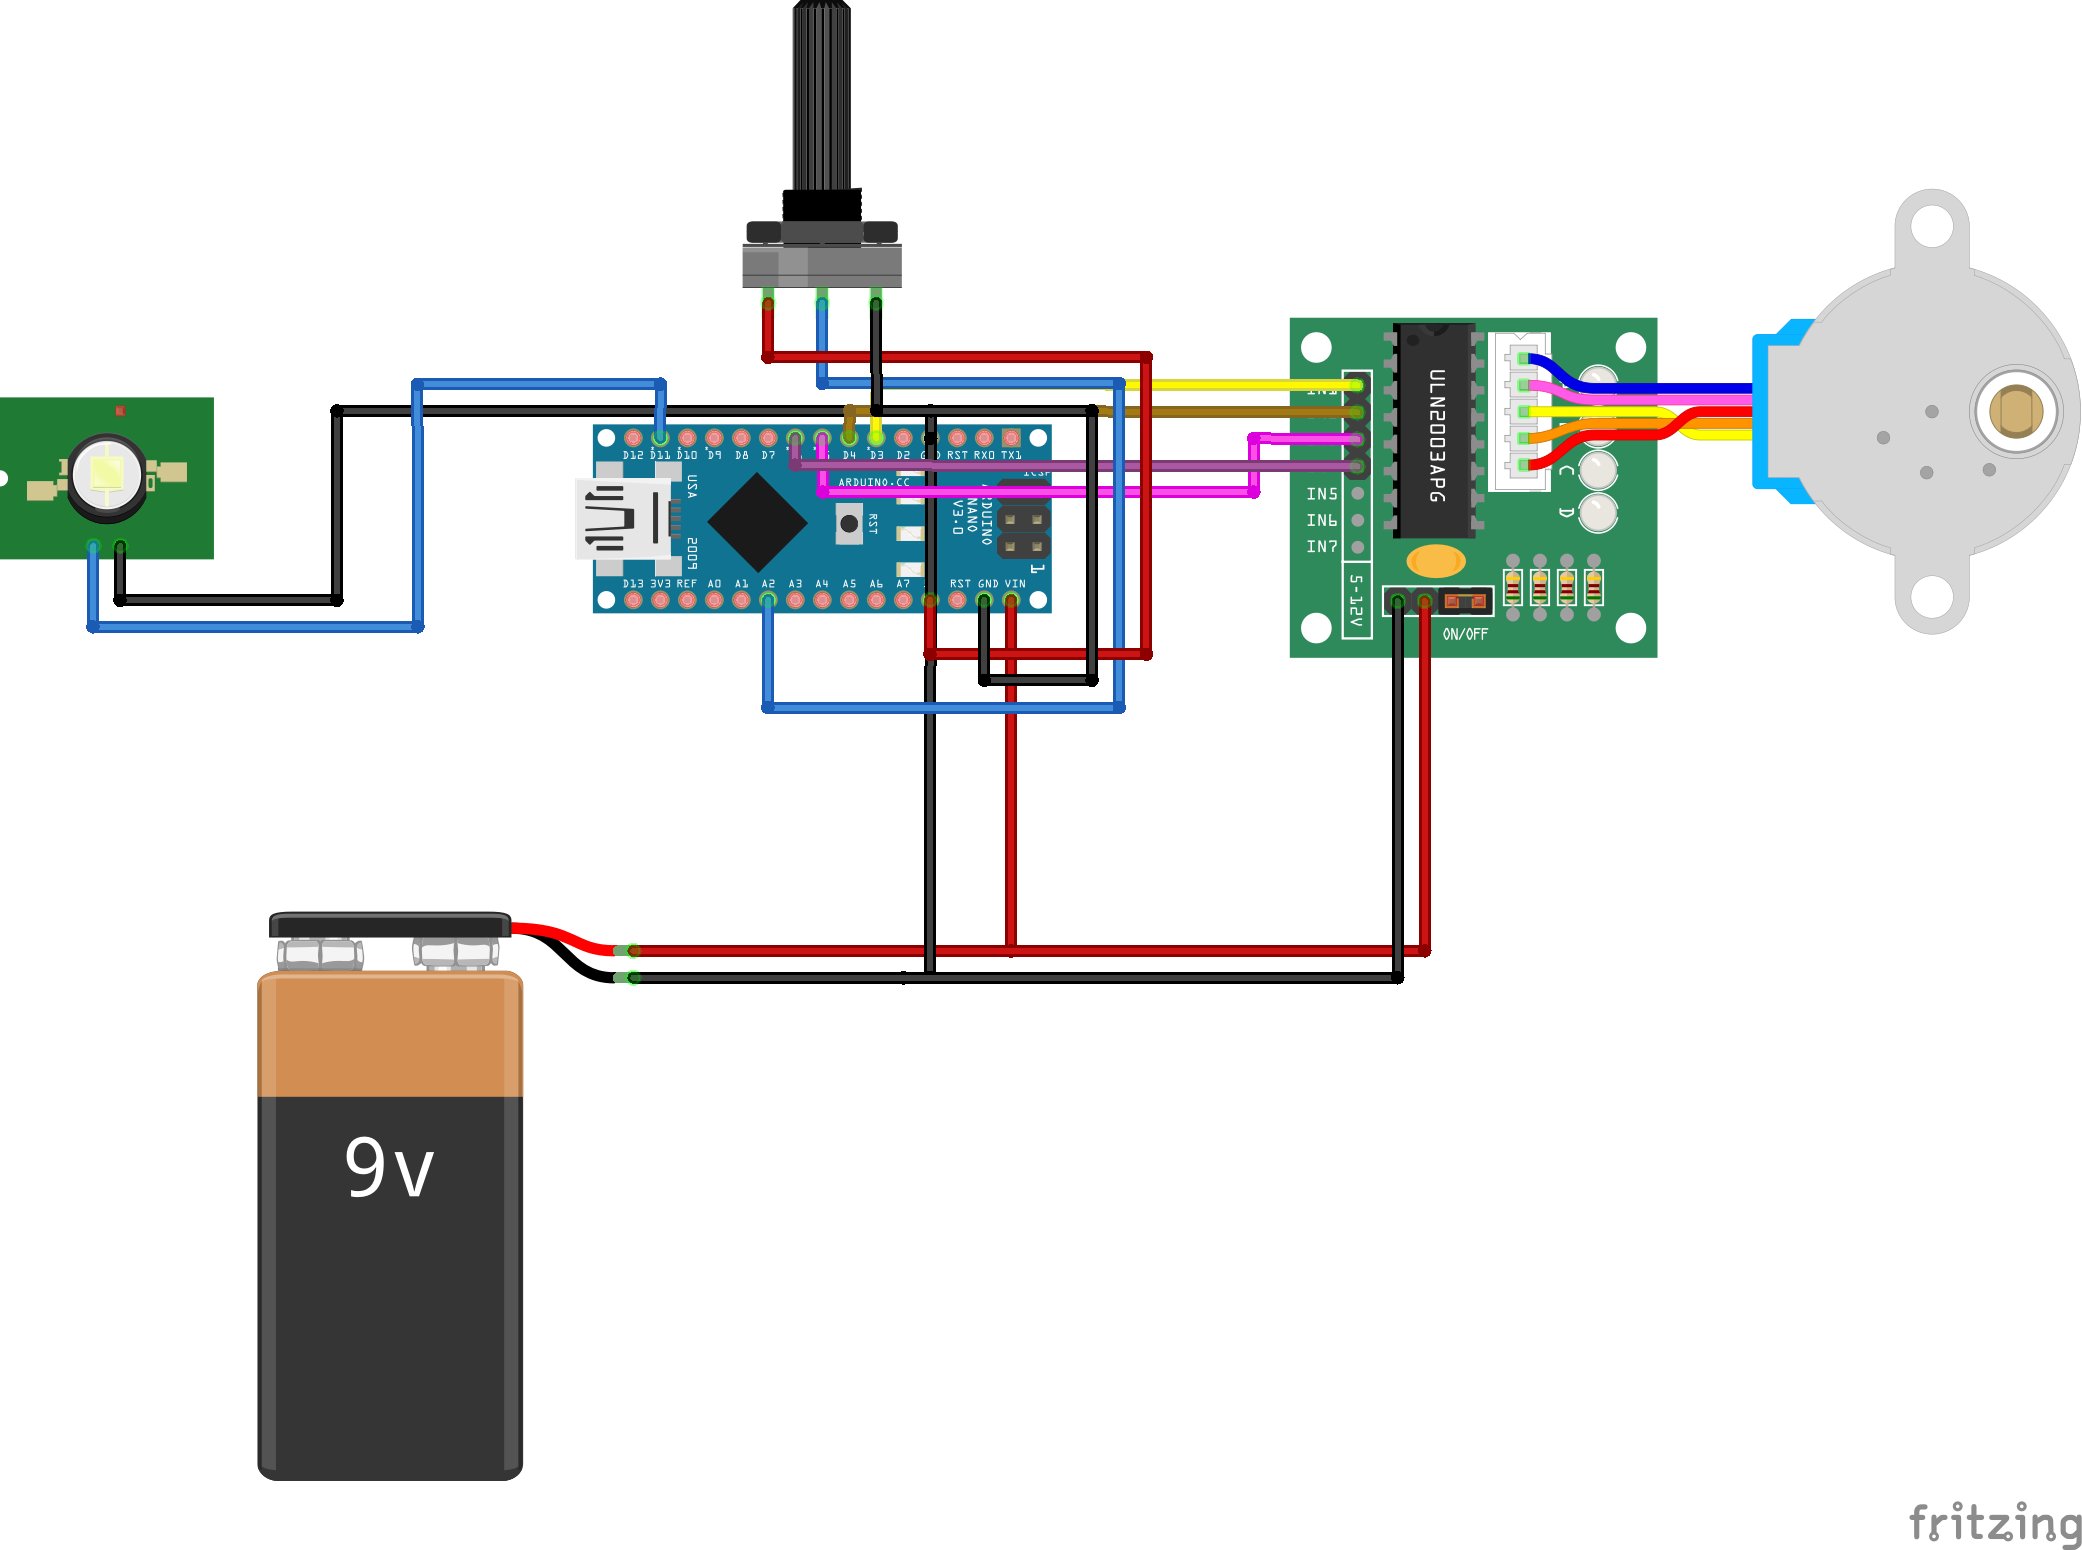


Comments