

Hardware components | ||||||
 |
| × | 1 | |||
| × | 1 | ||||
| × | 1 | ||||
Software apps and online services | ||||||
| ||||||
Buy electronic components with free shipping on utsource.net
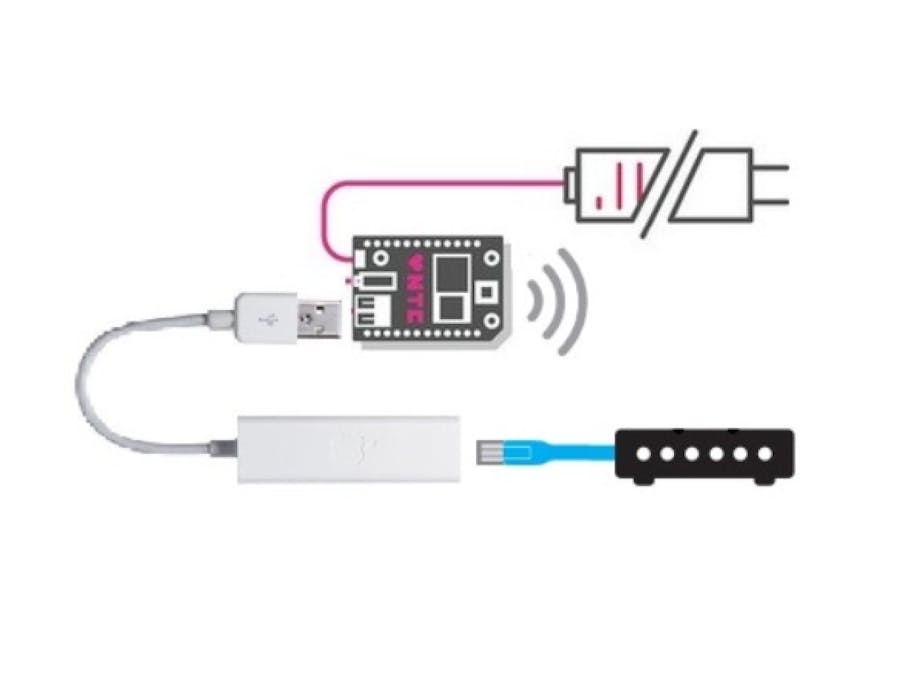
Getting started1) Make sure that CHIP is up-to-date with all newest packages:
sudo apt-get update
sudo apt-get upgrade
2) Then Install dnsmasq:
sudo apt-get install dnsmasq3) Verify that the CHIP recognizes the USB-Ethernet adapter.
lsusb4) Create a configuration file. With this eth0 becomes a way to connect to a network, and wlan1 becomes CHIPs access point.
sudo nano /etc/dnsmasq.d/access_point.confAdd some lines in order to transfer Ethernet to wlan1:
#If you want dnsmasq to listen for DHCP and DNS requests only on
#specified interfaces (and the loopback) give the name of the
#interface (eg eth0) here.
#Repeat the line for more than one interface.
interface=wlan1
#Or you can specify which interface not to listen on
except-interface=eth0
We also want to set the range and time of leases:
#Uncomment this to enable the integrated DHCP server, you need
#to supply the range of addresses available for lease and optionally
#a lease time. If you have more than one network, you will need to
#repeat this for each network on which you want to supply DHCP
#service.
dhcp-range=172.20.0.100,172.20.0.250,1h
5) Set up a static IP for the AP (accesspoint):
sudo nano /etc
etwork/interfaces
Add some lines:
# interfaces(5) file used by ifup(8) and ifdown(8)
# Include files from /etc
etwork/interfaces.d:
source-directory /etc
etwork/interfaces.d
auto wlan1
iface wlan1 inet static
	address 172.20.0.1
	netmask 255.255.255.0
6) Restart the wlan1 interface:
sudo ifdown wlan1
sudo ifup wlan1
ip addr show wlan1
As a result you'll see the address listed:
inet 172.20.0.17) Restart the DHCP server:
sudo /etc/init.d/dnsmasq restart8) Configure the WiFi access point on wlan1. We have to create a config file:
sudo nano /etc/hostapd.confAdd some lines:
interface=wlan1
driver=nl80211
ssid=hacksterwifi
channel=1
ctrl_interface=/var/run/hostapdAdd some lines:
interface=wlan1
driver=nl80211
ssid=hacksterwifi
channel=1
auth_algs=3
max_num_sta=10
wpa=2
wpa_passphrase=123456789
wpa_pairwise=TKIP CCMP
rsn_pairwise=CCMP
ctrl_interface=/var/run/hostapd
9) Now start the access point:
sudo hostapd /etc/hostapd.confHere, AP is been created you will see an open WiFi in your pc/mobiles.
10) Configure it to create AP on boot.
sudo nano /lib/systemd/system/hostapd-systemd.serviceAdd some lines:
[Unit]
Description=hostapd service
Wants=network-manager.service
After=network-manager.service
Wants=module-init-tools.service
After=module-init-tools.service
ConditionPathExists=/etc/hostapd.conf
null
[Service]
ExecStart=/usr/sbin/hostapd /etc/hostapd.conf
null
[Install]
WantedBy=multi-user.target
11) Disable the existing systemV script for booting hostapd:
sudo update-rc.d hostapd disable12) Setup the systemd service:
sudo systemctl daemon-reload
sudo systemctl enable hostapd-systemd
13) Reboot or test:
sudo systemctl start hostapd-systemd
systemctl status hostapd-systemd


Comments