

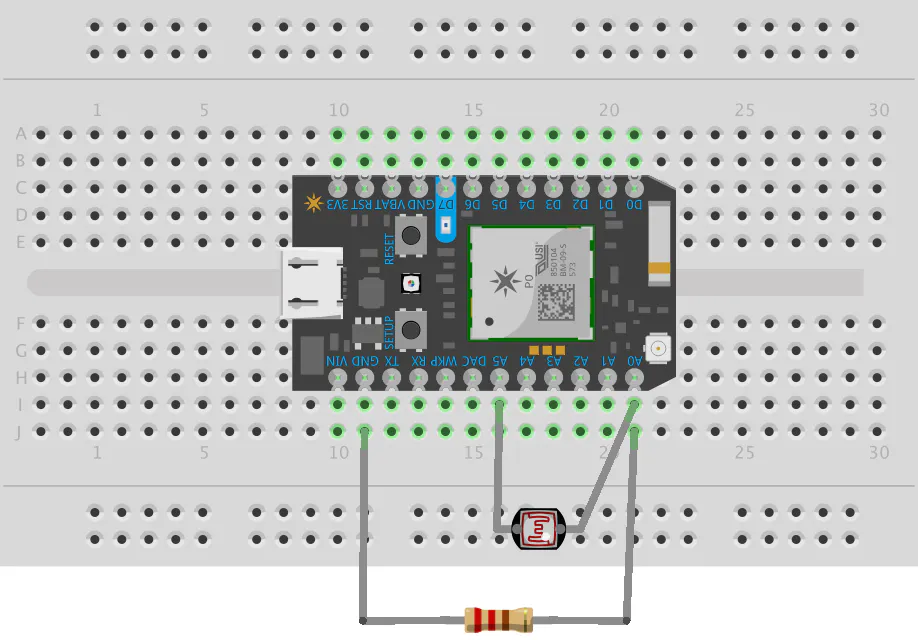
Hardware components | ||||||
 |
| × | 1 | |||
 |
| × | 1 | |||
 |
| × | 1 | |||
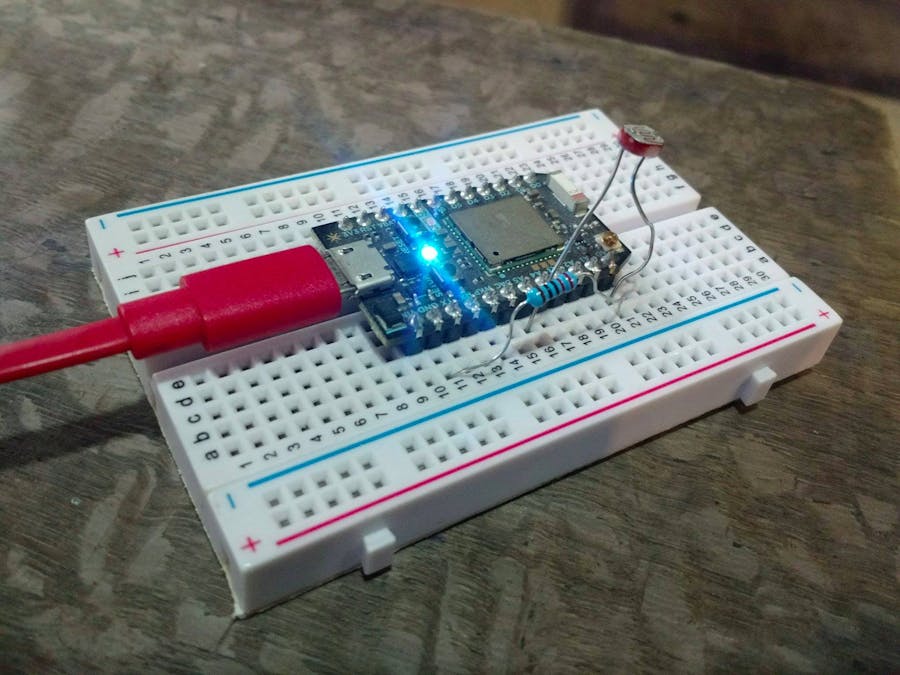
Receive emails, create social media triggers, or get phone notifications whenever the light intensity on your device exceeds the safety limit.
After my friend ruined his phone, because he kept it directly under the sun, I had to make a light detector for him.
The project is so easy that you literally don't have to do anything. Simply copy the code in the attachment and paste it here, and set up an IFTTT account.
- Create an account and press Create A Recipe
- After pressing, select particle
- Choose "New event published" as the trigger
- Insert event name as "Light_limit" and event contents as "Exceeded" as defined in the code, and select your device in the device name.
- Then click create trigger and select the trigger you want to use, we will choose email, but you can just as well use other mediums according to needs, such as Facebook, Twitter etc. for social media posts.
- You can see various options for call-on actions according to what you selected in the previous step.
- Select what information you want in the mail that you will receive, all should work just as well.
- And finally name your project, then press "create recipe" and you are done.
As soon as the light intensity exceeds the safe limit, the particle LED glows for 5 seconds and the trigger is activated. The user then receives an email informing him about the event! The monitor records behaviour every 15 seconds, so that the user doesn't receive multiple emails in a short duration.
Now tinker around; try using a flashlight over your photoresistor and finding the safe limit that could cause harm in your case.


Comments