

Hardware components | ||||||
 |
| × | 1 | |||
 |
| × | 1 | |||
 |
| × | 1 | |||
Software apps and online services | ||||||
 |
| |||||
Hand tools and fabrication machines | ||||||
| ||||||
Tired of fumbling for switches? Transform your workspace with an intuitive gesture-controlled LED strip, powered by Seeed Studio XIAO.
Every maker's desk is their command center, a place of creation, challenge, and countless hours. Mine is no different. But let's be honest, fumbling for a remote or an app just to change the desk light color can break your flow. I wanted something more intuitive, more integrated into my "workflow."
That's when inspiration struck: What if my desk light could understand my hands? What if I could simply show it what color I needed, or tell it to turn off with a simple gesture? This led me to combine the powerful yet tiny Seeed Studio XIAO with the versatile Grove Smart IR Gesture Sensor and the convenient LED Driver Board for XIAO. The goal? A minimalist, yet magical, gesture-controlled desk mood light.
Hardware List- Seeed Grove Smart IR Gesture Sensor (PAJ7660)
- SeeedStudioXIAO ESP32-C3(Tips: If it's your first time using it, I recommend purchasing the pre-soldered version.)
- LED Driver Board for XIAO
- WS2812B12V RGB LED strip (e.g. 300 LEDs)
- Grove Cable + USB Type-C Cable+External Power Supply for LED Driver Board
- Arduino IDE – The main development environment used to write, compile, and upload code.
- Seeed Studio XIAO Board Support Package – Allows the Arduino IDE to recognize and program the XIAO board.
- Seeed_Arduino_PAJ7620 Library – Provides an easy way to read gesture data from the Smart IR Gesture Sensor.
- Adafruit_NeoPixel Library – Used to control addressable LED strips with rich lighting effects.
This project is surprisingly easy to assemble, thanks to the modular design of Seeed Studio's Grove ecosystem and the dedicated XIAO LED Driver Board.
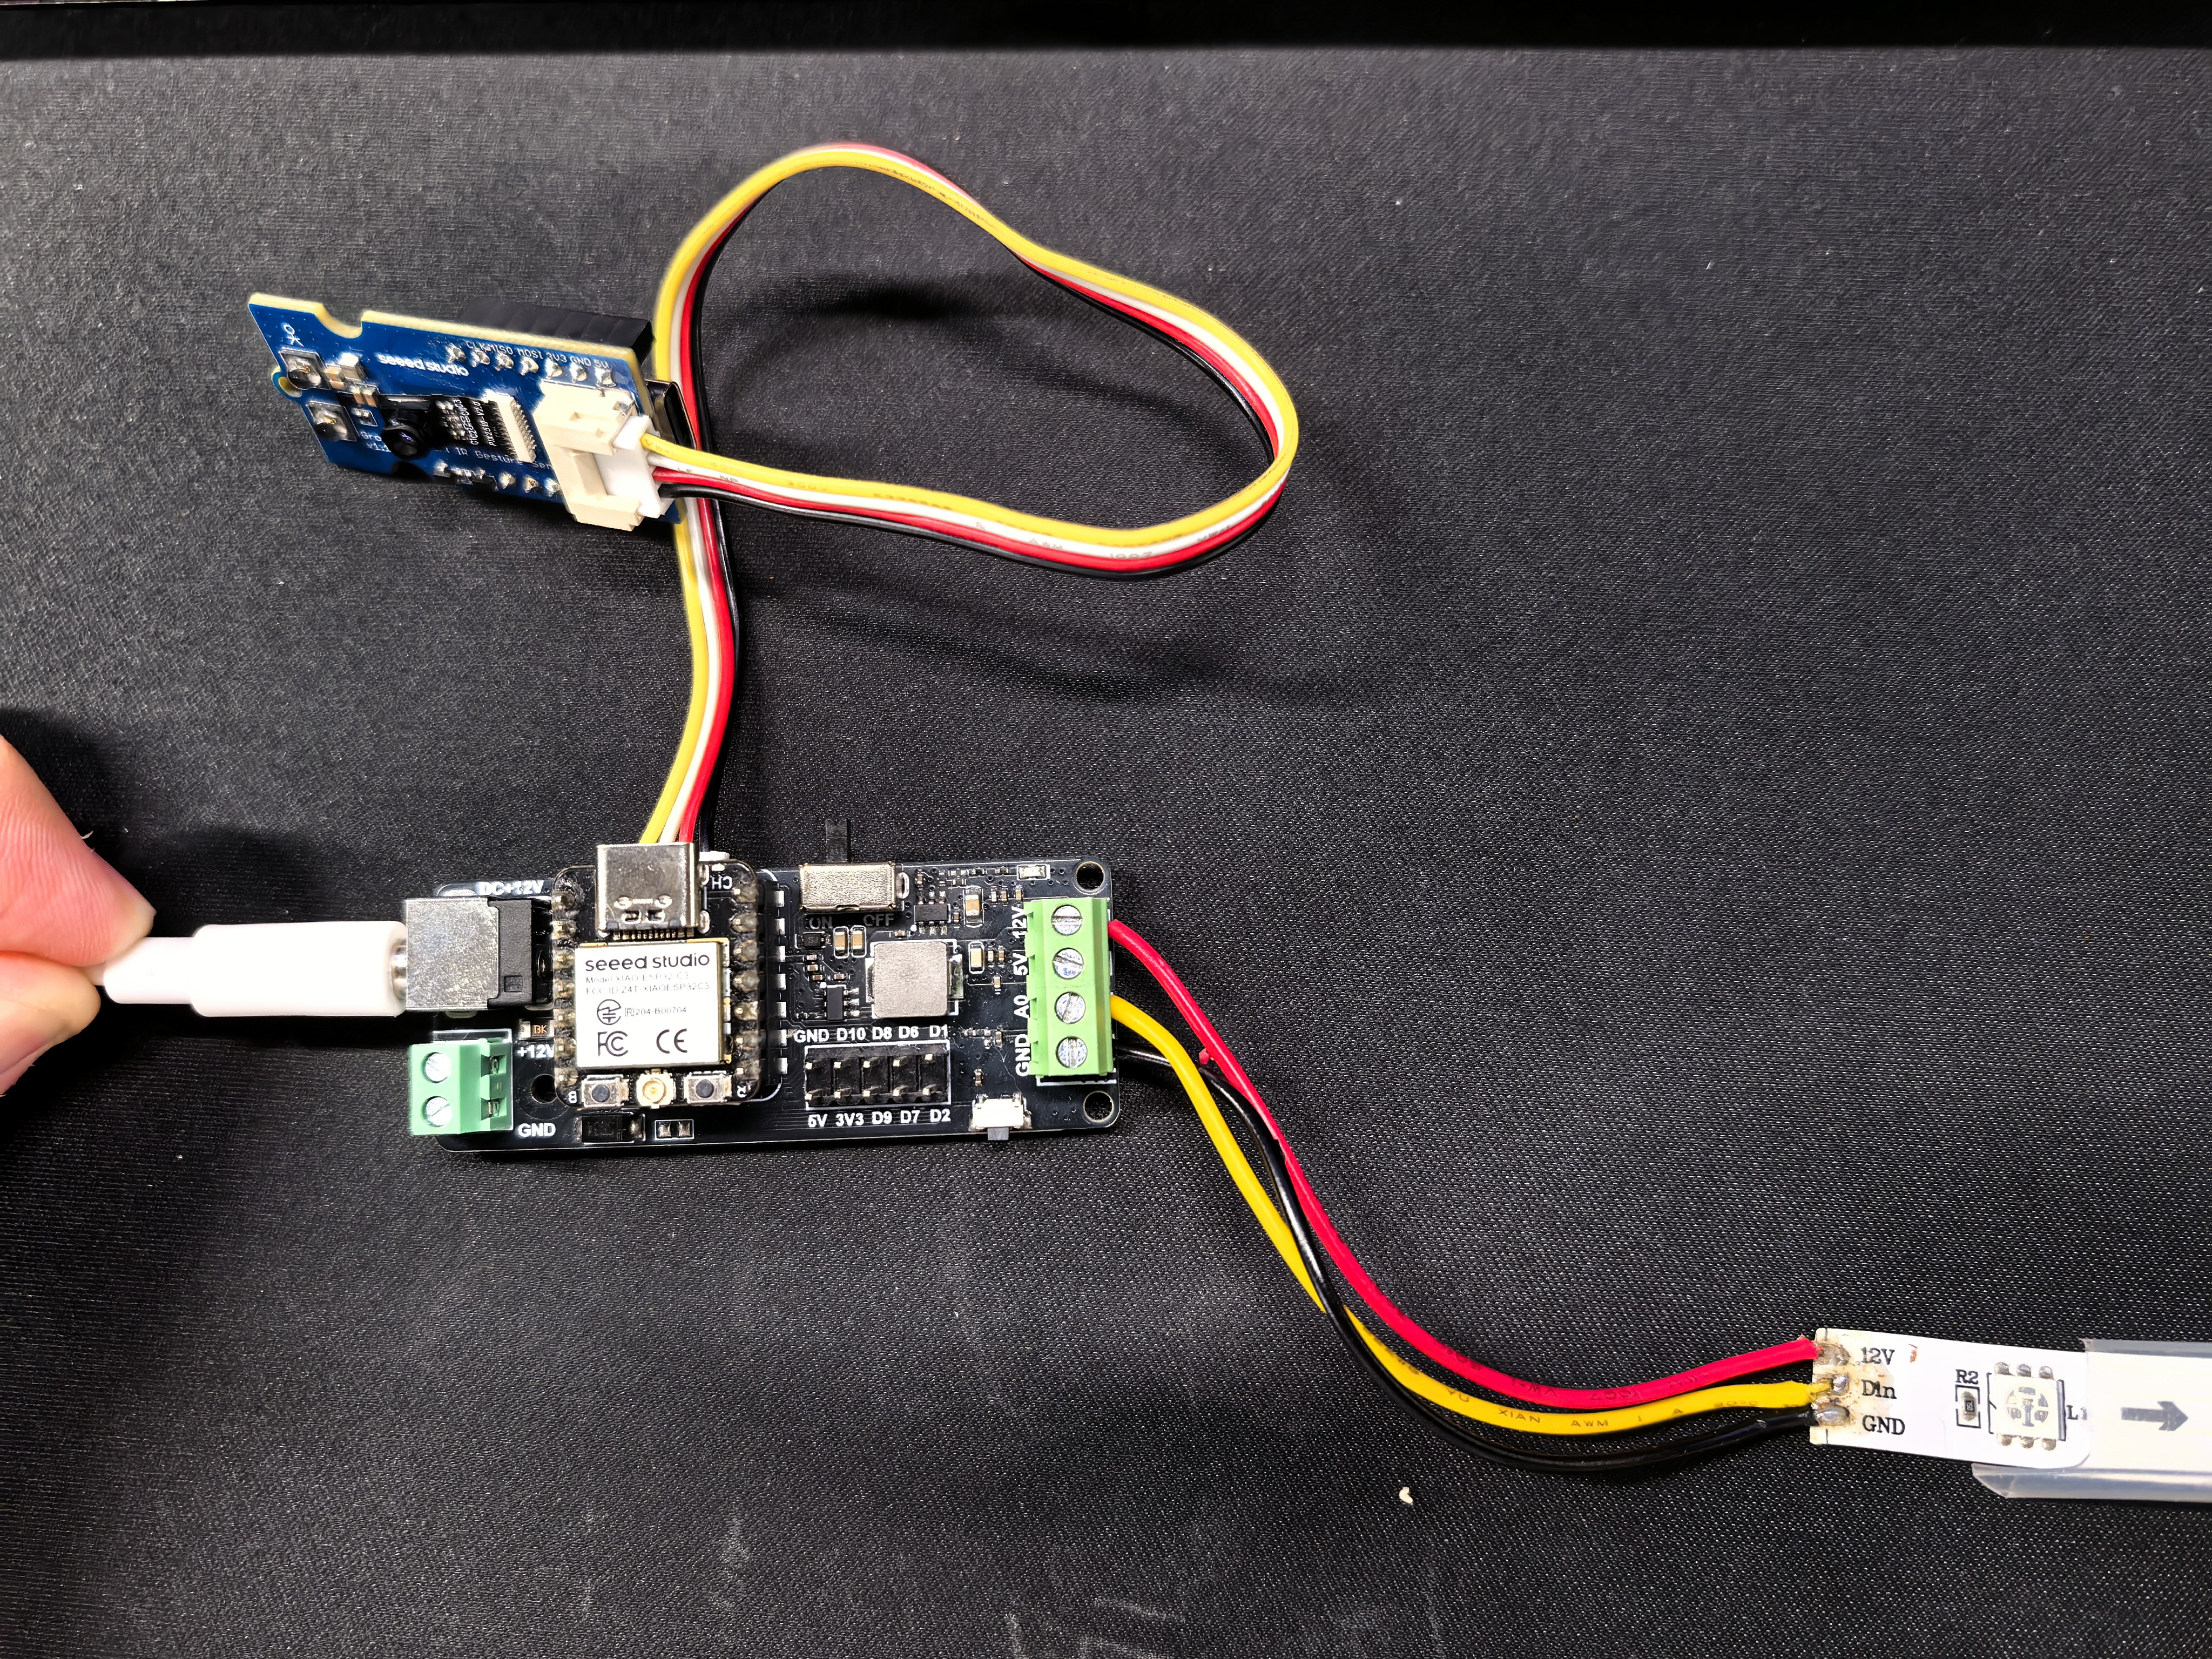
Step1. Carefully plug your Seeed Studio XIAO into the pins on the LED Driver Board. Ensure proper orientation.
Step2. Connect the Grove Smart IR Gesture Sensor to the I2C port on the LED Driver Board using a Grove cable.
Step3.Now, connect your addressable LED strip. Pay close attention to the wiring:
- Connect the LED strip's 12V (VCC) line to the 12V screw terminal on the LED Driver Board.
- Connect the LED strip's GND line to the GND screw terminal.
- Connect the LED strip's Data In (DIN) line to the DIN screw terminal.
Warning: Double-check these connections! Incorrect wiring, especially power, can damage your LED strip or even the board.
Step4. Connect your external 12V power supply to the DC jack on the LED Driver Board. This powers the LED strip directly. Then, connect the USB Type-C cable to your XIAO and your computer.
Step5. For detailed instructions on the software setup, please check the official guide:Seeed Wiki – LED Driver Board
Step6. Now that everything is set up, it’s time to write the code that links your hand gestures to the LED strip. (Example code is provided in the next section.)
Step7. Once you've uploaded the code to your XIAO, it's time to set up your gesture-controlled light strip on your desk!(Or anywhere you think would be fun)
Gesture Definition- 👍 Up → Increase brightness
- 👎 Down → Decrease brightness
- Tap → Blink white
- Grab → Blue theater chase effect
- Pinch → Toggle LED strip on/off
- Rotate Right → Hue shift +16
- Rotate Left → Hue shift -16
- Swipe Left → Rainbow cycle effect
- Swipe Right → Green theater chase effect
- N-finger Push → Set single color
The Grove Smart IR Gesture Sensor detects gesture directions, rotations, and static finger counts using IR sensing.
The gesture operation distance is 15 to 30 cm, the farthest cannot exceed 35 cm. Based on Sensor FOV 78.3° (horizontal) and 62.9°(vertical), and the operating area is 48 x 36 cm² at 30 cm.
In addition to the distance to the sensor, you also need to pay attention to where the sensor is placed. On the front of the sensor, in the upper left corner, there is a small human shape. If you see the figure standing upright, then you have placed it in the correct position. If it is upside down, then it is likely that you will not get an accurate recognition result.
As background noise may impact the accuracy of gesture recognition, it is recommended to avoid the relative higher reflective background object behind the palm. In normal gesture recognition condition, recommend at least 35cm distance between palm and background.
Signal Transmission: The XIAO ESP32-C3 reads gesture data over I2C.
Lighting Control: Depending on the gesture, the NeoPixel library drives the WS2812B LED strip to show different effects (solid color, rainbow cycle, theater chase, etc.).
A Demo- LED Strip Power: If using many LEDs (e.g., 300), use a separate power supply to avoid overloading the microcontroller.
- Sensor Positioning: Keep the area in front of the sensor clear. Gestures work best at a range of 15–30 cm.
This simple project has completely changed the way I interact with my workspace. It’s not just about switching colors—it’s about creating a smoother, more intuitive connection between me and my environment. No more fumbling for buttons or remotes, just direct feedback: my hands → my lights.
What’s Next for You?
- This is only the beginning! Here are a few directions you can explore to take this project further:
- Add Brightness Control – Map an easy “wave up/down” gesture to adjust brightness.
- More Colors & Effects – Experiment with advanced lighting patterns, a wider range of colors, or even add a dedicated “rainbow cycle” gesture.
- PC Integration – Use the XIAO’s capabilities to make the lights respond to audio, game events, or even system notifications.
- Enclosure Design – 3D print a sleek case for the XIAO and gesture sensor to give your project a polished, professional look.
I hope this guide sparks your creativity and inspires you to bring more interactivity and magic to your own workspace. Happy making! ✨


Comments