

Hardware components | ||||||
| × | 1 | ||||
| × | 1 | ||||
Software apps and online services | ||||||
 |
| |||||
 |
| |||||
Zerynth enables Python for microcontrollers by creating a virtual machine with a multithreaded Real-Time OS on your device.
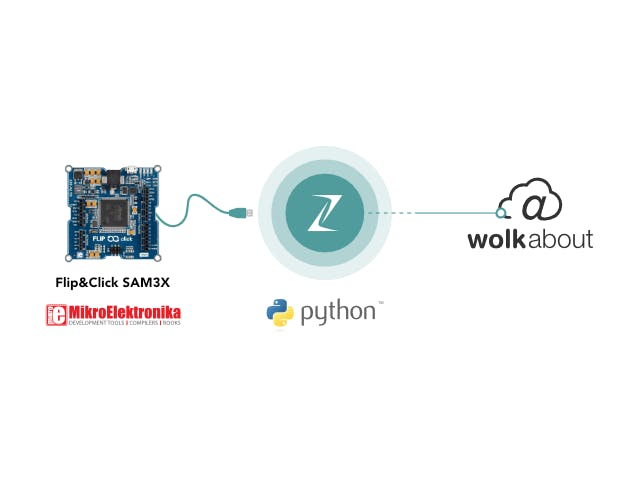
This tutorial will guide you through the process of connecting your Zerynth enabled Flip&Click SAM3X development board to the WolkAbout IoT Platform. It covers the following steps:
- Setting up physical device and virtualising it within Zerynth Studio - the device is a Flip&Click by MikroElektronika (based on the microcontroller SAM3X by Microchip).
- Creating a project in Zerynth studio.
- Cloning the examples from the GitHub repository.
- Importing a device template on the WolkAbout IoT Platform that defines what data the device will exchange with the Platform.
- Creating a device, from the device template, that will give you credentials to use within your example project.
- Creating a dashboard on WolkAbout Platform that will display the information received from the device.
- Running the example on the device.
- Flip&Click SAM3X
- WiFi 4 click
- Zerynth Studio (2.1 or greater)
- WolkAbout account
- Place WiFi 4 click in microBUS socket A
- Connect a USB micro-B cable to the device and the other end to your PC
If you are already familiar with Zerynth, virtualise your device and jump to Connecting the device section.
For those of you who are using Zerynth for the first time, follow these steps:
- Download and install the Zerynth Studio using the installation guide for additional assistance
- Continue with the Getting Started guide paying close attention to the Connect, Register and Virtualise your Device section
- Once your device is properly virtualised in Zerynth you can continue to the next step
Now that you have a virtualised device, create a new project in Zerynth Studio.
Get up and running with your IoT application by getting the example code from WolkAbout's GitHub repository:
git clone https://github.com/Wolkabout/wolkabout-iot.gitThen you can copy the content from
wolkabout-iot/examples/Controlled_publish_period/main.py
into your Zerynth project's main.py and make some changes to it:
- Enter the SSID and password of your WiFi network
- After that, you will be required to enter the device key and password
- To do that, go to the WolkAbout IoT Platform and create the device by following the next step
This section will guide you through the process of importing device template, creating a device from that template and creating dashboard to display the information received from the device on the WolkAbout IoT Platform.
- Go to the WolkAbout IoT Platform and log into your account
- If you don't have an account, you can register here
- Select Device Management from the application menu
- Change to the Device Type Management tab
This page contains the list of device types you have created on the Platform.
- For this project we will use the provided Simple example device type that has one temperature sensor
The gif illustrates the process of importing a device type, that is not required for this project, and the process of creating a device as well.
- Click the + button and choose the Create typed device option
- Enter Simple example as the device type
- Enter a device name, in this example Flip&Click SAM3X
- Tick the checkbox for Create Default Semantic
- Click the Save button
You are now presented with the device key and password that are needed for connecting your device to the Platform, so use one of the options to save this information, for example, email.
You have now completed the process of creating a device on the WolkAbout IoT Platform.
Let’s now proceed to enter these credentials into the code.
- Open your email, or any other way used to store device credentials
- Copy the device key and password into your Zeryth project's main.py in Zerynth Studio
- Change the Target device to Flip & Click SAM3X
- Click the Verify button
Click the Uplink button and wait for the sending of bytecode to complete.
The device is now ready to connect and send data to WolkAbout IoT Platform when powered on. To display data that will be sent from the device, create a dashboard with widgets on the Platform.
- Select the Reports and Visualisation tool from the applicaiton menu
- Click the + Add dashboard button and create from scratch
- Enter the name for your dashboard, for example, Flip&Click SAM3X Dashboard
- Set the scope to the Flip&Click SAM3X device
- Click the Create dashboard button
Now, you can start adding widgets to the dashboard.
- Click the + Add Widget button in the corner
- Then select Reading
- Now select: Temperature from your Flip&Click SAM3X,and click the Add widget button
You are now ready to display the information sent from the device to your dashboard
If you now power on your device and go to the dashboard, you should be able to see the data the Platform is receiving from your device.
That’s it! You are now publishing data from your Zerynth enabled Flip&Click SAM3X board to the WolkAbout IoT Platform! Read the repository's README for additional functionality like controlling state of device actuators, debugging, device configuration options and alarms that are all included in our other example. Finally, from for a more in-depth view into how the library works, see the documentation page.


Comments