

Hardware components | ||||||
_ztBMuBhMHo.jpg?auto=compress%2Cformat&w=48&h=48&fit=fill&bg=ffffff) |
| × | 1 | |||
 |
| × | 1 | |||
| × | 1 | ||||
 |
| × | 1 | |||
 |
| × | 1 | |||
Software apps and online services | ||||||
| ||||||
To get started with the Windows Remote Arduino Experience app, just follow these 3 simple steps:
- Set up a Windows 10 device
- Set up an Arduino
- Begin exploring
Setting up your Windows 10 device is as simple as downloading the Windows Remote Arduino Experience application from the Microsoft Store.
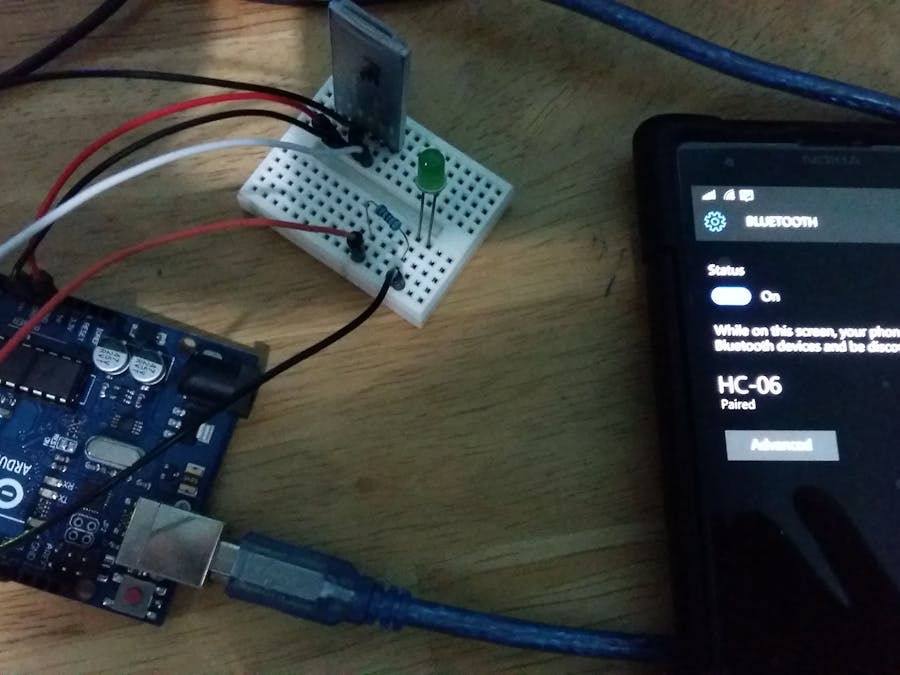
I have a Lumia 1020 phone and have installed the Windows Remote Arduino Experience app from the app store.
I set up an Arduino UNO board to be controlled by the Lumia 1020 phone prepared in setup 1. I use the following hardware:
- A Windows PC to upload sketchs to the Arduino UNO board
- An Arduino UNO board
- An USB cable
- Bluetooth device for Arduino (HC-60)
The Arduino needs to be running a version of Firmata, which will allow the board to communicate with the Windows Remote Arduino Experience app via Bluetooth.
Arduino setup steps:
1. Hookup the HC-60 bluetooth device
- The Bluetooth TX connects to pin 0 (Arduino RX or RX0).
- The Bluetooth RX connects to pin 1 (Arduino TX or TX1).
- The Bluetooth VCC connects to pin 5V.
- The Bluetooth GND connects to pin GND.
2. Download and install theArduino IDE on your PC.
3. Connect your Arduino device to the PC using USB.
4. Launch the Arduino IDE.
5. Verify that you have the correct Arduino board selected under Tools > Board.
6. Verify that you have the correct COM Port selected under Tools > Port. The name of your board should appear next to the correct option.
7. In the Arduino IDE, navigate to File > Examples > Firmata > StandardFirmata. Modify the baud rate to match that of the HC-60 bluetooth device.
Firmata.begin(9600);8. Press “Upload” to deploy the StandardFirmata sketch to the Arduino device.
3. Begin exploringConnect to the Arduino UNO board
Select the Bluetooth connection type. Choose a matching Baud rate as well. My HC-60 has a baud rate of 9600. If you are not sure, check your device documentation.
Once you've selected the correct settings, click "Connect" to connect remotely to your Arduino.
Remote control a LED
I have wired up a simple LED circuit. To build the circuit, connect one end of the resistor to Arduino pin 9. Connect the long leg of the LED (the positive leg) to the other end of the resistor. Connect the short leg of the LED (the negative leg) to the Arduino GND.
On the Digital page of the app, toggle the switch next to your chosen pin (in my setup I use digital pin 9) to Output, and then toggle the state switch to 5V. Your LED should flash on and off as you control from your Windows 10 device.
Useful Links
https://ms-iot.github.io/content/en-US/win10/WRAE.htm
https://ms-iot.github.io/content/en-US/win10/WRA.htm
https://github.com/ms-iot/remote-wiring/blob/master/bluetooth.md


Comments