


Hardware components | ||||||
 |
| × | 1 | |||
Software apps and online services | ||||||
 |
| |||||
| ||||||
This guide show you how to add Blynk Board support to the Arduino IDE, so you can get started writing and uploading Blynk firmware of your own.
Install FTDI DriverThe Blynk Board uses a specialized chip called an “FTDI” to convert USB data to a more simple serial interface. It’s over this serial interface that the Blynk Board downloads new code.
Follows this link to install FTDI driver.
Install Blynk Board Arduino Add-onDownload and install Arduino IDE and install the Blynk Board add-on. Open the Arduino Preferences under the File > Preferences menu.
Then copy this URL:
https://raw.githubusercontent.com/sparkfun/Arduino_Boards/master/IDE_Board_Manager/package_sparkfun_index.json
And, paste it into the "Additional Board Manager URLs" text box.
Navigate to Board Manager Tools > Board > Boards Manager... and search for Blynk. Select "SparkFun ESP8266 Boards" and click install.
Under the Tools > Board menu, select the "SparkFun Blynk Board" menu item.
Get a Blynk Auth TokenWith Blynk App, create a new Blynk project. Give your project a name and set the Hardware Model to SparkFun Blynk Board. Tap E-Mail under the Auth Token to send yourself a copy of the 32-byte string.
Finally, tap Create Project to create a blank Blynk project.
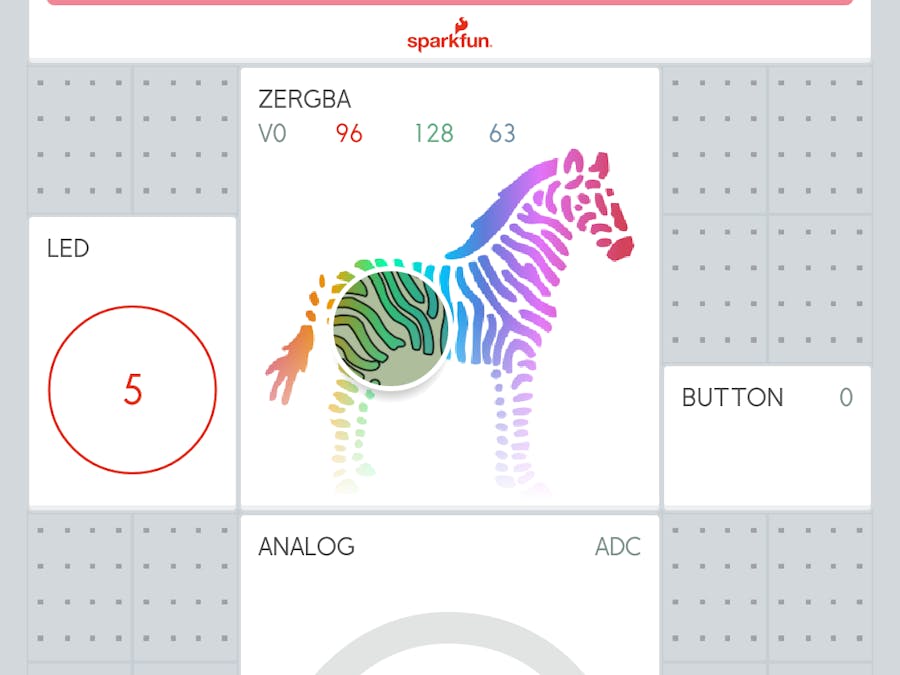
Add a button widget to drive the tiny, blue, pin 5 LED. Configure it as either push or switch; just make sure the pin is set to 5.
Add a value widget. Set the widget’s pin to 0.
Use a gauge widget to display the value of the ADC. Just make sure to set the pin to ADC.
Finally add a zeRGBa widget, set the switch to Merge and set the pin to V0.
Your project will look like this.
In Arduino IDE, create a new sketch and copy and paste the attached code in code section. Before uploading the Blynk Board, make the following changes:
- Paste your Blynk auth token over
auth_token, setting theBlynkAuthvariable.
- Paste your WiFi network name over
wifi_ssid, setting theWiFiNetworkvariable.
- Paste your WiFi password over
wifi_password, setting theWiFiPasswordvariable.
Select the correct COM port under the Tools > Port menu and hit the upload button. Check the serial monitor and you will see something like the following.


_3u05Tpwasz.png?auto=compress%2Cformat&w=40&h=40&fit=fillmax&bg=fff&dpr=2)
Comments