


For self-driving RC-car, data pre-processing is relatively more important than other projects due to the limitation of gathering enough data and sensitivity of noise data. This story will split pre-processing data into "data cleaning" and "Image Augmentation".
Data cleaning:- Removing "crashed" data
Think about the difference between controlling a real car and a RC-car. it's very easy for the Donkey car to go out of control and off the track due to wrong instruction given to the RC-car. Those "crashed" data bring huge impact to the model performance. Luckily, Donkey Car community provides a very easy tool to crop those data out by using this tool. For the data cleaning process, I found that not only we need to clean the data while the vehicle go off the track, but we also need to get rid off the data that caused the off track (few images captured before off track happened). Because those data is captured before crashing, it always contains a lot of extreme data that should not happen in that scenario, such as sharp turn etc.
- Balancing data
Anther part of data cleaning is balancing the data. In the training data I captured, it includes more data driving in straight road comparing to data making turns. By training without balancing data, the model will favor going straight than turning. We also need to make sure the amount of left turn and right turn are equal as well. Balancing process is easy, just remove the extra data from pandas frame. However, data must be shuffled before deletion, other wise this operation will lose some information related with driving straight in deletion data.
Image Augmentation I & cropped 2D CNN modelCollecting data for training is not an easy thing. Collecting data that can cover all scenarios for driving is an impossible mission. Even though we can capture all of those scenarios, the model is still not able to generalize other tracks. Data augmentation can help a lot in solving the two problems above. In this project, I use Opencv and imgaug to support data augmentation. If you are not familiar with imgaug, only Opencv is enough as well.
I have listed all augmentation method that I used below, and provided an example as well.
augmentation method:
- Zoom image
- Pan image
- Change brightness (Darker image gets better performance in my test scenario)
- Flip image(After flipping, angle direction should be changed as well )
- Crop Image(Done by Keras)
Orignal image:
After:
The image process logic should replace the inside of image generator. You can find the full source code here. Captured key part below:
   def get_train_gen(self, X_keys, Y_keys,
                     batch_size=128,
                     record_transform=None,
                     df=None,data_type='test'):
       """
       Returns a training/validation set.
       The records are always shuffled.
       Parameters
       ----------
       X_keys : list of strings
           List of the feature(s) to use. Must be included in Tub.inputs.
       Y_keys : list of strings
           List of the label(s) to use. Must be included in Tub.inputs.
       Returns
       -------
       A tuple (X, Y), where X is a two dimensional array ( len(X_keys) x batch_size ) and Y is a two dimensional array ( len(Y_keys) x batch_size ).
       See Also
       --------
       get_batch_gen
       """
       batch_gen = self.get_batch_gen(X_keys + Y_keys,
                                      batch_size=batch_size,
                                      record_transform=record_transform,
                                      df=df)
       def zoom(image):
           zoom = iaa.Affine(scale=(1, 1.3))
           image = zoom.augment_image(image)
           return image
       def pan(image):
           pan = iaa.Affine(translate_percent= {"x" : (-0.1, 0.1), "y": (-0.1, 0.1)})
           image = pan.augment_image(image)
           return image
       def img_random_brightness(image):
           brightness = iaa.Multiply((0.2, 1.2))
           image = brightness.augment_image(image)
           return image
       def img_random_flip(image, steering_angle):
           image = cv2.flip(image,1)
           steering_angle = -steering_angle
           return image, steering_angle
       def random_augment(image,angle):
           for each in batch:
               #print('---------',image.shape)
               #print('---------',angle)
               if np.random.rand() < 0.5:
                   image = pan(image)
               if np.random.rand() < 0.5:
                   image = zoom(image)
               if np.random.rand() < 0.5:
                   image = img_random_brightness(image)
               if np.random.rand() < 0.5:
                   image, angle = img_random_flip(image, angle)
               return image, angle
       while True:
           batch = next(batch_gen)
           X = [batch[k] for k in X_keys]
           Y = [batch[k] for k in Y_keys]
           if data_type == 'train':
               for i in range(len(X)):
                   for j in range(len(X[i])):
                       X[i][j],Y[i][j] = random_augment(X[i][j],Y[i][j])
                       #print('---------',X[i][j])
                       #print('---------',Y[i][j])
           yield X, Y
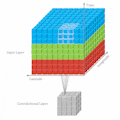
As I mentioned before, the image is not cropped from upper code. The reason is that Keras provides a way to crop data in the model. This cropping method is more flexible since we can change the crop side just by changing few parameters. If you want a more special cropping method, like cropping a triangle area, then we still need to use Opencv. But based on my experience, this kind of cropping is not necessary. I listed the cropping code and model below:
def default_linear():
   img_in = Input(shape=(180, 240, 3), name='img_in') # original size
   x = img_in
   x = Cropping2D(cropping=((40,30),(30,0)))(x) # cropped top 40 pixs, bottom 30 pixs & left 30 pixs
   # Convolution2D class name is an alias for Conv2D
   x = Convolution2D(filters=24, kernel_size=(5, 5), strides=(2, 2), activation='relu')(x)
   x = Convolution2D(filters=32, kernel_size=(5, 5), strides=(2, 2), activation='relu')(x)
   x = Convolution2D(filters=64, kernel_size=(5, 5), strides=(2, 2), activation='relu')(x)
   x = Convolution2D(filters=64, kernel_size=(3, 3), strides=(2, 2), activation='relu')(x)
   x = Convolution2D(filters=64, kernel_size=(3, 3), strides=(1, 1), activation='relu')(x)
   x = Flatten(name='flattened')(x)
   x = Dense(units=100, activation='linear')(x)
   x = Dropout(rate=.1)(x)
   x = Dense(units=50, activation='linear')(x)
   x = Dropout(rate=.1)(x)
   # categorical output of the angle
   angle_out = Dense(units=1, activation='linear', name='angle_out')(x)
   # continous output of throttle
   throttle_out = Dense(units=1, activation='linear', name='throttle_out')(x)
   model = Model(inputs=[img_in], outputs=[angle_out, throttle_out])
   model.compile(optimizer='adam',
                 loss={'angle_out': 'mean_squared_error',
                       'throttle_out': 'mean_squared_error'},
                 loss_weights={'angle_out': 0.5, 'throttle_out': .5})
   return model
Anther interesting thing to do is running line detection algorithm. The whole idea is to extract line information from images before feeding the data to the model. There's so many different types of line detection algorithm from Internet. I took this one as my implementation reference. But it doesnt work well since there are too much noises from my track (some extras lines in the gym). So I just used Opencv Canny functions to extract the lines.
The performance is not as good as when line detection algorithm was not used. In order to find out the reason, I captured some real driving data and Donkey car data, applied Line detection algorithm on both of them and did the comparison.
From the test result, I think line detection will be helpful for real self-driving problem but not for RC-Car. Because there are too much noises in the image captured in RC camera (maybe some resolution issues as well), it's hard to detect the real road.
Real driving:
RC_car Driving:
Comments