

Hardware components | ||||||
_ztBMuBhMHo.jpg?auto=compress%2Cformat&w=48&h=48&fit=fill&bg=ffffff) |
| × | 1 | |||
 |
| × | 1 | |||
 |
| × | 4 | |||
This project is for all Arduino lovers who are interested developing IoT project with maximum utility on their dashboard.
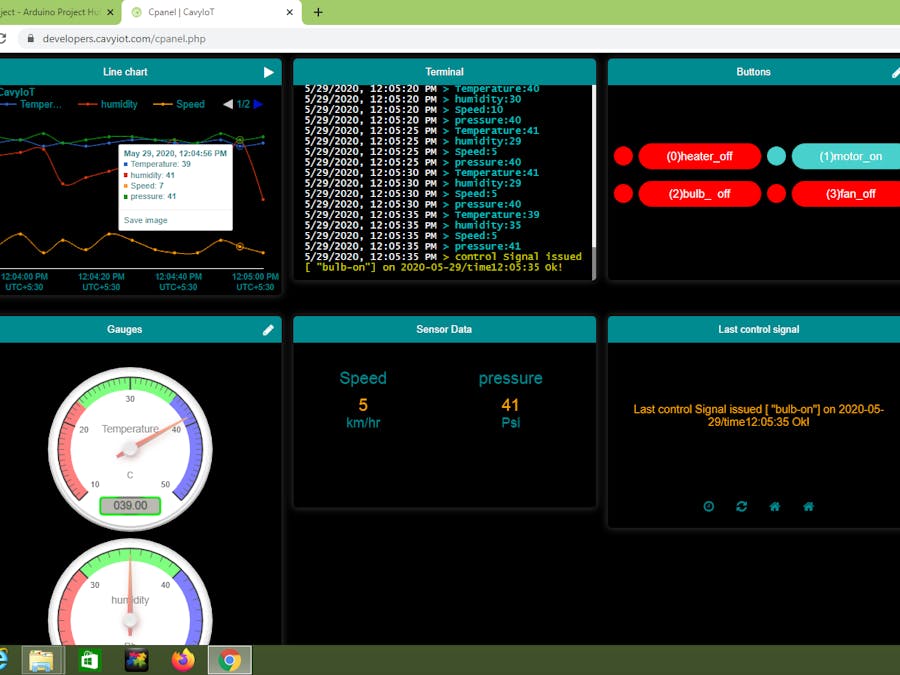
project Features- Monitors live data stream in charts
- Control device from anywhere anytime.
- User can set the triggers for automation.
- Log file for the track of operations, data and live status of device in the local storage of development boards.
User only need to upload few lines of code !
Step1:Register your account
At https://www.developers.cavyiot.com with your valid email id, it is free. Now login with your registered username and password. After login you have to verify your email. (After successful registration, within five minute you will get email verification code at registered email address). Once the verification is done, you will receive a 'Service-Id' for your IoT device.
select 'Add Device' Button which is at the upper right side of the page
add your device with Service-Id.
Step2: Make yourown CavyIoT Development Board.
- Download firmware for flashing NodeMCU from the link. https://github.com/CavyAgrotronics/CavyIoTdevelopmentBoard/blob/master/CavyIoTdevelopmentBoard/CavyIoT.nodemcu-V0.02.bin
- Download node-mcu-flasher from the link https://github.com/nodemcu/nodemcu-flasher
- Flash NodeMCU with CavyIoT.nodemcu-V0.02.bin.
- After successful flashing the ESP8266 /NodeMCU will change all configuration. This NodeMCU/esp8266 which you have flashed is your CavyIoT Development Board.
- Pin configuration of CavyIoT Development Board
Step 3 :Install Arduino library
Download and install Arduino library from the link
https://github.com/CavyAgrotronics/CavyIoTdevelopmentBoard
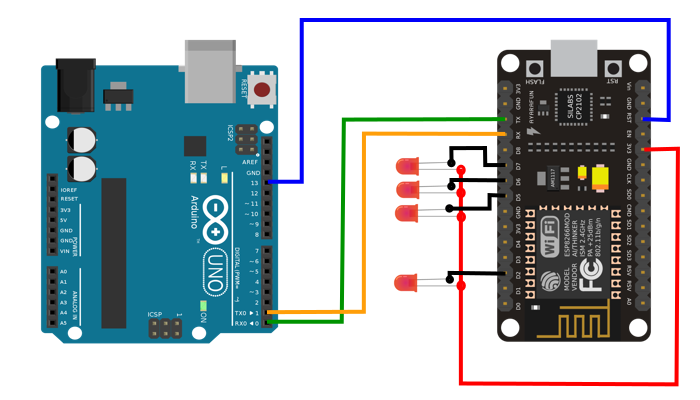
Step 4: Circuit connection
Upload an example sketch from a library to your Arduino board.
After successful sketch upload, open your serial monitor-
Congratulations, You have done. Login to your Control Panel/IoT Dashboard.


Comments