// I2C Keypad for Arduino
// Venkateswara Rao.E
// 19-oct-2015
// Credits to @author Alexander Brevig
#include <Wire.h>
#include <Keypad_I2C.h>
#include <Keypad.h>
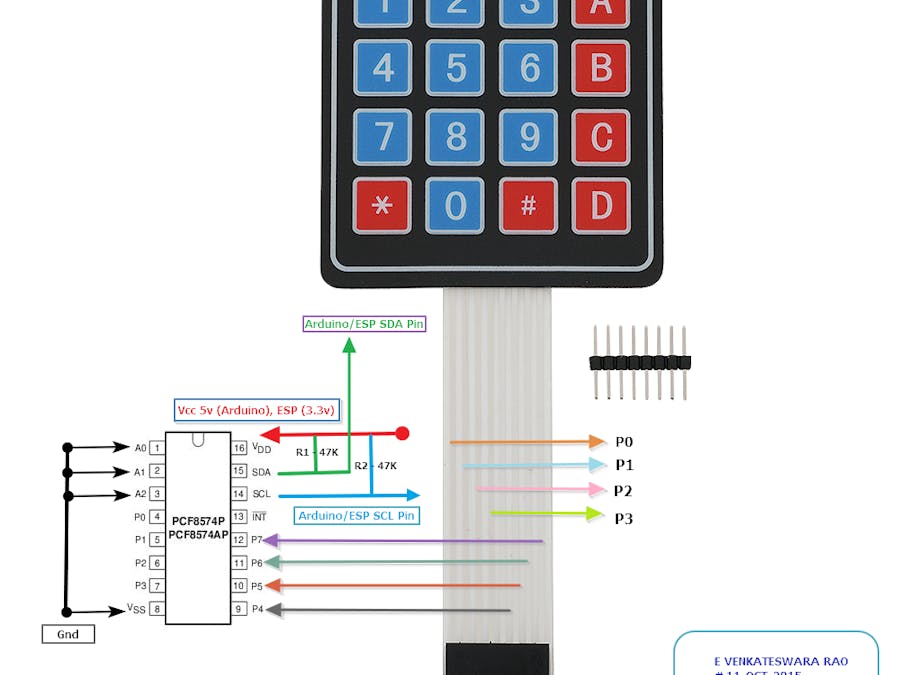
#define I2CADDR 0x38
const byte ROWS = 4; //four rows
const byte COLS = 3; //three columns
char keys[ROWS][COLS] = {
{'1','2','3'},
{'4','5','6'},
{'7','8','9'},
{'*','0','#'}
};
// Digitran keypad, bit numbers of PCF8574 i/o port
byte rowPins[ROWS] = {0, 1, 2, 3}; //connect to the row pinouts of the keypad
byte colPins[COLS] = {4, 5, 6}; //connect to the column pinouts of the keypad
Keypad_I2C kpd( makeKeymap(keys), rowPins, colPins, ROWS, COLS, I2CADDR, PCF8574 );
void setup(){
Wire.begin( );
kpd.begin( makeKeymap(keys) );
Serial.begin(9600);
Serial.println( "start" );
}
void loop(){
char key = kpd.getKey();
if (key){
Serial.println(key);
}
}


Comments