


Hardware components | ||||||
| × | 1 | ||||
| × | 1 | ||||
 |
| × | 1 | |||
 |
| × | 1 | |||
Software apps and online services | ||||||
 |
| |||||
This simple project is to monitoring the air quality with NodeMCU and MQ135 sensor. The ppm value displayed to thnigsai.io. This simple project is very easy to beginner and have real time air quality monitor over internet.
Software :
- Arduino IDE with NodeMCU board compatible. You can follow this link to add NodeMCU board on Arduino IDE.
Sending data to the Cloud & Setting Up thingsai.io Account:When just logging to the serial monitor, our data isn't that useful. Once in thingsai.io, we can graph and react to the data.
Setting Up thingsai.io Account
1. visit to https://thingsai.io/ website.
2. Register Your self with Google account or Email Id.
3. Login page:
4. After Login, Click on Create New Project and Give any name of your choice. For My case it is " Air Quality Meter".
5. Now Add the Parameters, Like We are monitoring the Air Quality of our room then our Parameters will be AirQuality (In Decimal).
6. Now Click on Update Device.
For Mode Detail or you facing the problem during creation of project please watch Demo Video
Now Copy the code to arduino Ide and Upload the Code to the NodeMcu and Connect the NodeMcu to your home Wifi Hotspot. If all working then Data will start updating to thingsai.io Account.
Wifi Setup:
1. Start the Phone Wifi and scan for Ap name abcd.
2. Connect with this AP.
3. Now a Web page opened, Click on Wifi Configuration and type your Hotspot SSID and Password.
4. Now your Node is Connected to Network.
Note: If no any web page opened in browser then type 192.168.4.1 in your phone browser it will show the wifi configuration page.
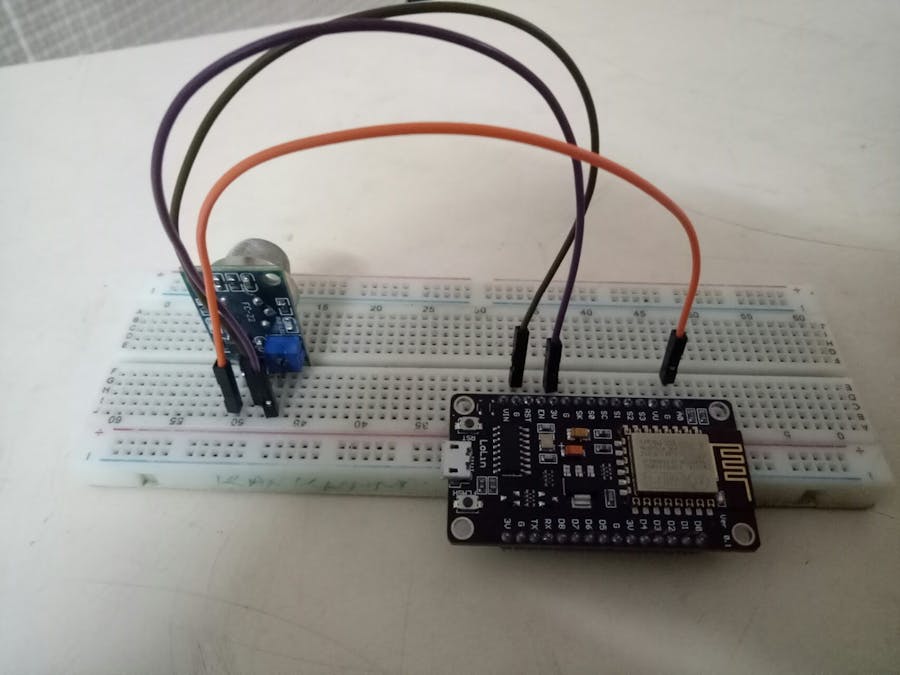
Connection Beetwen NodeMCU & MQ135NodeMCU MQ135
VIN (5V) VCC
GND GND
A0 AO
I recommend MQ135 have the separate power supply because it's a heater that need big current (800mA Approximately).


Comments