


Hardware components | ||||||
 |
| × | 1 | |||
 |
| × | 1 | |||
 |
| × | 1 | |||
 |
| × | 1 | |||
 |
| × | 1 | |||
 |
| × | 1 | |||
 |
| × | 1 | |||
 |
| × | 1 | |||
 |
| × | 1 | |||
 |
| × | 1 | |||
Software apps and online services | ||||||
 |
| |||||
| ||||||
 |
| |||||
Hand tools and fabrication machines | ||||||
| ||||||
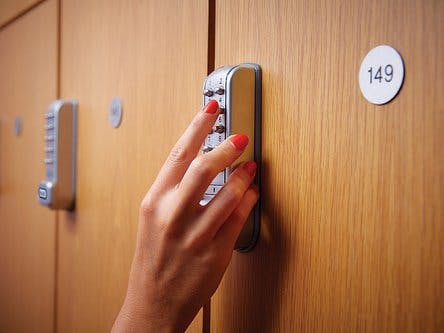
This project will give a detailed description on how the lockers in our home or in our office is being monitored by the Bolt IoT device using LDR. Meanwhile in the Bolt cloud a line graph is being plotted based on the readings obtained by the LDR. With the help of the readings obtained we can find the time that the person spent in our locker.
It also sends us SMS if someone opens the locker. This is done with the help of Twilio. Twilio is a third party SMS functionality provider which helps us out in this task. As we know when the intensity of the light increases the resistance of LDR decreases. When the value of the LDR crosses the thresshold level it will send the SMS to our mobile phone.
Let us see how this locker monitor system works in detail.
HARDWARE SETUP:Let us see how to connect the LDR to the bolt device. Before starting our project please make sure that the components used here are in good working condition.
1. In the breadboard insert the LDR sensor. Now connect the one end of the sensor to the A0 (analog) pin. Let the other end of the Analog pin is connected to the 3v pin of the bolt device.
2. Now connect the 10k ohm resistor the column in which the pin of the ldr connected to the A0 pin and one more leg to column connected the ground in the breadboard.
3. Connect the Bolt WiFi module to the computer USB port or the charger to give the power supply to the WiFi module.
4. Now the circuit is completely ready to use. Please make sure that there is a proper connection. If there exist an improper connection, short circuit may occur resulting to the damage on the bolt device.
5. As I mentioned earlier take the locker box made of cardboard and fix the battery holder of coin cell battery using glue inside the locker and the battery insulator to the adjacent gate of the locker in such away that when the door gets opened the insulator moves out of the battery and vice versa.
6. Connect the legs of the LED to the coin cell holder and then insert the battery to the holder.
7. Keep the LED in such a way that when it glows it falls on the surface of the LDR.
SOFTWARE SETUP:Now the connection of the bolt device to the bolt cloud will be done by the following ways.
1. Create a new account on the Bolt iot cloud service by registering email id.
2. Connect your Bolt device to Bolt iot cloud by installing Bolt application in the mobile phone.
3. To learn more about how to create and connect the bolt iot device click here:
https://docs.boltiot.com/docs/setting-up-the-bolt-wifi-module
VISUALIZING THE OF DATA ON THE BOLT CLOUD:The steps to visualize the data collected are
1.Login to the Bolt cloud using https://cloud.boltiot.com/login and the click on the product tab on the left side.
2. Create a new product for Locker monitor. This product can also be used for multiple bolt devices.
3. Now click the configure product icon to configure our new product call locker monitor. Then click on the hardware configuration and configure the pin details as mentioned below.
4. Now click on the 'code' tab and then 'import code' tab to create a new code in that.
5. Type the specific code on the work space.
The code for collecting and visualizing the data using google library is given below:
setChartLibrary('google_chart');
setchartType('linegraph');
setChartTitle('locker_monitor');
setAxisname('Time','locker condition');
plotChart('time_stamp','light');
setCrossHair(true);- setChartLibrary - for data visualisation google library is used.
- setChartType - there are many type of visualisation in google library here we use line graph to plot the readings in them.
- setChartTitle - this sets the title of the chart or the graph being obtained as the output.
- setAxisname -this sets the name for both x and y axis respectively.
- plotChart - this plots the data which is passed as the variable on the output page.
6. Give a new name and then save the configuration.
7. Link the configuration to the product we created. This allows the bolt cloud to access the configuration.
8. Now we have to transfer the informations from the device to the cloud. so we need to deploy the configuration. To deploy them click on the deploy option on the product window.
If the locker is opened the SMS is sent to the concerned mobile number. For that we have to create a new account Twilio. This Twilio is a third party application which functions on sending SMS or email or even sends message on our social media pages. But now we are going to use only the SMS option. To do this we need to create a new account in Twilio.
To create a new Twilio account, please follow the instruction given below:
https://www.twilio.com/docs/usage/tutorials/how-to-use-your-free-trial-account
1. Login the Twilio account and add the project locker monitor.
2. After logging in create a new file named confy.py. This will store all realated data of the Twilio. Now create a new file type sudo nano confy.py in the terminal.
3. Now write the code by using the syntax given below to save all data in the same file.
SID = 'You can find SID in your Twilio Dashboard'
AUTH_TOKEN = 'You can find  on your Twilio Dashboard'
FROM_NUMBER = 'This is the no. generated by Twilio. You can find this on your Twilio Dashboard'
TO_NUMBER = 'This is your number. Make sure you are adding +91 in beginning'
API_KEY = 'This is your Bolt Cloud accout API key'
DEVICE_ID = 'This is the ID of your Bolt device'
Save the above code after filling the details.
4. Now type sudo nano locker_sms.py in the terminal which will leads you to create new file name locker_sms.py.
5. Write the main code to collect the data from the Bolt and send sms if the locker is being opened.
import conf
from boltiot import Sms, Bolt
import json, time

minimum_limit = 0
maximum_limit = 720


mybolt = Bolt(conf.API_KEY, conf.DEVICE_ID)
sms = Sms(conf.SID, conf.AUTH_TOKEN, conf.TO_NUMBER, conf.FROM_NUMBER)


while True:
    response = mybolt.analogRead('A0')
    data = json.loads(response)
    print("Sensor value is: " + str(data['value']))
    try:
        sensor_value = int(data['value'])
        if sensor_value > maximum_limit or sensor_value < minimum_limit:
            print("Making request to Twilio to send a SMS")
            response = sms.send_sms("Someone opened your locker")
            print("Response received from Twilio is: " + str(response))
            print("Status of SMS at Twilio is :" + str(response.status))
    except Exception as e:
        print ("Error occured: Below are the details")
        print (e)
    time.sleep(10)
6. In my case the value of LDR sensor remains constant when the locker is kept closed (i.e. 700). if the door is opened the value reaches the greater extent. hence I have kept my maximum value as 720. This value may differ from each sensor.
7. The sms recieved will be as follows.
This system will send sms if someone opens the locker. we can also find the time spent by the person in the locker by looking the output graph obtained by the bolt cloud. As if the door is opened the LED starts to glow. Since the LDR is kept adjacent the light rays of the led falls on it. This will cause internal resistance and the values are collected. The collected values are the used by the Twilio and this will send sms to the authorized person that "Someone opened your locker".


Comments