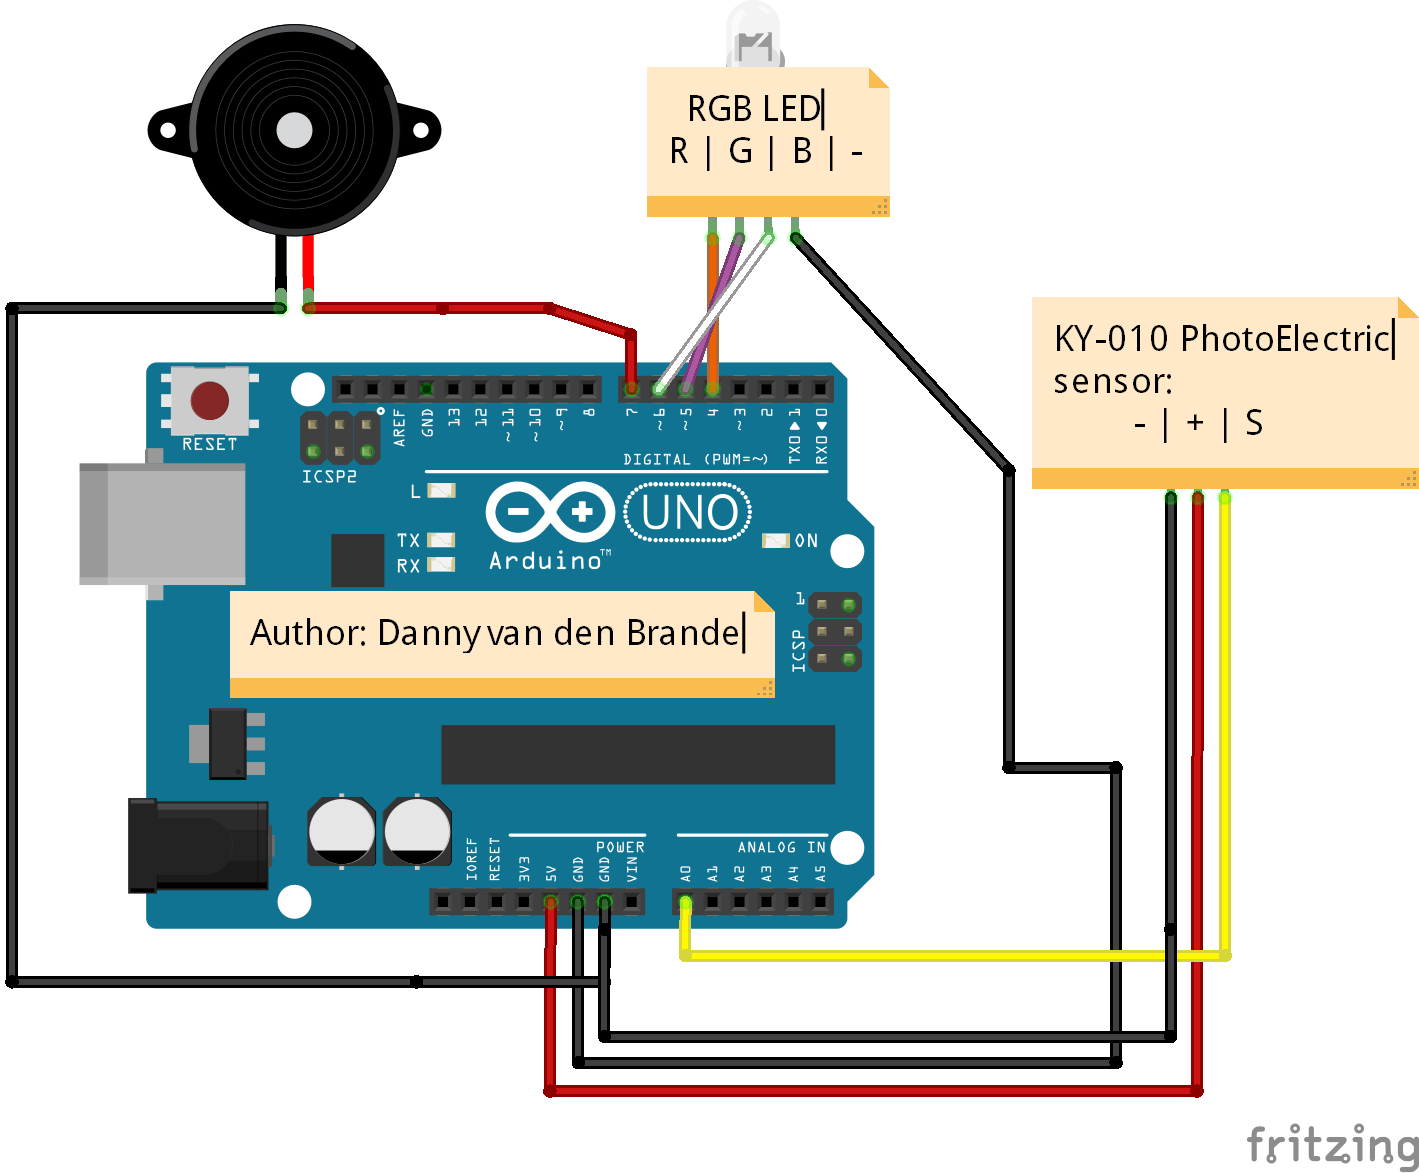
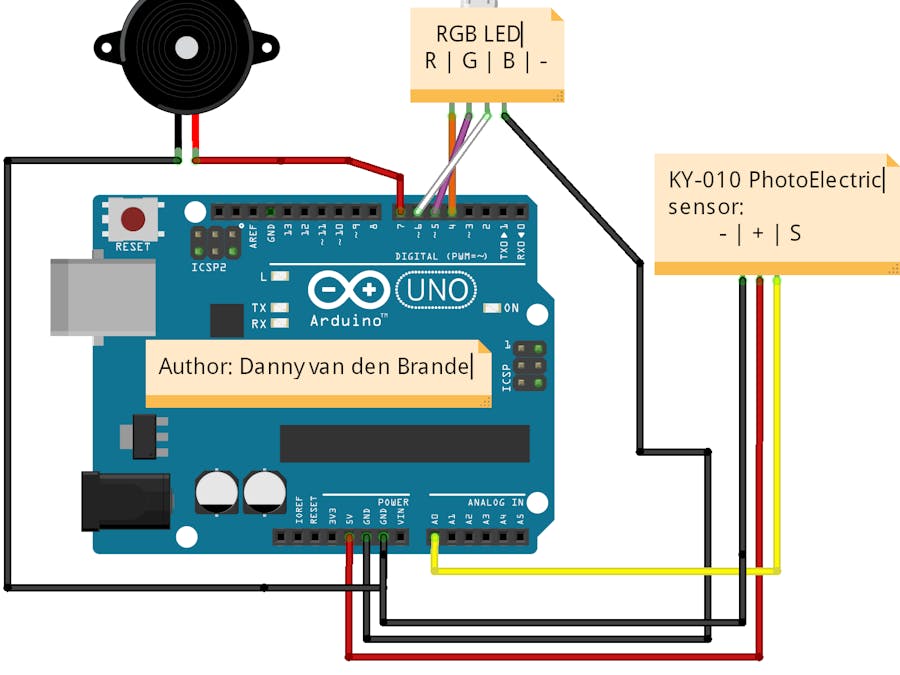
//Author: Danny van den Brande, arduinosensors.nl
//Hello world! I made a simpel example on what you can do with the KY-010
//In this case we made a simpel alarm with a piece of plastic,
//i used a atm card to put in the sensor any piece of plastic will work,
//when you remove it the alarm will trigger and print a value and text in the serial monitor.
//You can make it print on a lcd to, or for more advanced stuff make it send a sms or add relays, whatever you want it to do!
int PhotoElectricSensor = A0;
int buzzer = 7;
int RedLed = 4;
int GreenLed = 5;
int BlueLed = 6;
int val ;

void setup ()
{
  Serial.begin(9600);
  pinMode (buzzer, OUTPUT) ;
  pinMode (RedLed, OUTPUT) ;
  pinMode (GreenLed, OUTPUT) ;
  pinMode (BlueLed, OUTPUT) ;
}
void loop ()
{
  val = analogRead (PhotoElectricSensor) ;
  Serial.print(val);// printing the value in the serial monitor
  if(val < 50&& val < 500)
  {
    Serial.println(" ATM CARD NOT PLACED");// Open the serial monitor to see this.
    digitalWrite (GreenLed, LOW);
    alarmsound(10);// Change if you want the alarm to last longer if card is removed
  }

  else if (val > 500 && val < 1023)
  {
    Serial.println(" ATM CARD IN PLACE");// the alarm will not trigger and the green led will be on.
    digitalWrite (GreenLed, HIGH);


  }

  delay(1000);
}

void alarmsound(int duration){ // alarm section, alarm will flash red and blue when trigger, if not it will stay green.
  for (int p = 0; p < duration; p++){
for (int i = 0; i <80; i++)
    {
      digitalWrite (buzzer, HIGH) ;
      digitalWrite (RedLed, HIGH) ;
      delay (1) ;
      digitalWrite (buzzer, LOW) ;
      digitalWrite (RedLed, LOW) ;
      delay (1) ;
    }
    for (int i = 0; i <100; i++)
    {
      digitalWrite (buzzer, HIGH) ;
      digitalWrite (BlueLed, HIGH) ;
      delay (1) ;
      digitalWrite (buzzer, LOW) ;
      digitalWrite (BlueLed, LOW) ;
      delay (1) ;
    }
  }

}

_ztBMuBhMHo.jpg?auto=compress%2Cformat&w=48&h=48&fit=fill&bg=ffffff)


Comments