//Author: Danny van den Brande. ArduinoSensors.nl
//Do what ever you want with this code!
//Again a Multifuntional code, you can control your whole home with it if you want. I made a simple example on how to do this. Good luck!
#include <IRremote.h> //Important to have the library installed! https://codebender.cc/library/IRremote
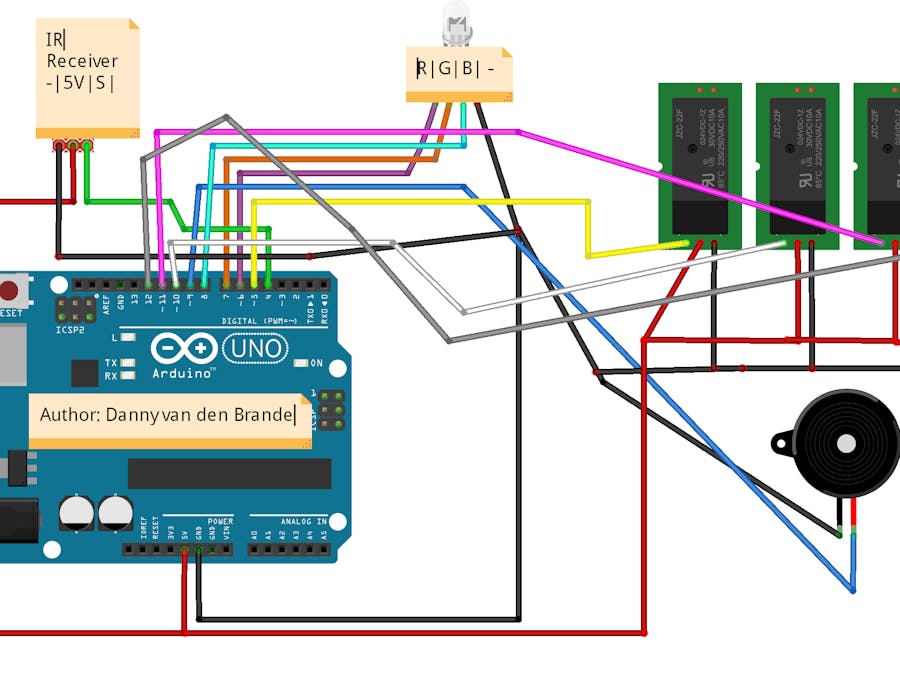
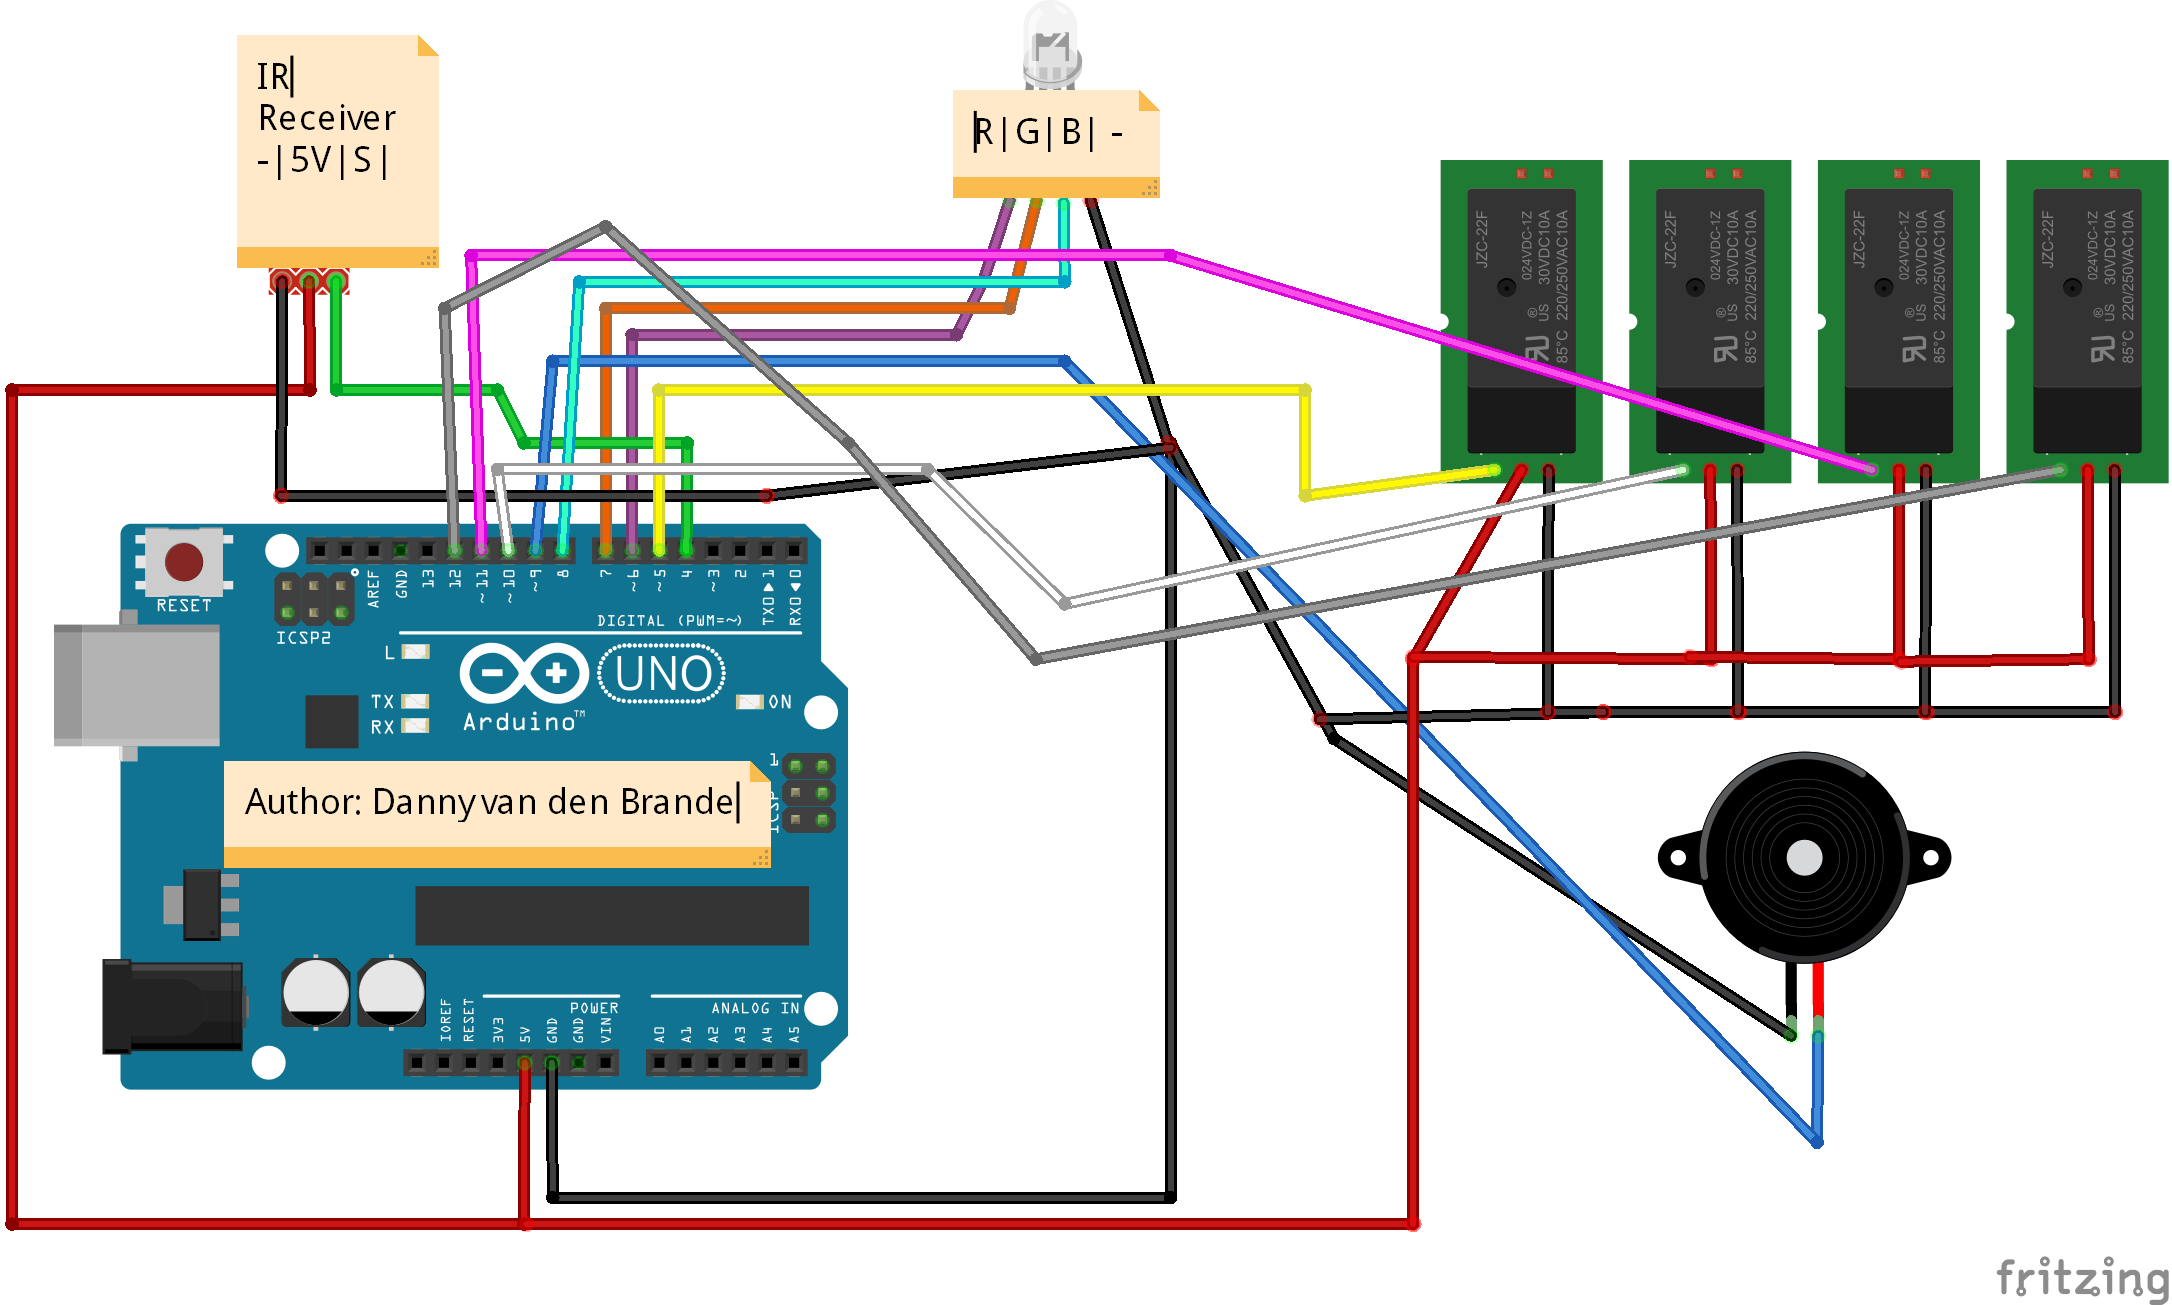
int IRreceiver = 4;
int Relay = 5;
// You can add a 8 channel relay to, to control your home from 1 remote control for example. Just change the leds and buzzer to Relays.
// i already set extra relays in the code so all you need to do is add them. Right now we have 10 11 and 12 USED, you can add 3 more relays.
int Relay1 = 10;
int Relay2 = 11;
int Relay3 = 12;
int RedLed = 6;
int GreenLed = 7;
int BlueLed = 8;
int Buzzer = 9;
int OnOrOFF[] = {0,0,0,0,0,0,0,0,0,0}; //If you add a button, then add a ,0 here for each button you add.
//Here we Define the buttons, if you are using a different remote then the HX1838 that i used open serial monitor and press the desired buttons.
//change the numbers you see in the serial monitor here below, and asign a button to that number..
#define Button1 48703 // button 1
#define Button2 58359 // button 2
#define Button3 539 // button 3
#define Button4 25979 // button 4
#define Button5 15547 // button 5
#define Button6 59295 // button 6
#define Button7 65015 // button 7
#define Button8 5499 // button 8
#define AllonOff 19899 // Play/Pauze on the HX1838 Switches Off or On everything.
IRrecv irrecv(IRreceiver);
decode_results results;
void setup()
{
Serial.begin(9600);
irrecv.enableIRIn();
pinMode (Relay, OUTPUT);
pinMode (Relay1, OUTPUT);
pinMode (Relay2, OUTPUT);
pinMode (Relay3, OUTPUT);
pinMode (BlueLed, OUTPUT);
pinMode (RedLed, OUTPUT);
pinMode (GreenLed, OUTPUT);
pinMode (Buzzer, OUTPUT);
}
void loop() {
if (irrecv.decode(&results)) {
unsigned int value = results.value;
switch(value) {
// HERE YOU SET THE BUTTONS, you can add more buttons just copy new sections.
// Just copy what is between "case Button1 and case button 2. make sure you also change if(OnOrOFF[1]<--(change the number to 10 in this case.) Because button 9 (the AllonOff button)
// is number 9 right right now, which is asigned to the Pauze/Play button on the remote control. If you place another button after that it would be Button 11, and so on.
// case Button10: This would be the next button.
// if(OnOrOFF[10] == 1) { //<--- Just copy this section and paste it below the latest button.
// digitalWrite(BlueLed, LOW); // OFF
// OnOrOFF[10] = 0;
// } else {
// digitalWrite(BlueLed, HIGH); // ON
// OnOrOFF[10] = 1;
// }
// break; <-- make sure you copy this to.
case Button1:
if(OnOrOFF[1] == 1) {
digitalWrite(BlueLed, LOW); // OFF
OnOrOFF[1] = 0;
} else {
digitalWrite(BlueLed, HIGH); // ON
OnOrOFF[1] = 1;
}
break;
case Button2:
if(OnOrOFF[2] == 1) {
digitalWrite(RedLed, LOW);
OnOrOFF[2] = 0;
} else {
digitalWrite(RedLed, HIGH);
OnOrOFF[2] = 1;
}
break;
case Button3:
if(OnOrOFF[3] == 1) {
digitalWrite(GreenLed, LOW);
OnOrOFF[3] = 0;
} else {
digitalWrite(GreenLed, HIGH);
OnOrOFF[3] = 1;
}
break;
case Button4:
if(OnOrOFF[4] == 1) {
digitalWrite(Buzzer, LOW);
OnOrOFF[4] = 0;
} else {
digitalWrite(Buzzer, HIGH);
OnOrOFF[4] = 1;
}
break;
case Button5:
if(OnOrOFF[5] == 1) {
digitalWrite(Relay, LOW); // START OF RELAYS
OnOrOFF[5] = 0;
} else {
digitalWrite(Relay, HIGH);
OnOrOFF[5] = 1;
}
break;
case Button6:
if(OnOrOFF[6] == 1) {
digitalWrite(Relay1, LOW);
OnOrOFF[6] = 0;
} else {
digitalWrite(Relay1, HIGH);
OnOrOFF[6] = 1;
}
break;
case Button7:
if(OnOrOFF[7] == 1) {
digitalWrite(Relay2, LOW);
OnOrOFF[7] = 0;
} else {
digitalWrite(Relay2, HIGH);
OnOrOFF[7] = 1;
}
break;
case Button8:
if(OnOrOFF[8] == 1) {
digitalWrite(Relay3, LOW);
OnOrOFF[8] = 0;
} else {
digitalWrite(Relay3, HIGH);
OnOrOFF[8] = 1;
}
break;
case AllonOff:
if(OnOrOFF[9] == 1) {
digitalWrite(Buzzer, LOW);
digitalWrite(Relay, LOW);
digitalWrite(Relay1, LOW);
digitalWrite(Relay2, LOW);
digitalWrite(Relay3, LOW);
digitalWrite(GreenLed, LOW);
digitalWrite(RedLed, LOW);
digitalWrite(BlueLed, LOW);
OnOrOFF[9] = 0;
} else {
digitalWrite(Buzzer, HIGH);
digitalWrite(Relay, HIGH);
digitalWrite(Relay1, HIGH);
digitalWrite(Relay2, HIGH);
digitalWrite(Relay3, HIGH);
digitalWrite(GreenLed, HIGH);
digitalWrite(RedLed, HIGH);
digitalWrite(BlueLed, HIGH);
OnOrOFF[9] = 1;
}
break;
//<<--- this is the spot where you paste a new button.
}
Serial.println(value);
irrecv.resume();
}
}


_ztBMuBhMHo.jpg?auto=compress%2Cformat&w=48&h=48&fit=fill&bg=ffffff)


Comments