

.jpg?auto=compress%2Cformat&w=900&h=675&fit=min)
Hardware components | ||||||
 |
| × | 1 | |||
What is "Blynk" .... It is a Smart Phone APP that uses either Android or iOS to IoT your projects for remote control. To get things started download the Blynk app off Google Play or Apple itunes.
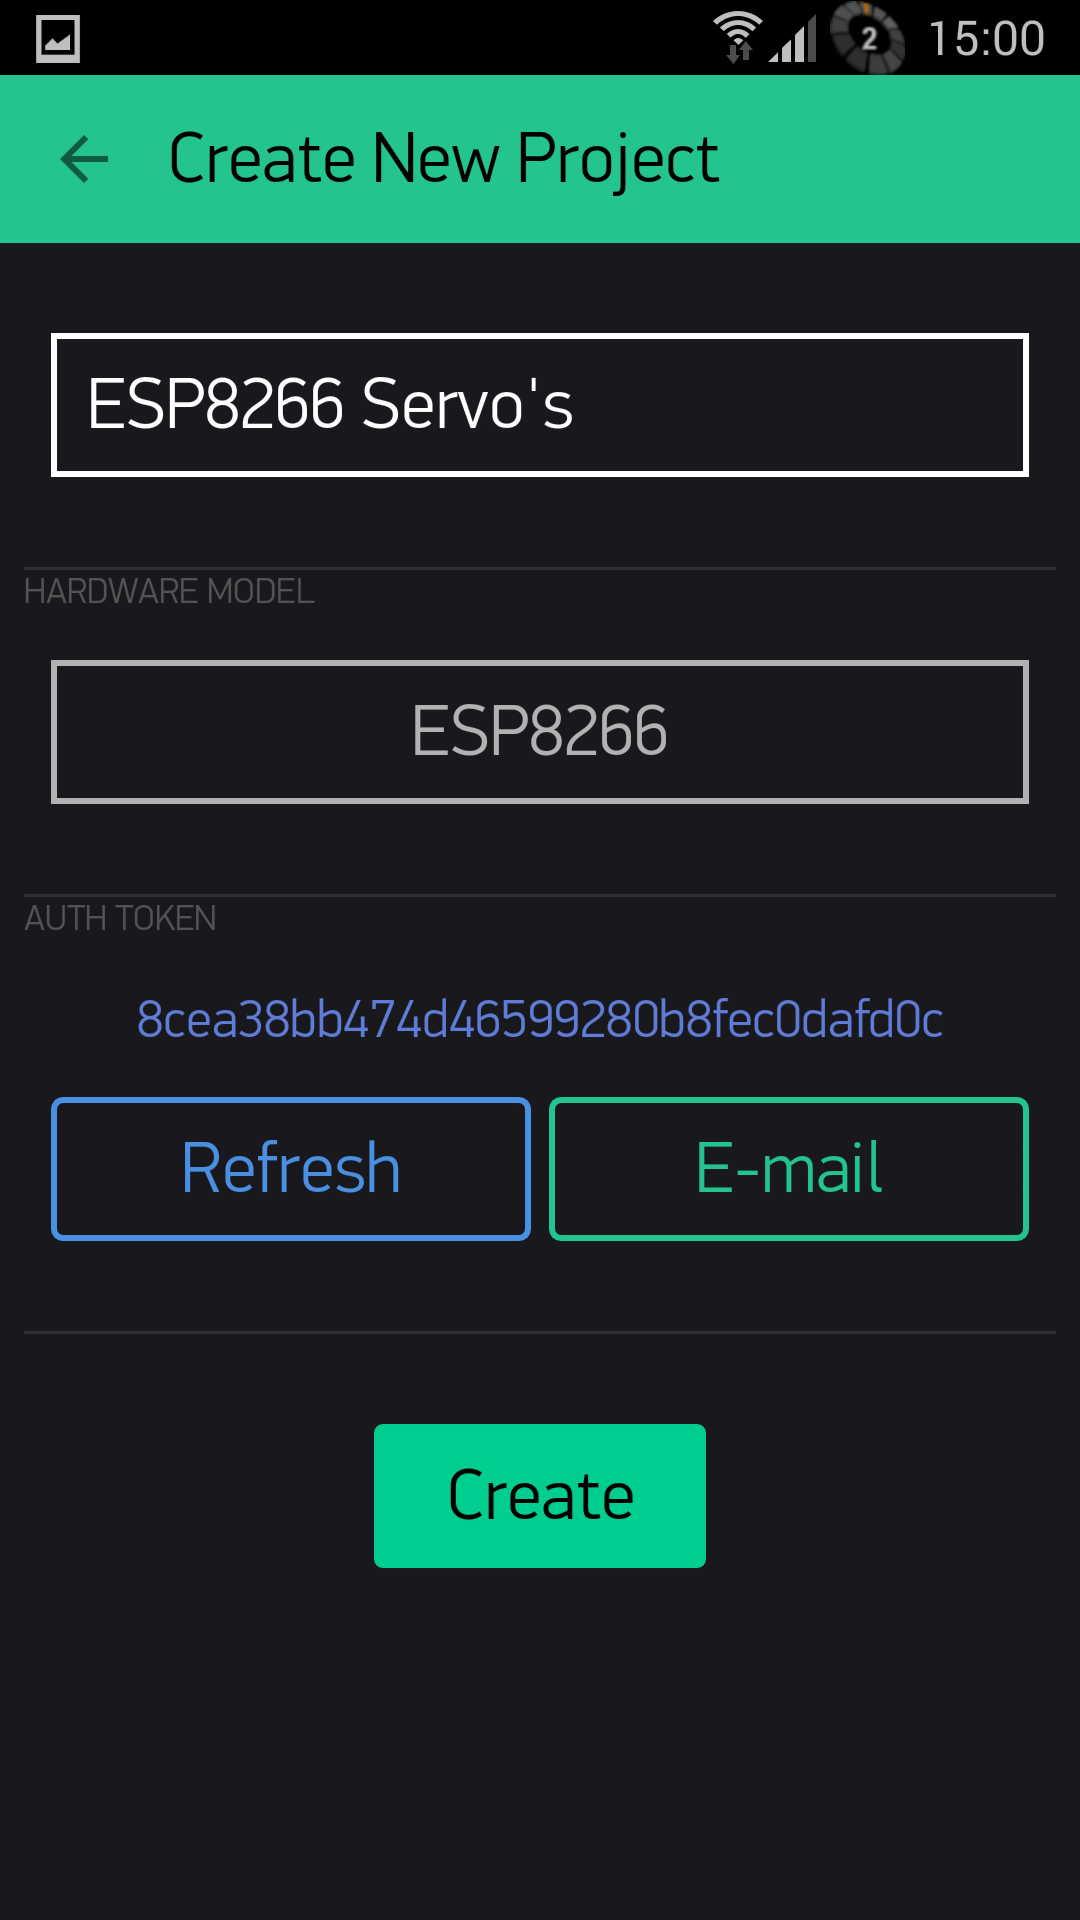
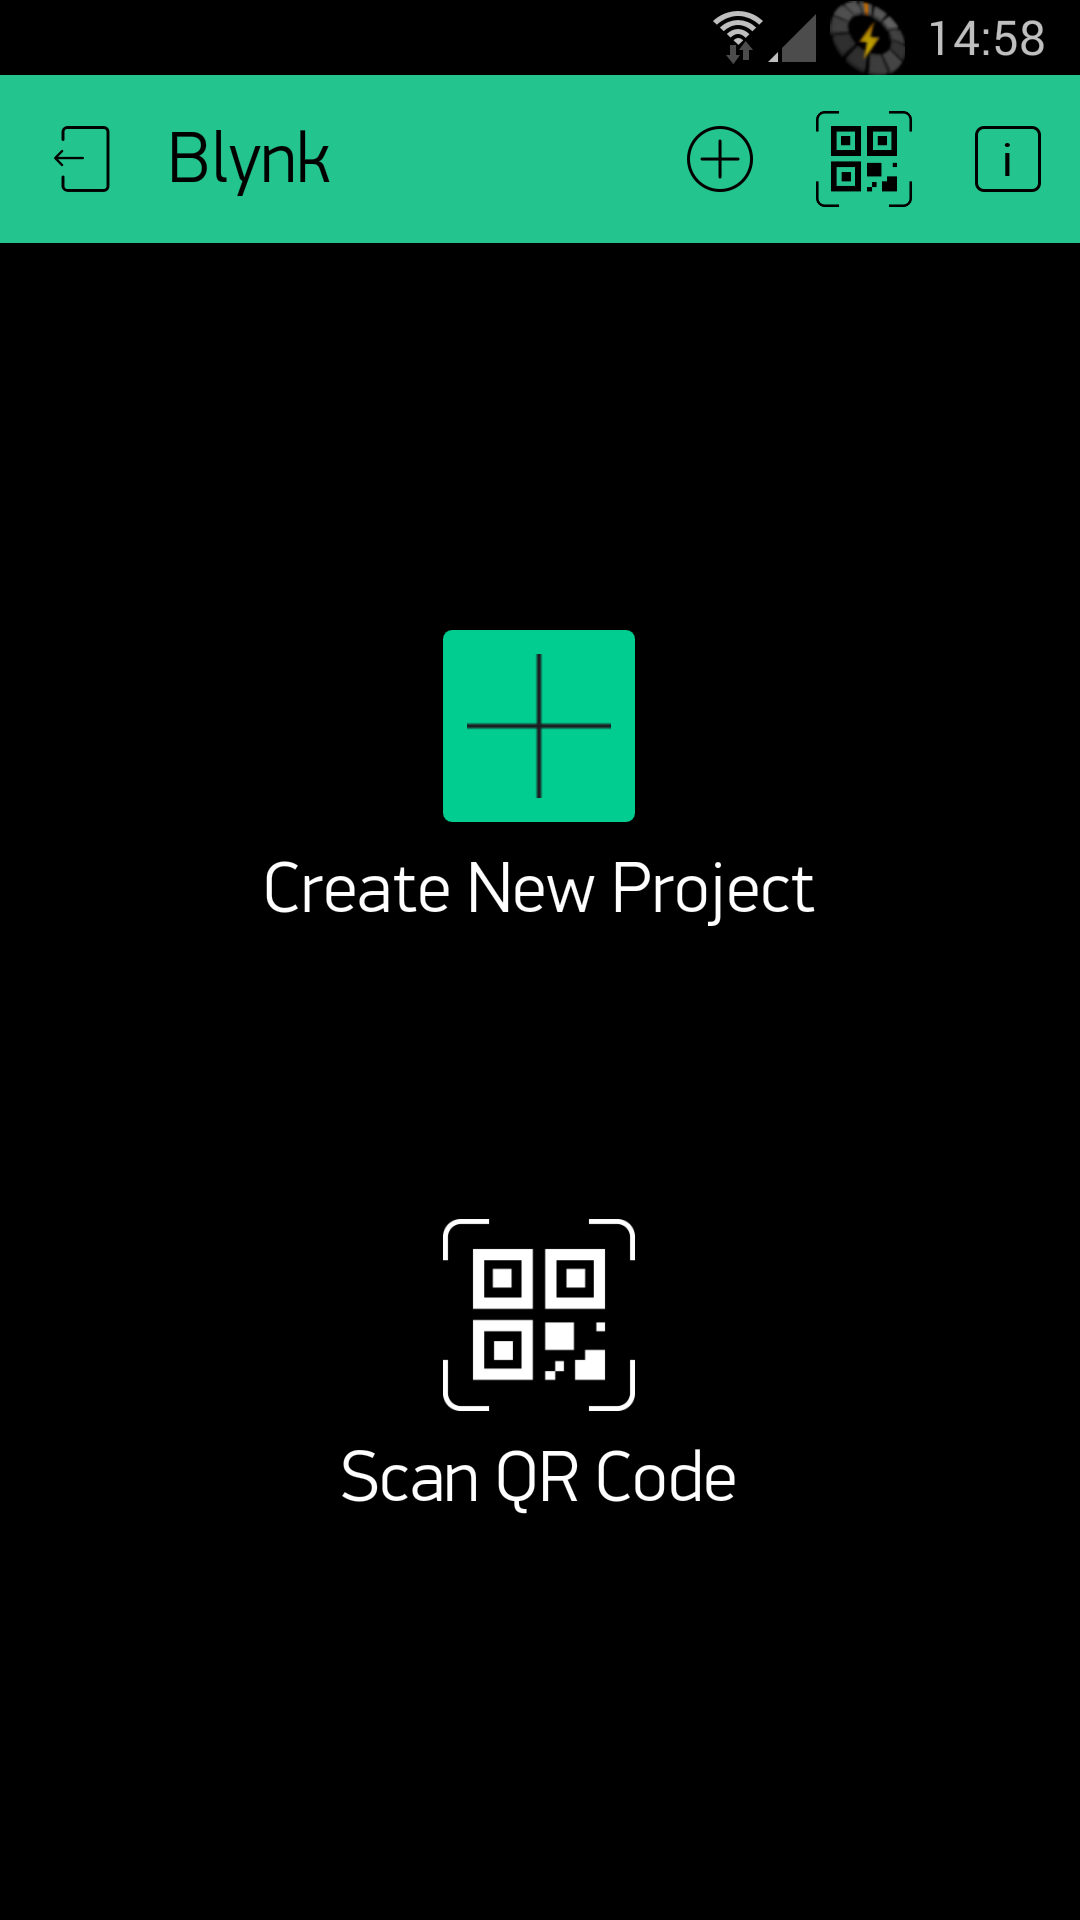
Part 1Run the APP and continue to Signup for an account (you will need this for authentication). Click on the "Create New Project" selection to start the process. Name your project and on the Hardware Model choose ESP8266 (there are many other selections including Arduino, Raspberry Pi, etc)
It will create an "Auth Token" which its best to straight away email to your self as you need to paste this into your ESP8266 code later.
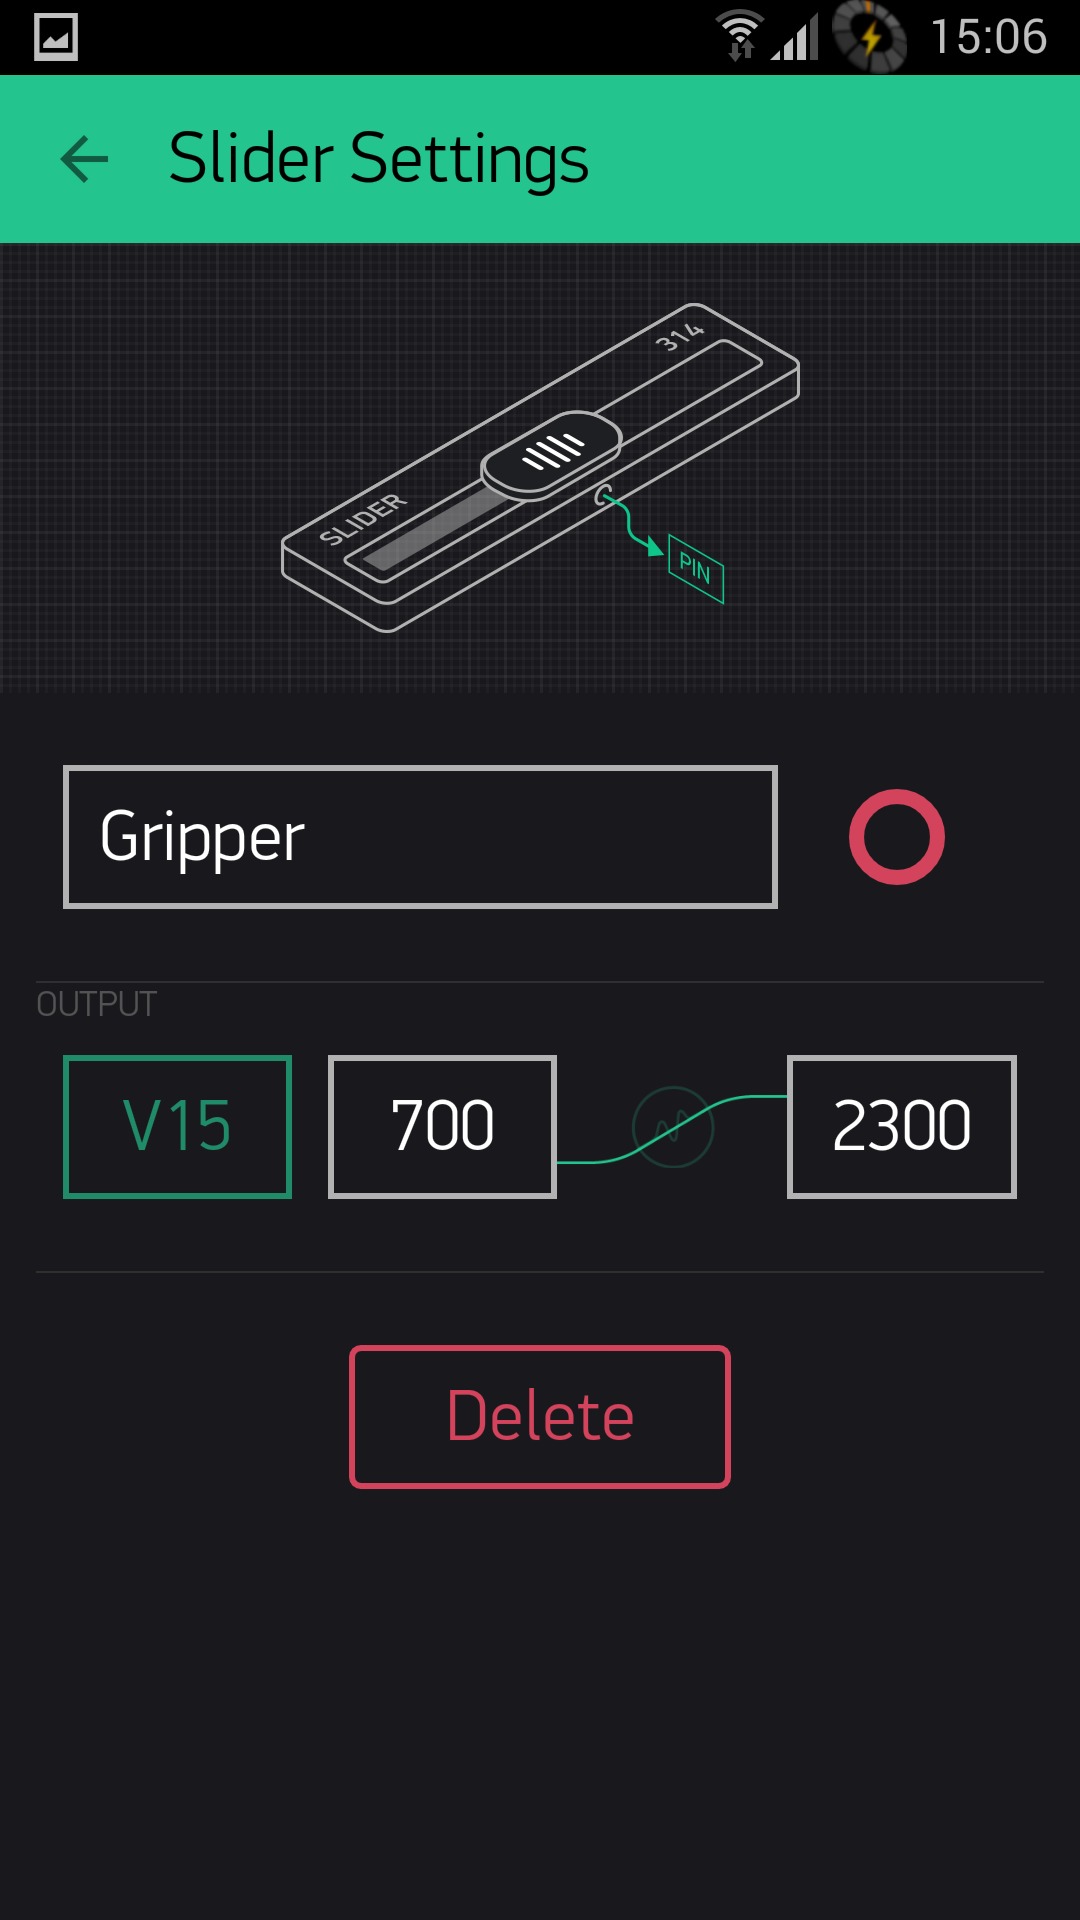
Next a blank screen will be shown which confused me at first until I discovered that a "Right Swipe" of the screen brings in the "Widget Box"
In our example we will set it up to control a Servo (5 actually) using an ESP8266.


_3u05Tpwasz.png?auto=compress%2Cformat&w=40&h=40&fit=fillmax&bg=fff&dpr=2)
Comments