

Hardware components | ||||||
 |
| × | 1 | |||
| × | 1 | ||||
Software apps and online services | ||||||
| ||||||
This is an article about how to connect your Raspberry Pi to your desktop or laptop using Putty, now what is Raspberry Pi and what is Putty. Actually Raspberry Pi which in laymen terms is a small size computer which features a quad-core 64-bit ARM Cortex and the graphics capabilities is provided by the VideoCore IV GPU, where as“Putty” is a open source terminal emulator, SSH and telnet client which help Raspberry Pi to get connected with another computer.
The first time I got the information or rather say education about Putty when my humble and beloved teacher Jeremy Howard of the course fast.ai was using putty to connect to the remote computer during his online live class on Convolutional neural networks.I thought why not used it to connect my laptop with the raspberry pi 3 I own.
Now, you must be asking yourself why I’m reading this at the first place what benefits I’ll get after reading this so let me tell you that:
- if you know how to connect your Raspberry Pi using Putty to your system you don’t need to buy a Raspberry Pi LCD display which cost around 56–58$ (saving a good amount of money).
- you don’t need to everytime connect the HDMI port of the Raspberry Pi to a HDMI to VGA connector to connect it to your desktop.
- And if by any chance if you want to use your Raspberry Pi as a desktop computer for which you need a separate keyboard, a monitor and a mouse. All these requirements are reduce to a laptop with Putty installed in it and a powered Raspberry Pi with SSH enable on it.
If you want to know more about Putty you can check here, if you want to know more about Raspberry Pi 3 you can check here. So lets start our journey by downloading Putty into our system, to download putty click here.
Step 1After downloading putty from the above source this is the first dialog box you will see.
Click on next:
Make sure there are no red mark on any of the boxes displayed below then press install:
Click on finish, congrats you have finished one part of this article. Go grab some chocolates because you deserve it.
Now this is the dialog box you’ll see when you open putty for the first time:
Now, let me halt you here. Lets move to Raspberry Pi now:
I’ll show you how to connect only one time, (you don’t have to do it again) Raspberry Pi with keyboard, mouse, HDMI to VGA connector and a monitor.
Now the next step is in two fold, first click on red color Pi icon which is at the top leftmost corner of the monitor and then click on preferences and then click on Raspberry Pi configuration.
Then go to interfaces block and click on enabled SSH and press ok then reboot your Pi. This can be seen in the snapshot below:
Once you reboot your Pi, now its time to know your Pi IP address which can be found by sudo ifconfig command then if you are using a LAN connection straight away look at inet addr under lan0 and if you are using wireless connection like me straight away look on inet addr under wlan0 and just write down the IP address somewhere we gonna need it in future.
Now go back to the putty part where I halted you, write down the IP address which you just noted down on the space below Host Name on the dialog box give a name to it under saved session.click on save and then click on open.
And then it will ask you for your username and password the default user is pi, and the password is raspberry. Which you can change later.
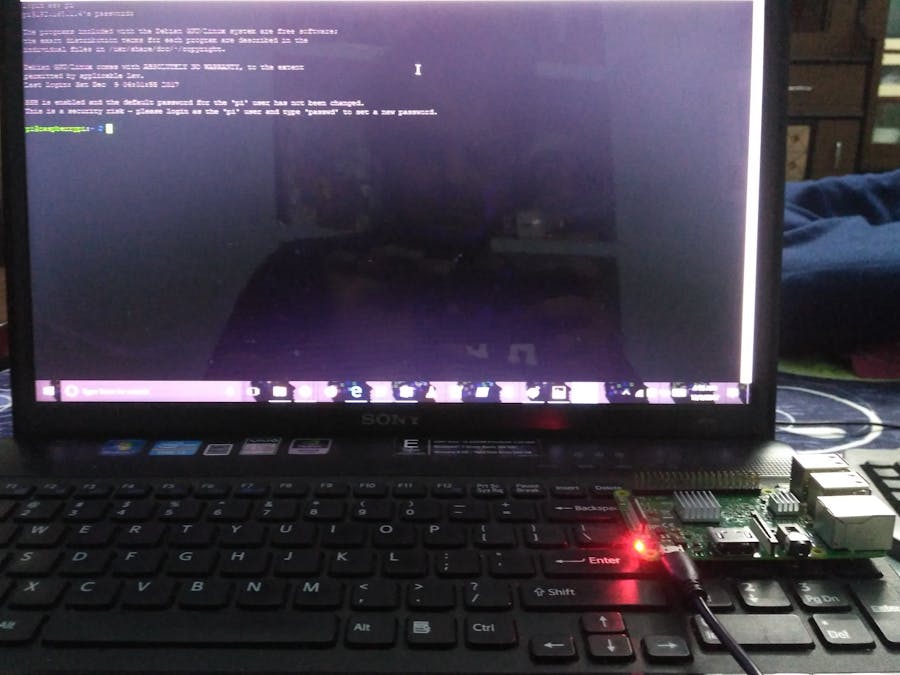
Congratulations, if you successfully followed these steps you must have now a SSH secure shell connection between your Pi and your laptop. Let me show you how my setup looks. You can cross verify with the filename which you can see in both of the systems:
Now ,you have come to the penultimate step of this whole exercise of connecting you Pi with your laptop or desktop.
So therefore click on the Putty icon, click on the saved session in my case I gave it a name as “rasp1” then click on load, once you click on the name of your saved session the IP address will appear automatically under the Host name bar and then click on open, it will ask you your username and password and once you give it you are good to go and then you can freely use your pi without any keyboard, mouse or any connector.
Let me show through this snapshot what all I mentioned above:
As I promised that with Putty you only require your laptop and Raspberry Pi. Here you can see my Raspberry Pi 3 is connected to my laptop using Putty and you can see me to at my laptop screen hiii!!
If you guys went through all the steps and were able to achieve the same result as you can see on the image above seriously you deserve a chilled beer but if you are on a low carb diet like me drink hot water with combination of honey and lemon. Cheers! You deserve it .


Comments