
Hardware components | ||||||
_baVEVgguW1.jpg?auto=compress%2Cformat&w=48&h=48&fit=fill&bg=ffffff) |
| × | 1 | |||
 |
| × | 1 | |||
| × | 1 | ||||
| × | 1 | ||||
| × | 1 | ||||
| × | 1 | ||||
 |
| × | 1 | |||
| × | 3 | ||||
| × | 1 | ||||
| × | 1 | ||||
Software apps and online services | ||||||
 |
| |||||
 |
| |||||
Hand tools and fabrication machines | ||||||
| ||||||
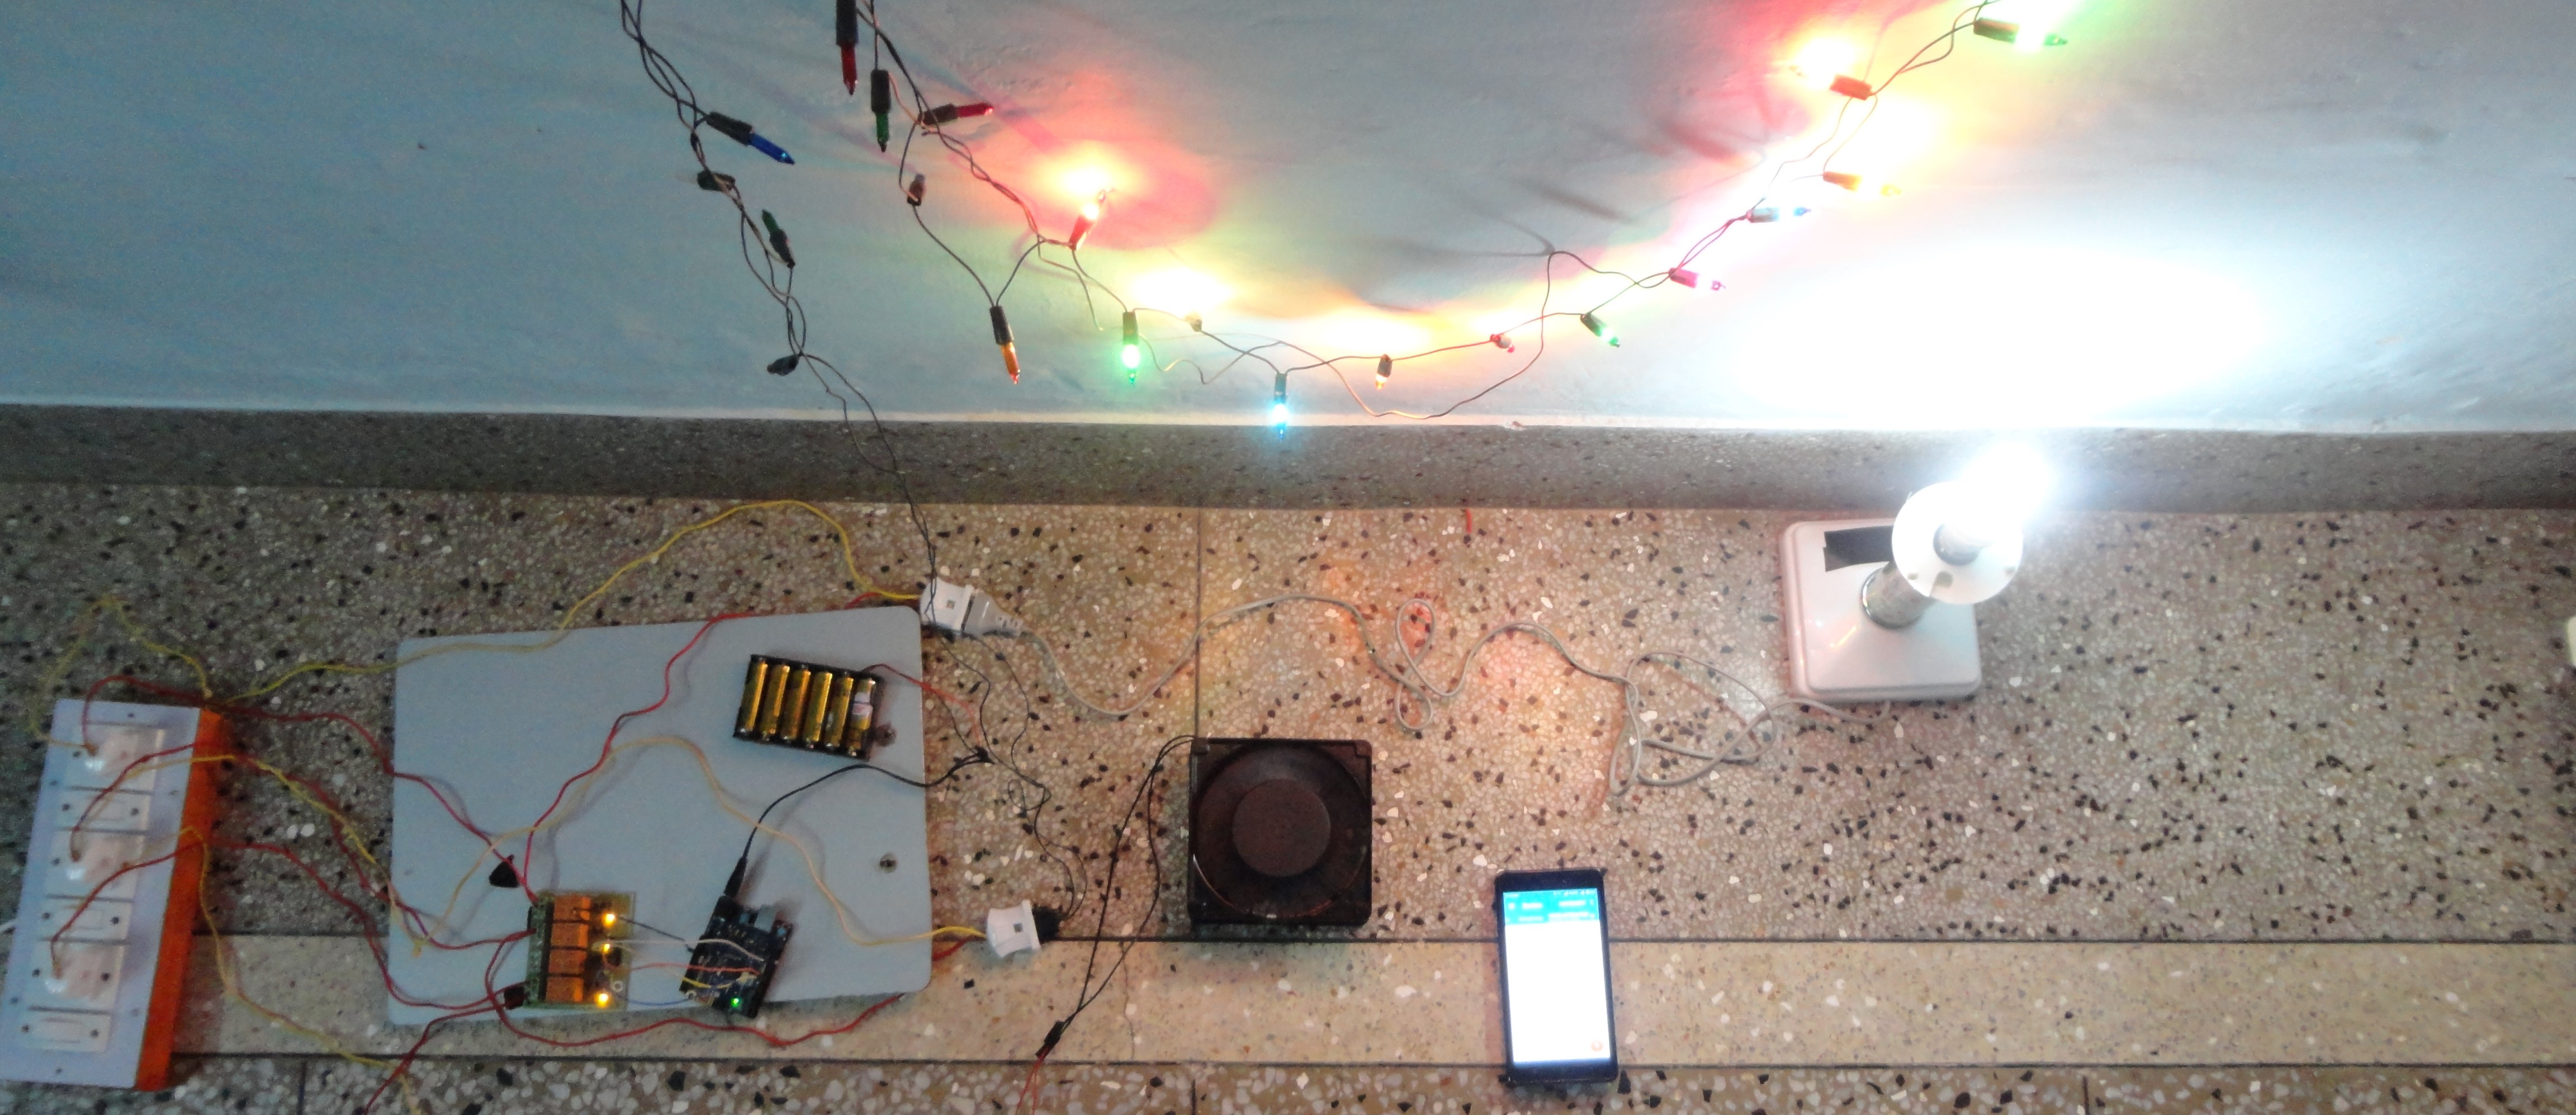
This project is about controlling Christmas lights, a 5 Watt CFL, and a fan through Arduino/Genuino 101 consisting of Intel Curie module using Bluetooth Low Energy through a Android Smartphone. The components which are used in developing this project for e.g. a 5 V 4 channel Relay, male-female pins are cheap and are easily available at any hardware shop.
The video below show how I control the above mentioned appliances:
Medium link to view the article I wrote on my project:
https://medium.com/@naveenmanwani/lets-make-home-automation-easy-831cda460412
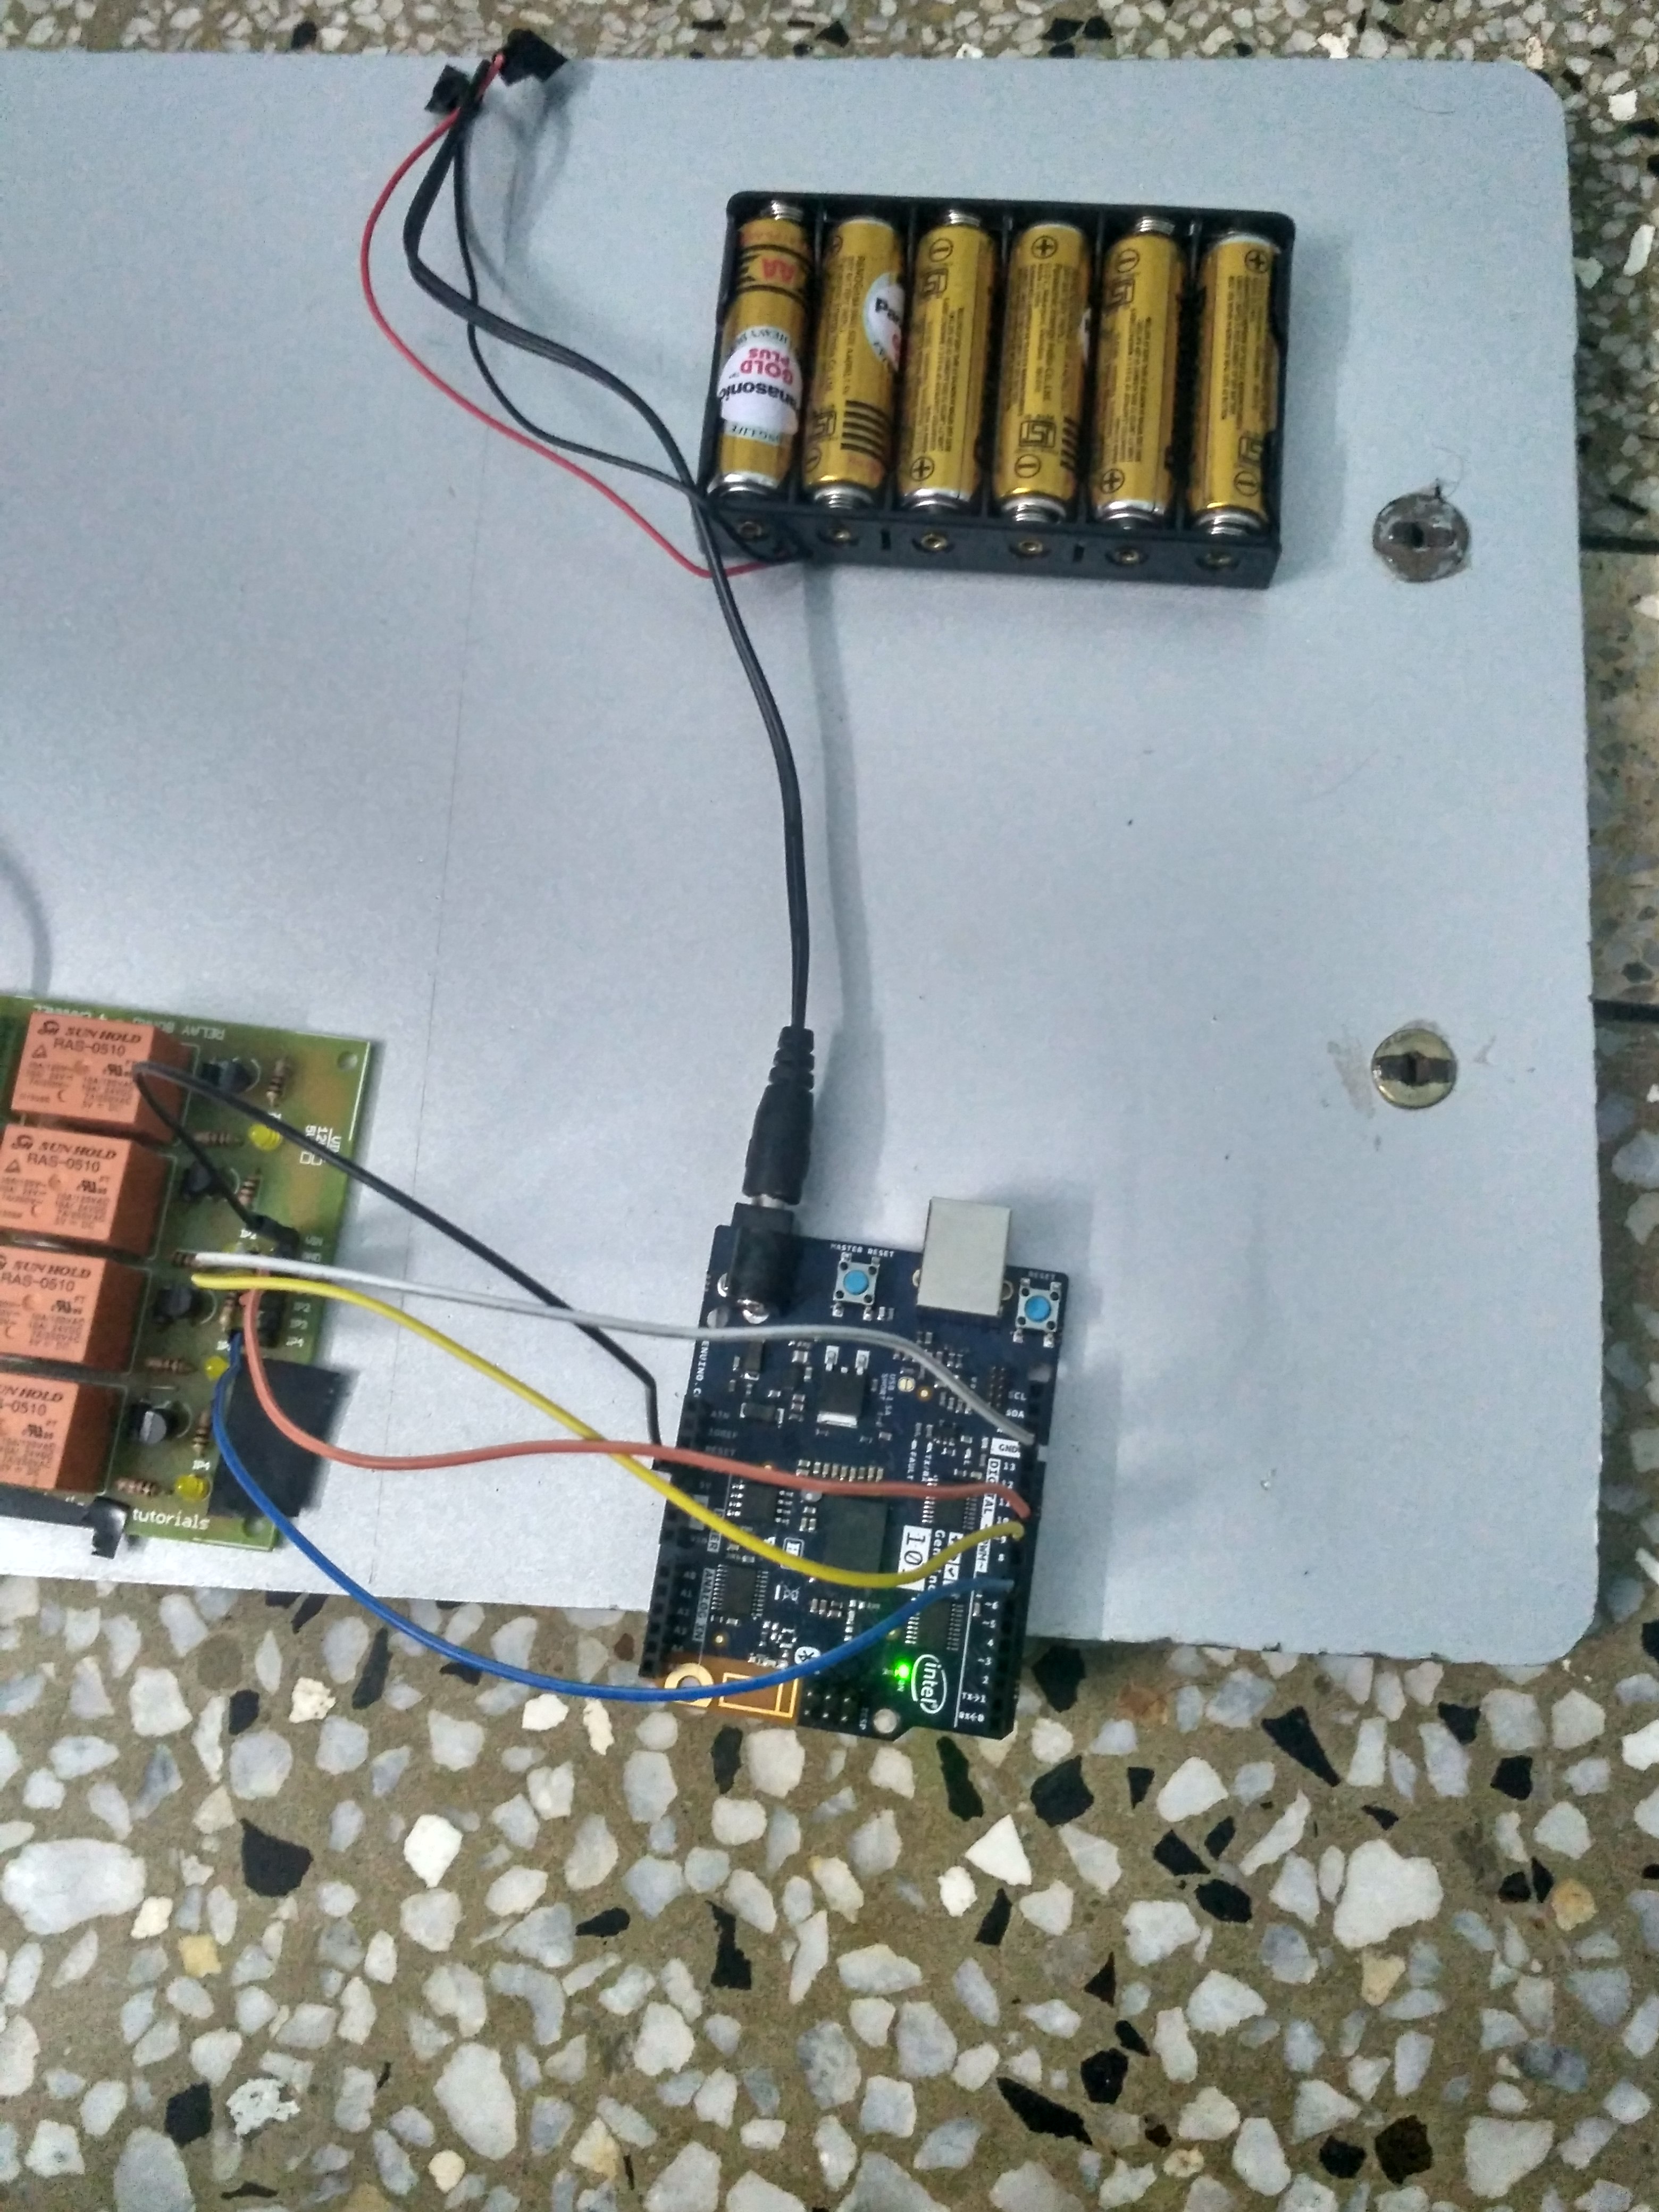
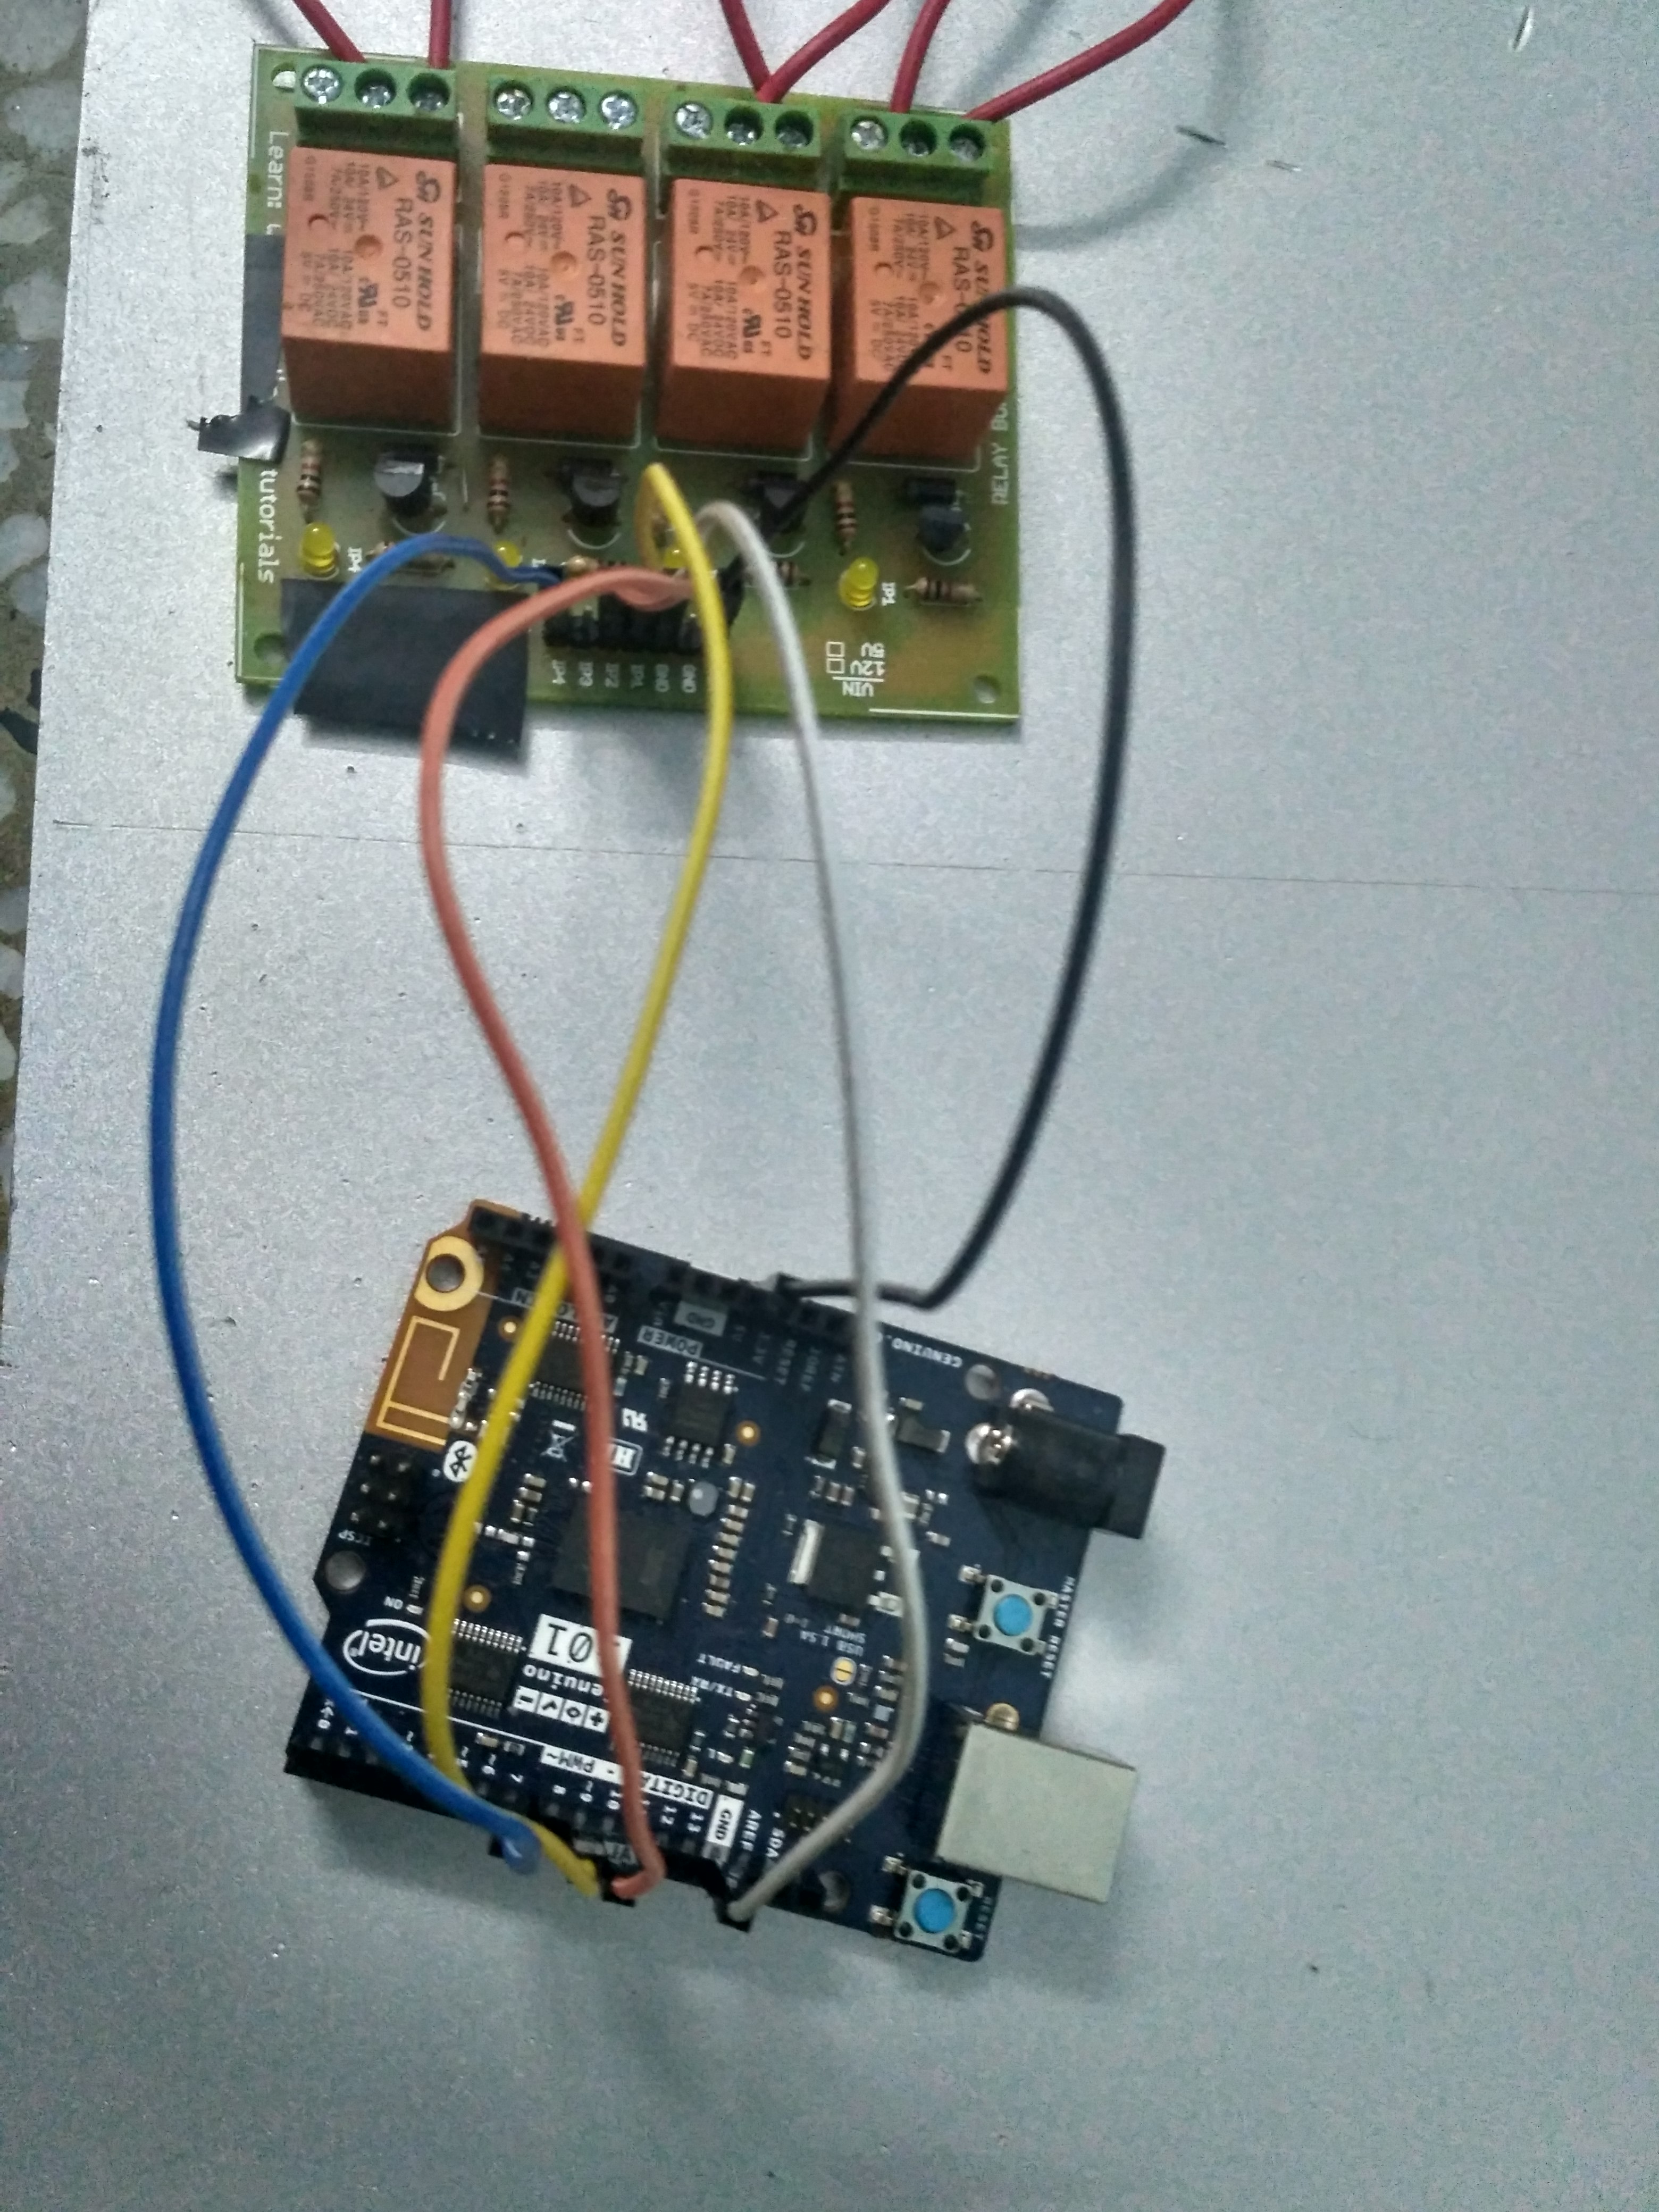
Step 1:connections from Arduino/Genuino 101 to 5 V 4 channel relay board
This section demonstrate which digital pins i used to connect to the various relay channels of the relay board
1.black pin is connected to Vin which is connected to 5 V on Arduino board
2.white pin is connected to ground of relay to the ground of Arduino board
3.pin 9 is connected to 1 channel of the relay board
4.pin 10 is connected to 2 channel of the relay board
5.pin 7 is connected to 4 channel of the relay board ,you can connect it to channel 3 also.

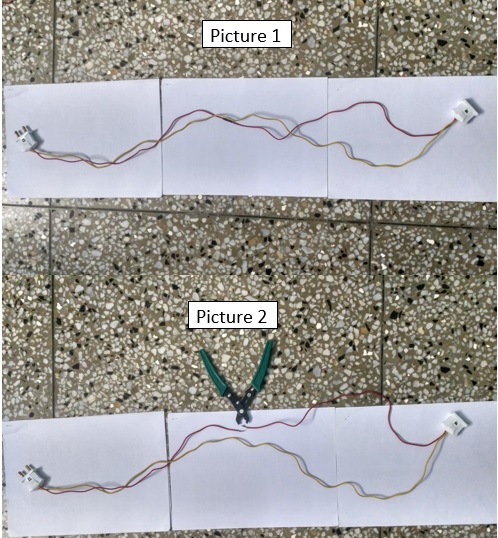
Step 2: how to prepare round pin male and female for connecting with relay board
the Image below consist of two pictures
1. Picture 1 show how i made a pair of male and female round pins for connecting it to relay channel on the relay board
2. Picture 2 show how using wire strip cutter i cut the red wire into two half.
In next step i'll show you which half goes where
1. Picture 1 show how i made a pair of male and female round pins for connecting it to relay channel on the relay board
2. Picture 2 show how using wire strip cutter i cut the red wire into two half.
In next step i'll show you which half goes where
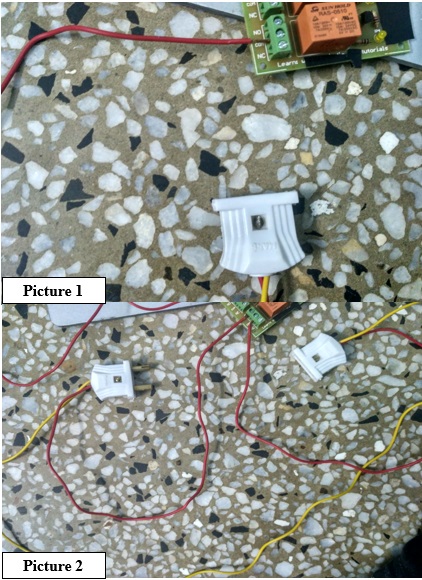
Step 3:which pins ends goes where
Since, in previous step i had shown cutting of the red wire into two half ,now in this step i'll show you which half goes where
In the image i have demonstrated two very specific connections:
1. Picture 1 show that how i connect female pin end to com port of the relay channel on the relay board
2. Picture 2 show that how i connect male pin to "NO" (normally open) port of the relay channel on the relay board
i made 3 such pairs ,because i need to control 3 appliances.

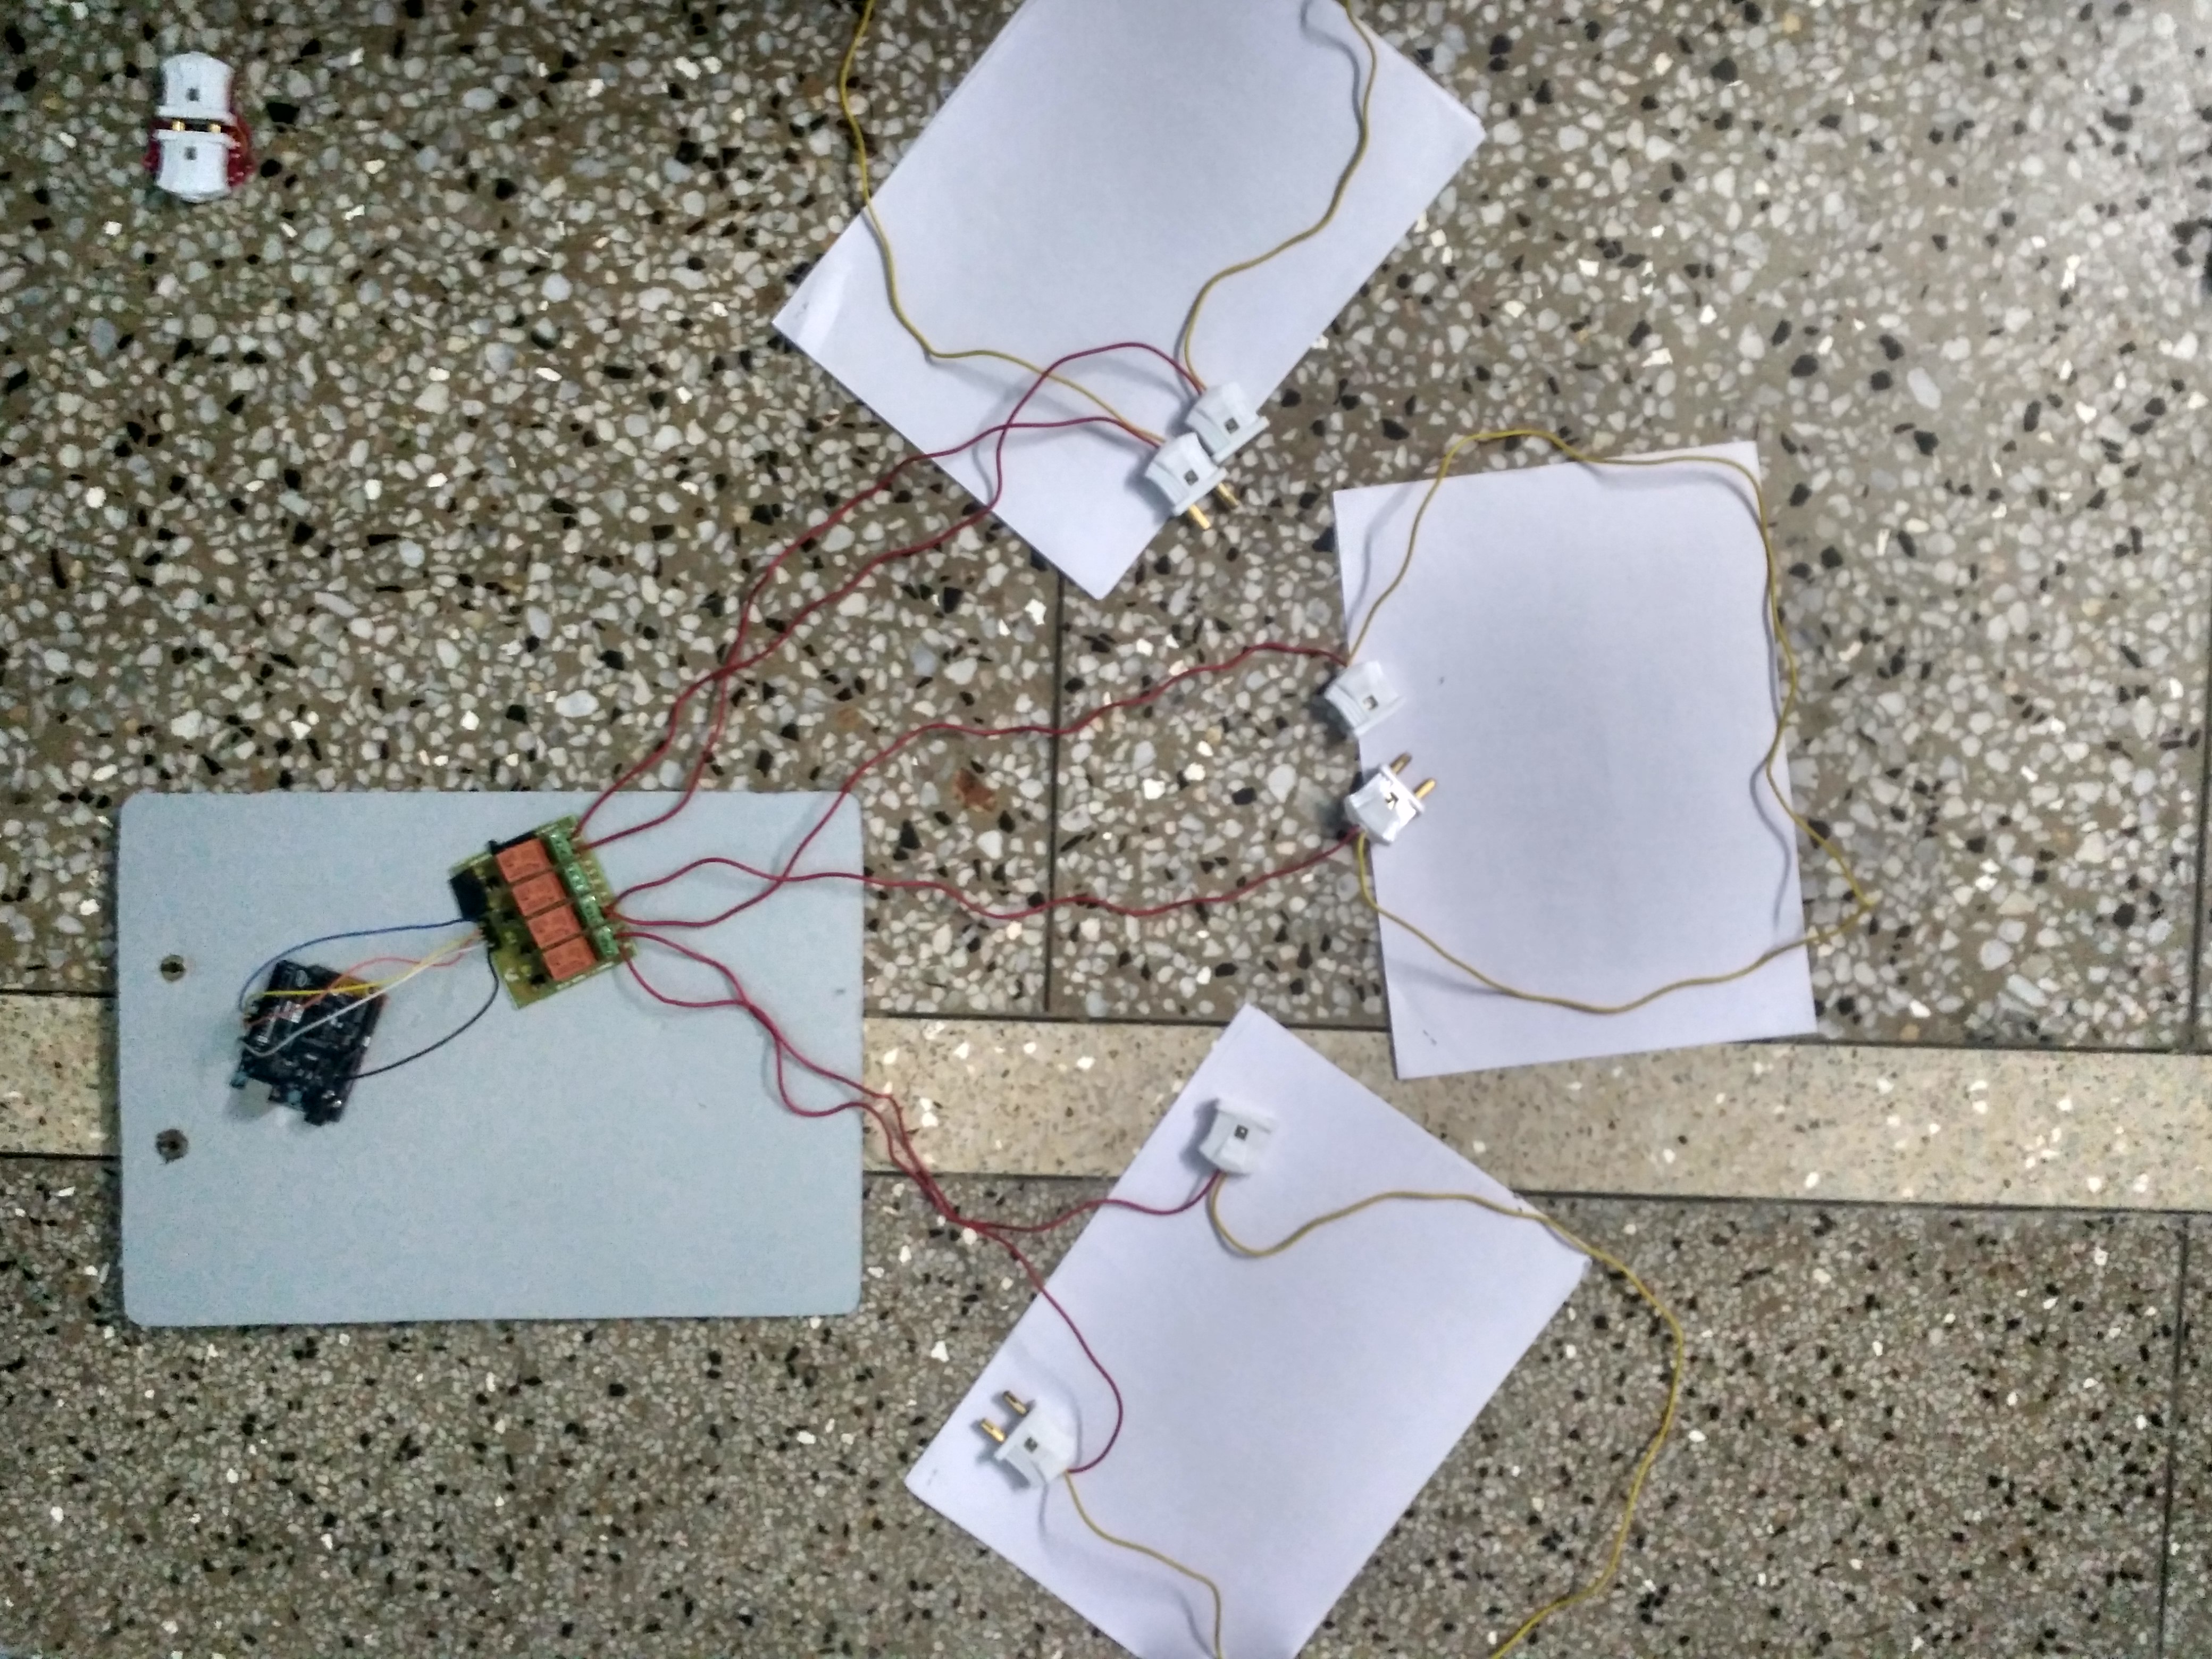
Step 4 : Final look how the setup from relay board to various round pins
in this step ,i have shown the full set up of connection from various relay channels of the relay board to the different round pins male and female
Step 5: Choosing the Power Source
instead of using USB jack ,to make this project robust i have used 6 AA batteries of 1.5 V each and connect it to the power jack
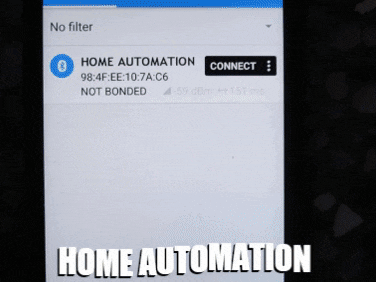
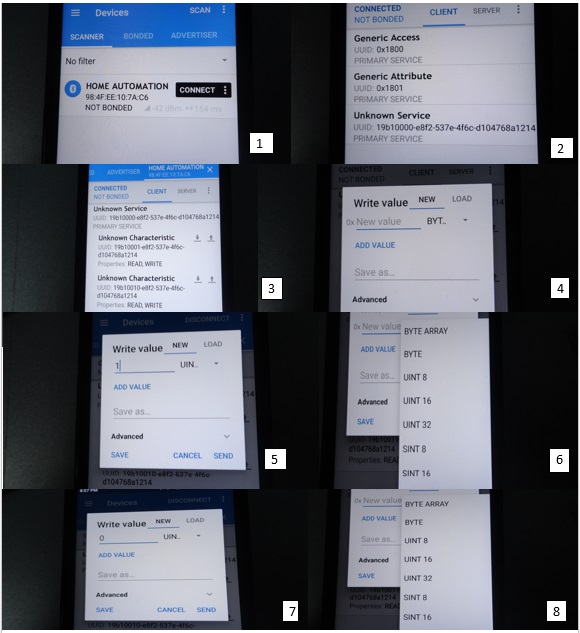
Step 6: How to use nRF connect for mobile app
let me explain each image
1. it shows the first screen you'll see after you open the app and click on scan which is at the top right most corner,Home Automation is the name of the service which i had given through code.please click on CONNECT.
2. after you click on CONNECT,please click on Unknown Service.
3. you must be seeing 3 characteristics on the image, characteristics is equivalent to the appliances you want to control ,i want to control 3 that's why 3 characteristics.
4. this dialog box will appear if you click on up arrow of any of the characteristic.
5. if want to switch ON any of the appliance type 1 on the empty line just below where Write Value is mention .
6. after typing 1, choose UINT 8 from the list beside the space where you typed 1.
7. if want to switch OFF any of the appliance type 0 on the empty line just below where Write Value is mention .
8. after typing 0, choose UINT8 from the list beside the space where you typed 0.

9 projects • 9 followers
Electronics & Communication Engineer,machine learning and deep learning enthusiast |Fast.ai Fellowship,Mentor @ coursera deeplearning.ai


Comments