

Hardware components | ||||||
 |
| × | 1 | |||
 |
| × | 1 | |||
 |
| × | 1 | |||
 |
| × | 1 | |||
Software apps and online services | ||||||
 |
| |||||
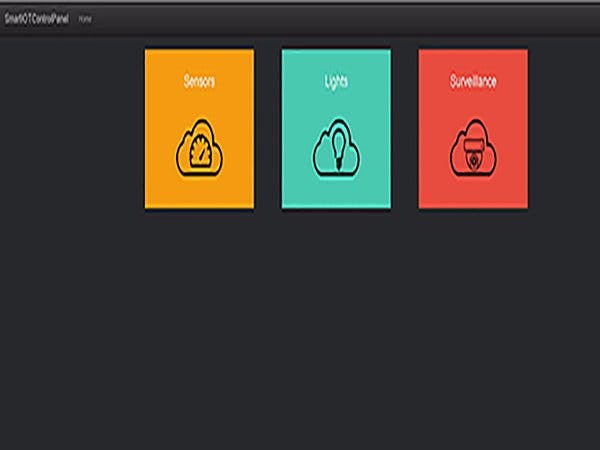
Hello all, I am writing about this project as a follow-up to my previous project: DIY Smart IOT control Panel.
In the previous project, I wrote about how we create a smart IOT device using Raspberry Pi Zero W and how to develop a web-based application to control and get status from your devices.
In this project, I am going to explain how we add an Amazon Alexa Skill to your smart devices and make them respond to your commands.
List of Software Needed- Python – https://docs.python.org/3/tutorial/
- Mosquito MQTT – https://mosquitto.org/
- Pahoo MQTT Client – http://www.eclipse.org/paho/
- HTML5, JavaScript, Pahoo JS – https://www.w3schools.com/
https://github.com/aterry35/SmartIOTControPanel
YouTube Video:
List of Hardware Used in the Below Example- 2 Channel Relay board (Used for Lights)
- USB webcam used for surveillance
- Amazon Echo Dot
- Client / User End: HTML 5 + Bootstrap + MQTT Pahoo Client JavaScript, Amazon Alexa Skill kit
- Device End: Python + Pahoo MQTT, Python Flask Ask library, ngrok.
- IOT Broker: Mosquito IOT Broker + Linux Ubuntu 16.04
- IOT Broker name: my personal VPS IOT Broker. NOTE: You can buy your VPS and configure the Mosquito MQTT Broker or free Broker like mosquito.org or hive.com, etc.
- Mqttport Number: 1883
- Web-socket Port Number: 9001
Step to Setup the IOT Broker and Client: Please refer to my previous post and my source code Git: "DIY Smart IOT control Panel".
To Create Alexa Skill for your Device:Once Python is installed in your Raspberry Pi Zero W, you may also need to install PIP (the recent Raspbian images comes with the PIP installed). Once Python and PIP are installed, open a terminal, and type the below command to install Flask-Ask. Note: You might need to precede it with sudo on Unix if you get permission errors.
pip install flask-ask
Now create a Python script to communicate with our Web controller when a Amazon Alexa command is given; the Script makes your device respond to your voice commands.
from sense_hat import SenseHat
import paho.mqtt.client as mqtt
import logging
from random import randint
from flask import Flask, render_template
from flask_ask import Ask, statement, question, session
sense = SenseHat()
# The callback for when the client receives a CONNACK response from the server.
def on_connect(client, userdata, flags, rc):
	print("Connected with result code "+str(rc))
app = Flask(__name__)
ask = Ask(app, "/")
logging.getLogger("flask_ask").setLevel(logging.DEBUG)
@ask.launch
def smartcontroller_launch():
   welcome_msg = render_template('welcome')
   return question(welcome_msg)
@ask.intent("lightintent",mapping={'status': 'status'})
def smartcontroller_light(status):
   if status=='on':
       sense.show_message("ON")
	response_msg = render_template('yesvalue')
	return statement(response_msg)
   elif status=='off':
	sense.show_message("OFF")
	response_msg = render_template('novalue')
	return statement(response_msg)
   else:
	sense.show_message("ELSE")
	response_msg = render_template('wrongvalue')
	return statement(response_msg)
@ask.intent("sensorintent",mapping={'status': 'status'})
def smartcontroller_sensors(status):
   if status=='get':
       client = mqtt.Client(transport="websockets")
	client.on_connect = on_connect
	client.connect("yout IOT Broker Address", 9001, 60)
	client.publish("sensorpage","sensors",qos=0,retain=False)
	client.disconnect()
	Sensor_response_msg = render_template('openvalue')
	return statement(Sensor_response_msg)
   else:
	Sensor_response_msg = render_template('wrongvalue')
	return statement(Sensor_response_msg)
@ask.intent("cameraintent",mapping={'status': 'status'})
def smartcontroller_camera(status):
   if status=='show':
       client = mqtt.Client(transport="websockets")
	client.on_connect = on_connect
	client.connect("yout IOT Broker Address", 9001, 60)
	client.publish("camerapage","camera",qos=0,retain=False)
	client.disconnect()
	Sensor_response_msg = render_template('showvalue')
	return statement(Sensor_response_msg)
   else:
	Sensor_response_msg = render_template('wrongvalue')
	return statement(Sensor_response_msg)
if __name__ == '__main__':
   app.run(debug=True)
Once your script is done, you need a speech template file as follows:
welcome: Welcome to smartcontroller. tell me the commands for smartcontroller ?
yesvalue: The light is turned ON
novalue: The Light is turned OFF
wrongvalue: sorry couldnt execute the request you asked
openvalue: Sensor page is opened
showvalue: camera page is opened
Save the above content as "template.yaml". Once both processes are done, run your script by:
sudo python
Now we need to run a tunneling service to expose your smart device, done with Raspberry Pi Zero W to Internet, for which we need to install ngrok.
A development server launches on http://127.0.0.1:5000/, and the Skill is almost ready to configure in Amazon's Developer Portal.
Before configuration, the Skill must run behind a public HTTPS server or AWS Lambda function. Setting up either would be impediments right now. Fortunately, there's ngrok to the rescue!
NgrokNgrok is a command-line program that opens a secure tunnel to localhost and exposes that tunnel behind an HTTPS endpoint. Ngrok makes it so Alexa can talk to your code right away. Follow the next three steps to generate a public HTTPS endpoint to 127.0.0.1:5000.
- Download the ngrok client for your operating system.
- Unzip it to a location you can remember.
- Open up a new terminal, cd into the location, and enter on Raspberry Pi Zero W:
./ngrok http 5000
Ngrok displays a status message similar to the one below. Note: The status message you see will be different.
ngrok by @inconshreveable Tunnel Status online Version 2.0.25/2.1.1 Region United States (us) Web Interface http://127.0.0.1:4040 Forwarding http://20ba2c6f.ngrok.io -> localhost:5000 Forwarding https://20ba2c6f.ngrok.io -> localhost:5000
Make note of the last HTTPS endpoint (in the example above, it's: https://20ba2c6f.ngrok.io). Now, let's configure the Skill in Amazon's developer portal.
Step 1
- Login to Amazon Developer console and select Alexa from the top tab.
Step 2
- Click on Alexa Skills kit Get Started.
- And Select Add Skill on the second window.
Step 3
- Set the Skill Name to "smartcontroller" and the Invocation Name to the word(s) you want to use to activate the skill.
- Click Next to continue.
Step 4
- Select Interaction Model and it will take you the the Amazon Alexa Skill Kit.
Step 5
- Add the intents needed for the project "smartcontroller."
- Add the following intents and the slots for it:
{
     "intents": [{
       "intent": "sensorintent",
       "slots": [{
           "name": "status",
           "type": "REQUEST_CONTROL"
       }]
  "intent": "lightintent",
       "slots": [{
           "name": "status",
           "type": "REQUEST_CONTROL"
       }]
  "intent": "cameraintent",
       "slots": [{
           "name": "status",
           "type": "REQUEST_CONTROL"
       }]
   }]
}
Step 6
- Add the below slot values to the
REQUEST_CONTROL: on, off, get, show.
- Copy/paste the following into the Sample Utterances box:
smartcontroller turn the light {status}
smartcontroller  {status} the sensor data
smartcontroller  {status} me the camera page
- Click on Save and then Next.


Comments