This is the cheap soap dispenser while im learning arduino :). As the picture you saw, it's one year old :)
note from bellow schematic:
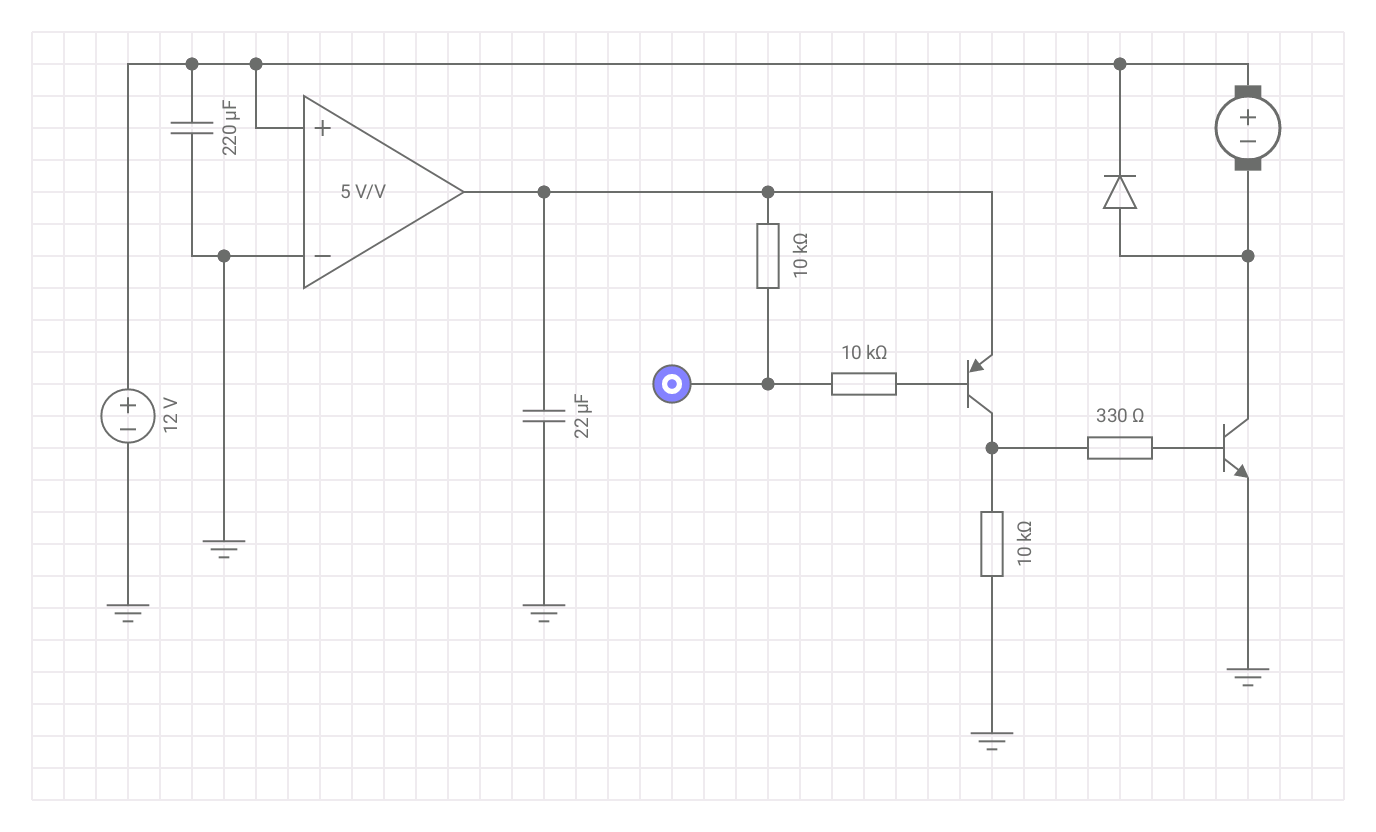
- there are two version of e18-d80nk, the one using for the indoor only(pnp) and the others can be using for the both indoor and out door(npn), the one the the schema is the npn
- the 'logic source' is the output from primitxi e18 d80nk. You could replace this component with a fisheye sensor which support digital output.
- the opamp in the schema will be replace by the lm7805, which will provide +5v for the arduino and the sensor.
- cut down the wire output from pnp then connect it to d2 of arduino, we using this pin for the input, and then connect the d8 from arduino to 330R to trigger npn transitor, arduino just process for the time of pump will active, you count even using attiny13 to replace the arduino
- in the document about pump motor, it can be consume up to 2amples, when im measure the pump with no load it consume 250ma, so im using 1n4007 & d882 transittor, you could replace 1n4007 with 2n4407 for the safe, and even connect the capacitor paranell to the diode.
- some time the sensor trigger at the time you provide power source to the circuit, what why there is for the counter>1, it will ignore the first time trigger
- the main reason to choosing the interupt wake up by 'FALLING' is to make sure what ever you activate the sensor, the system will wait util the sensor lost the signal, then start the pump. With the small change to the time delay, you could make it preparing a cup of wine :)


Comments