


Hardware components | ||||||
 |
| × | 2 | |||
 |
| × | 2 | |||
 |
| × | 1 | |||
 |
| × | 1 | |||
 |
| × | 1 | |||
 |
| × | 7 | |||
Software apps and online services | ||||||
 |
| |||||
 |
| |||||
Purpose
I decided on this project because I ended up not purchasing the RV with the fan system to adjust (someone else keeps buying them before I can), and because the nice fan at my parents house, they didn't want me to keep messing around with it. So, here we are with recording the temperature of my jeep on the soon to be cold days of winter.
The story (recently rebooted because other things didn't work out) is that I remembered how much I dislike a cold car, especially when it surprises me. The steering wheel is of particular importance because of how cold it is when gripping. I need a system that will show the temperature inside the vehicle so that I can decide if a light pair of gloves will need to be brought out.
Solution
To solve this problem a temperature sensor will be built and power by the car's dc outlet. This sensor will publish the temperature to particle.io. To display the temperature in an easy to read fashion so that I don't have to look at my phone's program to quickly understand my car's temperature situation. Another particle will subscribe to the publishes of the temperature sensor on line and update the circuite to display the temperature on the OLED display.
Bill of Materials- This project takes a resistor, only one, at 10K ohm:
- 7 wires for connections:
- A temperature sensor with surprisingly high results:
- A serial Oled display that gave me so much trouble:
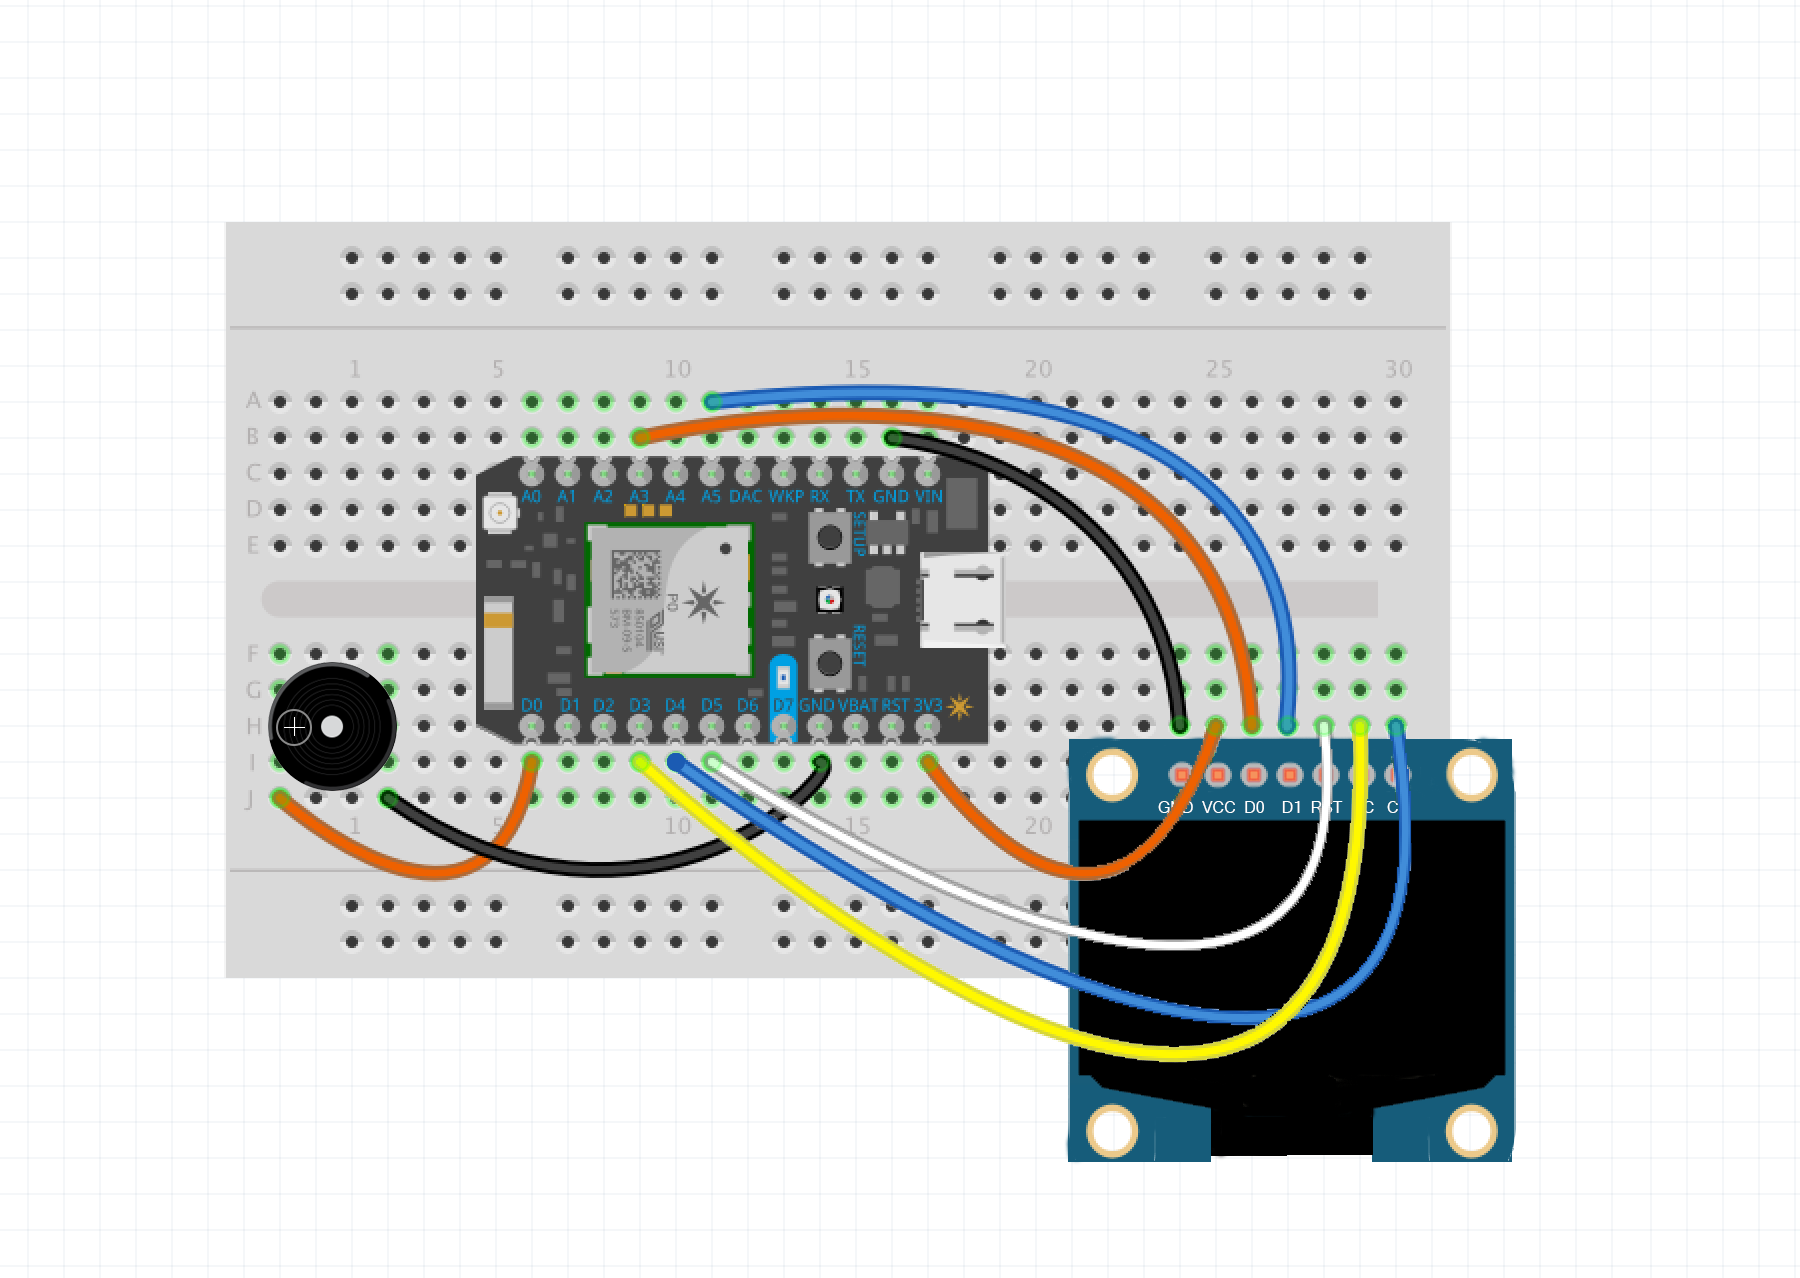
Connection pins
The image below is the schematic of the wiring for the Oled screen.
Making sure which Oled screen you have is very important because their pins vary from each model.
- D4 ⇒ CS
- D3 ⇒ DC
- D5 ⇒ RST
- A5 ⇒ D1
- A3 ⇒ D0
- 3V3 ⇒ VCC
- GND ⇒ GND
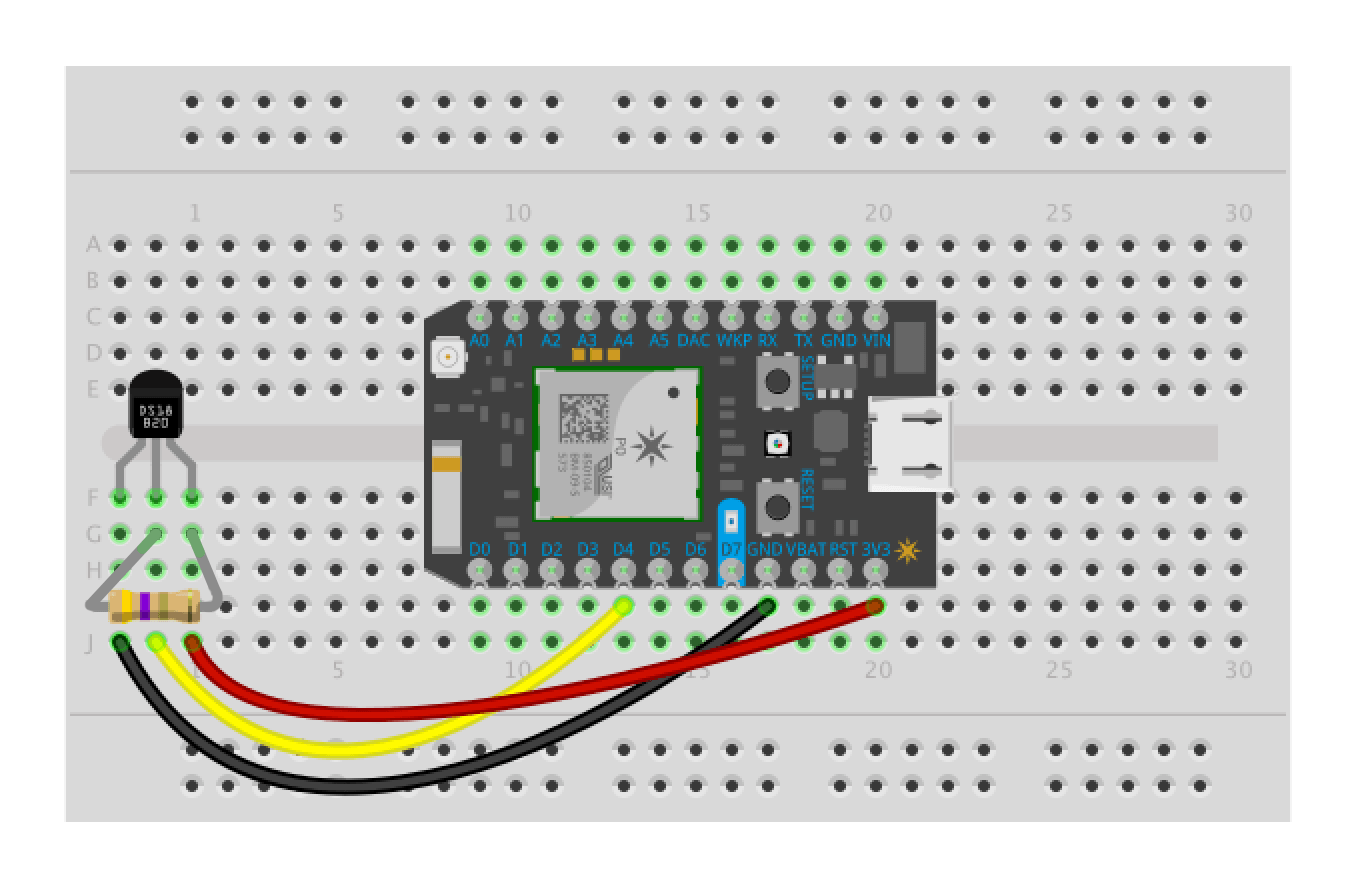
The next schematic is the wiring for the thermometer.
As you can see, it has a 4.7k Ohm resistor. But I used a 10k Ohm resistor because it is within acceptability.
- Pin 1 (GND) ⇒ GND
- Pin 2 (DQ) ⇒ D4
- Pin 3 (VDD) ⇒ 3V3
Shown below is the graph from the logging file of the temperatures.
As you can see there is a spike for no apparent reason. Overall the project has turned out well.
Shown below are two recordings during a cold morning showing 34 degrees Fahrenheit.
The Particle cloud is published with IFTTT. I want to take some time to thank the particle guys; their tutorial was very well done.
LCD


Comments