

Hardware components | ||||||
 |
| × | 1 | |||
| × | 1 | ||||
 |
| × | 1 | |||
| × | 1 | ||||
| × | 1 | ||||
| × | 1 | ||||
Software apps and online services | ||||||
 |
| |||||
 |
| |||||
We’ve controlled lights with touch, we’ve controlled them with a Smartphone. How about controlling them with voice?
Presenting to you the voice-activated light bulb! This project is a smaller version of the bigger home lighting automation projects that is ideal for beginners who wish to make IoT projects and educators who wish to introduce IoT and home automation to their students.
To make this project, we’re going to use the evive IoT kit and code it using PictoBlox - a graphical programming software based on Scratch with advanced capabilities. You can download it from HERE.
Ready to automate light control? Ready. Set. Go!
Step 1: List of SuppliesHardware
- evive
- Relay
- HC05 or HM10
- Bulb
- Bulb Holder
- MDF Sheet
- Electric Wires
- Jumper Cable
- Nuts and Bolts
Software
- PictoBlox- Graphical Programming Software for Kids
- Dabble- The Smartphone Application
Note: All the above electronic components can be found in evive IoT Kit. Also, you can use both HC05 and HM10 if you have installed Dabble in your Android phone and HM10 if Dabble is installed in an iOS device.
Step 2: Fixing the Bulb HolderNote: Before we begin to assemble, you can even use strong cardboard to make the box instead of the MDF sheet or no box at all. As the main aim is to understand the working of the relay and how to control it using a Smartphone.
Let's start by fixing the bulb holder on to the top plate. If you are working with cardboard, you can either fix it by making the hole in the cardboard or can simply glue to the top plate.
As the bulb will need an external power supply, connect electrical wires to it. How will you connect? Take a small piece of electrical wire and insert it into one of the two slots(any slot) of the bulb holder.
Next, take the other electrical wire with a plug on the other side and fix it's one of the two wires(any wire) into the remaining slot.
As the wiring is done under the plate, bring the free ends of both the wires on the top.
Before we attach the relay, let's first understand how does a relay works and why are we using it here?
Relay is an electrical component which acts as a switch. When the relay is ON, the circuit it is connected to is closed and when it is OFF, the circuit is open.
We are adding the relay in this project as it will receive the command we will send from our Smartphone via Dabble and act accordingly.
Step 4: Attaching the RelayWe will be attaching the relay on the top plate.
Now, we will be inserting the two free wires into the two ports out of the three ports of the relay.
We are going to use COM(common) and the NO(Normally Open) port for the connection. NO port will keep the circuit open till the signal is not received to close the circuit.
Insert the electrical wires into these ports.
Note: You can insert any wire into any port(COM or NO).
Step 5: Completing the BoxAttach all the other side to the top plate using M3 nuts and bolts. Simply make a box out of the cardboard.
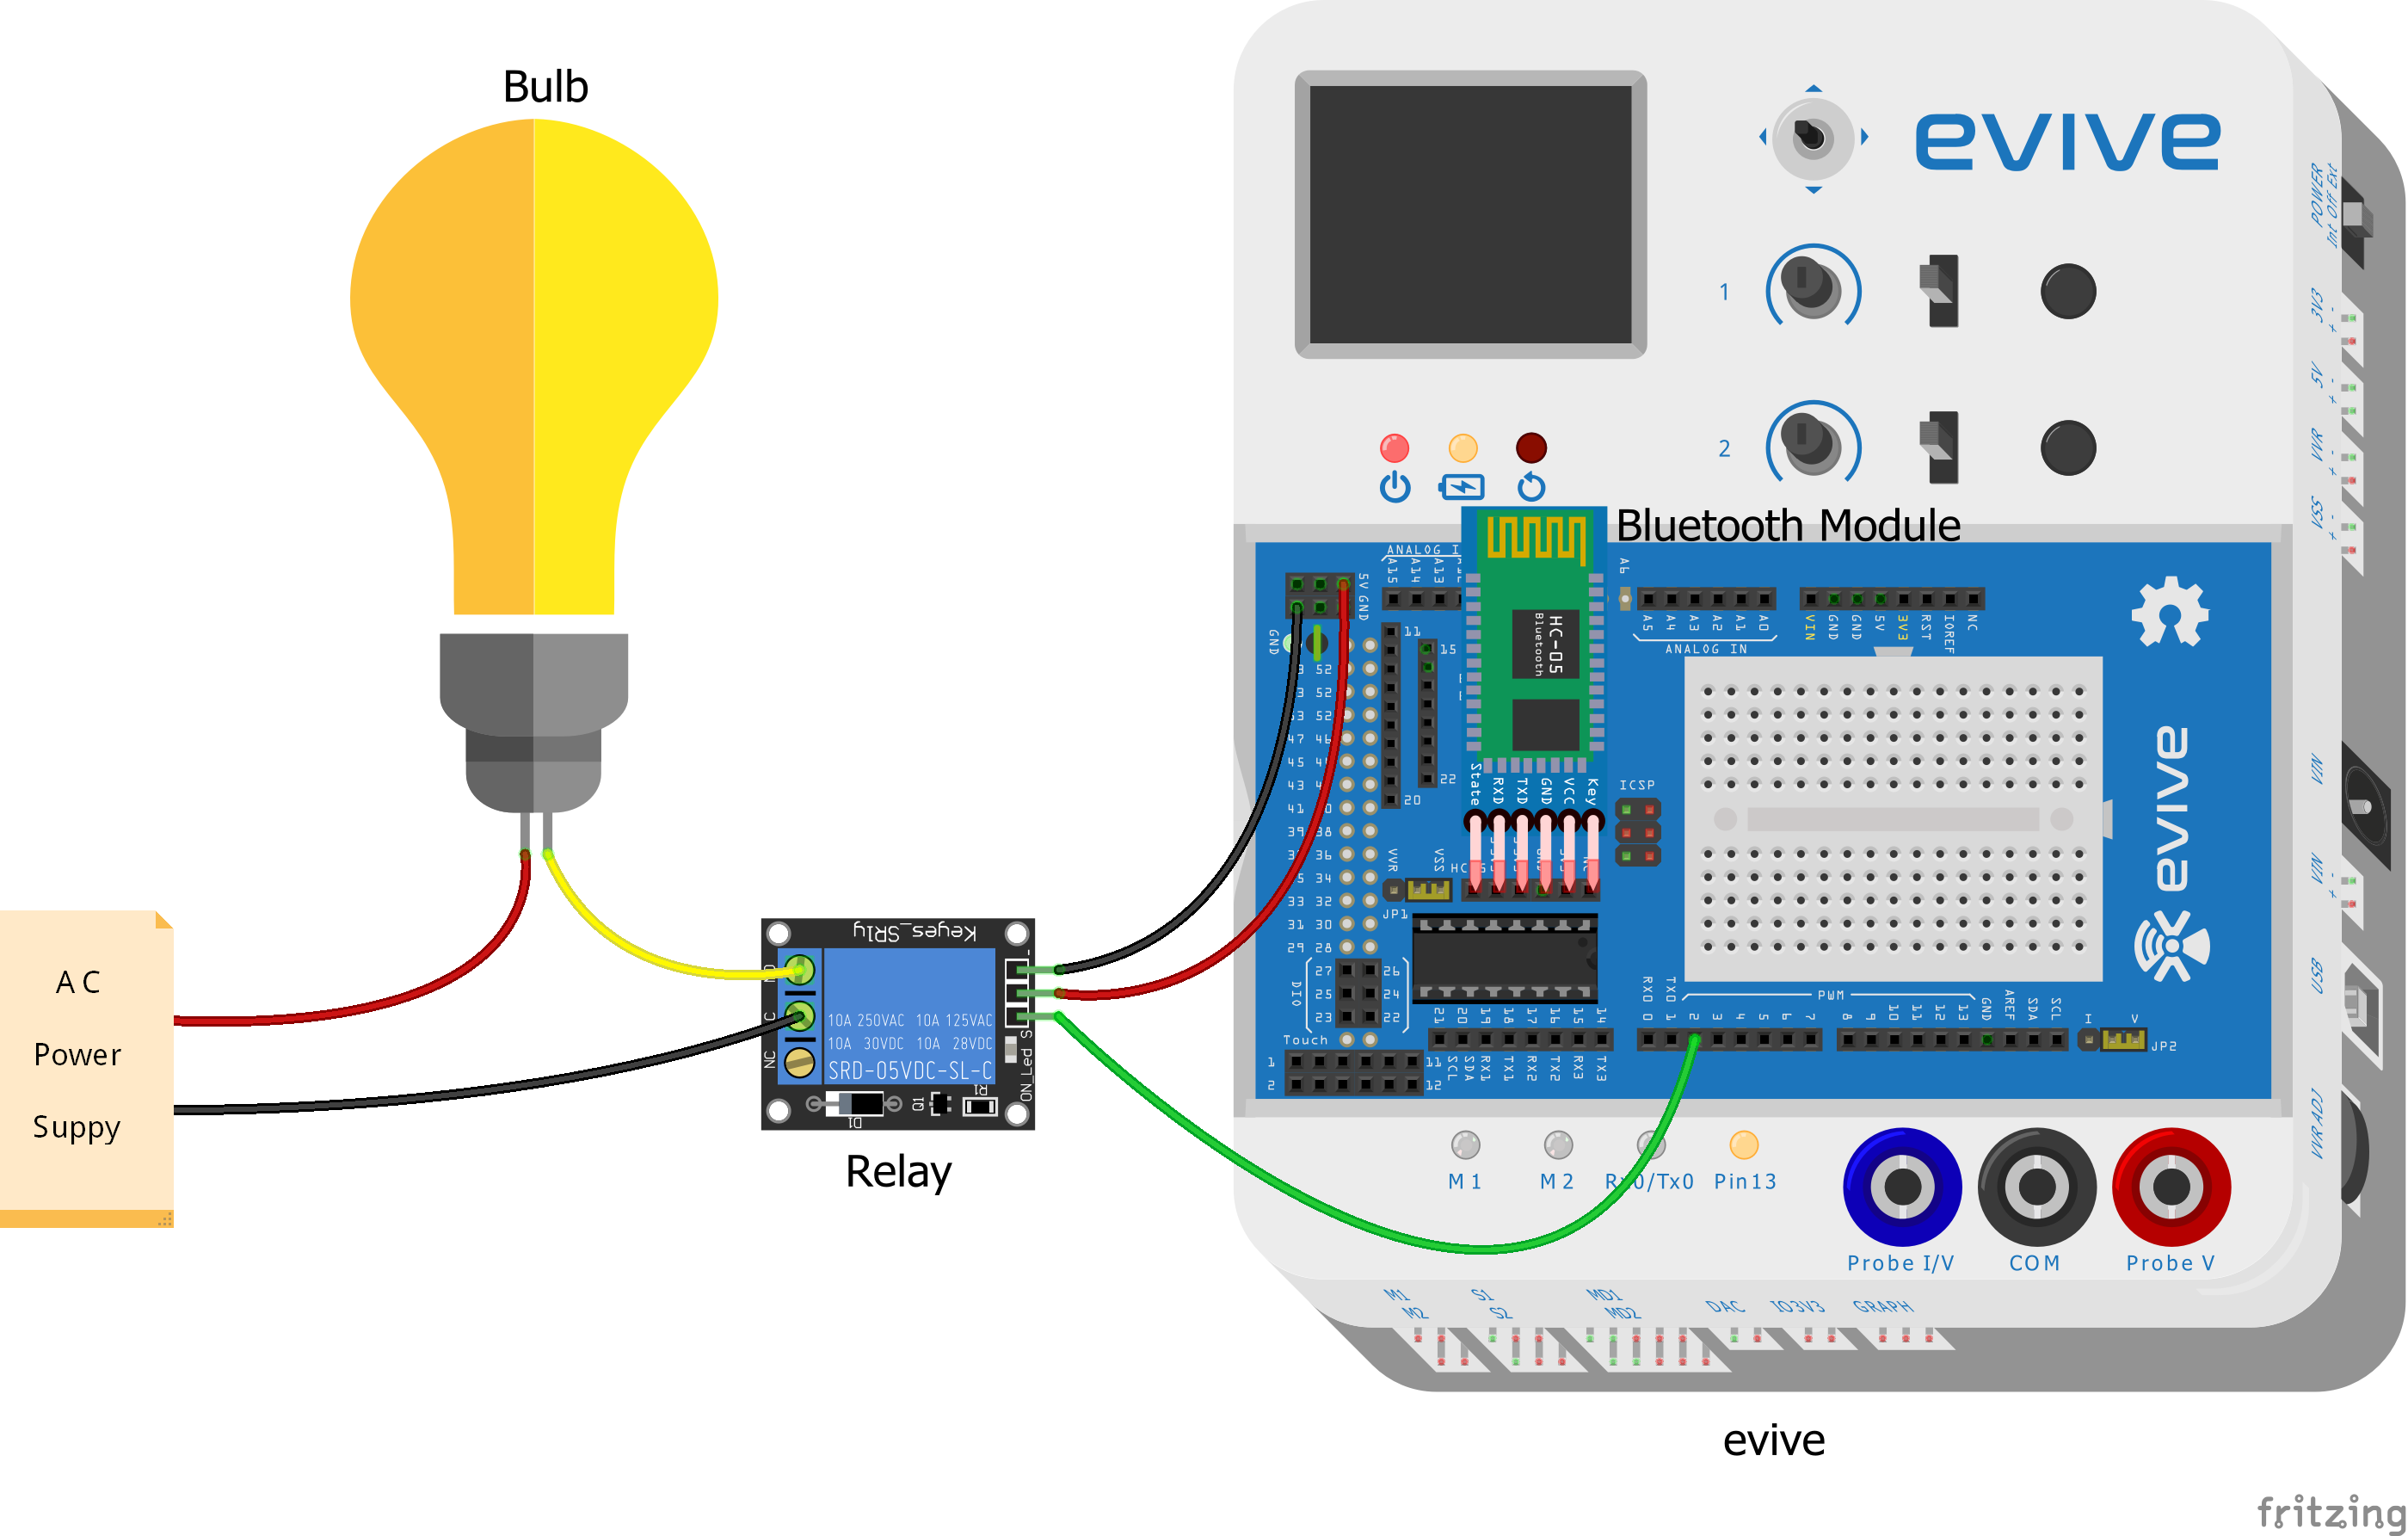
Now, it’s time to connect the relay to evive- our Arduino based embedded platform.
Connect:
VCC of the relay to +5V of evive GND of the relay to GND of evive OUT of the relay to Digital Pin 2 of evive
Now, as we need to a Bluetooth Controlled Home Automation project using Arduino (evive) we will connect our HC05 Bluetooth module to evive.
Finally, connect the light bulb to complete the making of our Smart light bulb.
To make the project simpler. We are going to code it in PictoBlox- a scratch based graphical programming language, where we need to just drag and drop a few blocks to create a complete script.
Before writing the code let's first understand how will our system work.
We are going to use the terminal module of Dabble to send the data to evive. Thus, dabble terminal block needs to be used in the code.
Now, as soon as we write or speak "lights on" the bulb will glow, as we will set the signal pin of the relay "High" which in turn will close the circuit. Turning the bulb ON.
Similarly, on receiving "lights off", the signal pin of the relay will be set to "LOW" and the bulb will turn OFF.
Write the following script and upload it to your hardware. Or download the code given below:
If you want to display the status of the bulb on the evive TFT display: upload the following code
With this, your voice-activated light bulb is all set to light up your life with IoT!


Comments