

Hardware components | ||||||
 |
| × | 1 | |||
 |
| × | 1 | |||
| × | 1 | ||||
Software apps and online services | ||||||
 |
| |||||
| ||||||
And we’re back with another DIY gaming project! As always, playing with something made with your own hands is always an out-of-the-world experience! First, it was a DIY Game Controller; now it’s time for a DIY Joystick using Accelerometer!
This time we’re going to make a DIY Joystick using an accelerometer using which you can control a robotic arm, an entire robot, and even play many games!
Ready to transform your gaming experience?
Then begin right away!
Step 1: Things You'll Need:- Male to Male Jumper Cables
The first two electronic component can be available in evive. With the help of which the number of projects can be made.
Step 2: AssemblyWe have interfaced the accelerometer with our 2 previously made robots. Whose assembly you can find on the link given below.
And will also use as:
- A Game Controller
The above Mobile Robot project can be easily made with the help of Starter Kit. And not just this project, many more projects can be made from it, some of which are even listed on Hackster.
Similarly, the Robotic Arm Kit provides you with interesting projects such as Pick and Place Robot, Sketching Robot, etc.
The catch here is that we will be using the accelerometer to control the movements of robots or the game sprite. The Accelerometer cannot be just held in hands. Thus, we are using a 3D printed holder. We have attached the Accelerometer on the top of the holder.
With this, we have completed our assembly part.
Want to make more 3D printed stuff? Now, whatever you design can come to life.
Own a 3D printer now!
Step 3: About AccelerometerAn Accelerometer is a device used to measure the acceleration, which is nothing but the change in velocity with respect to time. To be precise, the accelerometer we use here measures the change in the gravitational acceleration.
As we know, our sensor can respond in specific values to any tilt or movement in its x, y, or z-axes. We will be using this property and will assign specific actions for each change.
In Mobile Robot:
- Tilt Forward – Robot moves Forward
- Tilt Backward – Robot moves in Reverse Direction
- Tilt Right – Robot turns Right
- Tilt Left – Robot turns Left
- No Tilt – Brake
In Robotic Arm:
- Tilt Forward – Base Servo will turn Left
- Tilt Backward – Base Servo will turn Right
- Tilt Right – Link Servo will turn Right
- Tilt Left – Link Servo will turn Left
- No Tilt – Stop
As Game Controller
- Tilt Forward – Jump / Space
- Tilt Backward – Shoot / Shift
- Tilt Right – Game Sprite will move Forward
- Tilt Left – Game Sprite will move Backward
- No Tilt – Stop
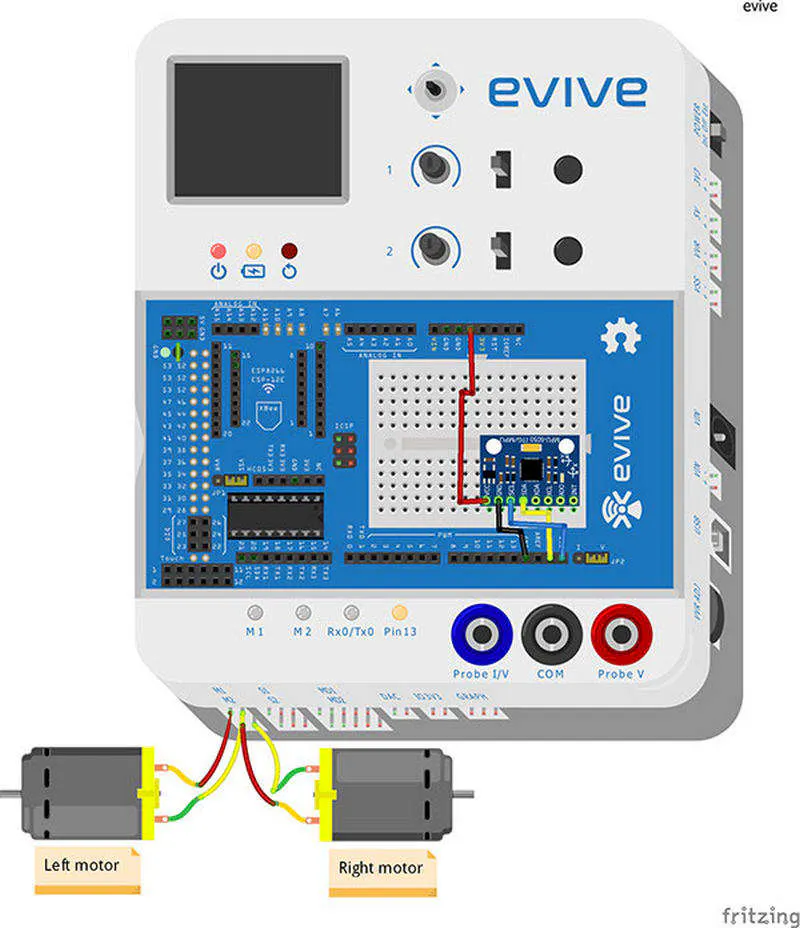
The circuitry is for the Mobile Robot is shown:
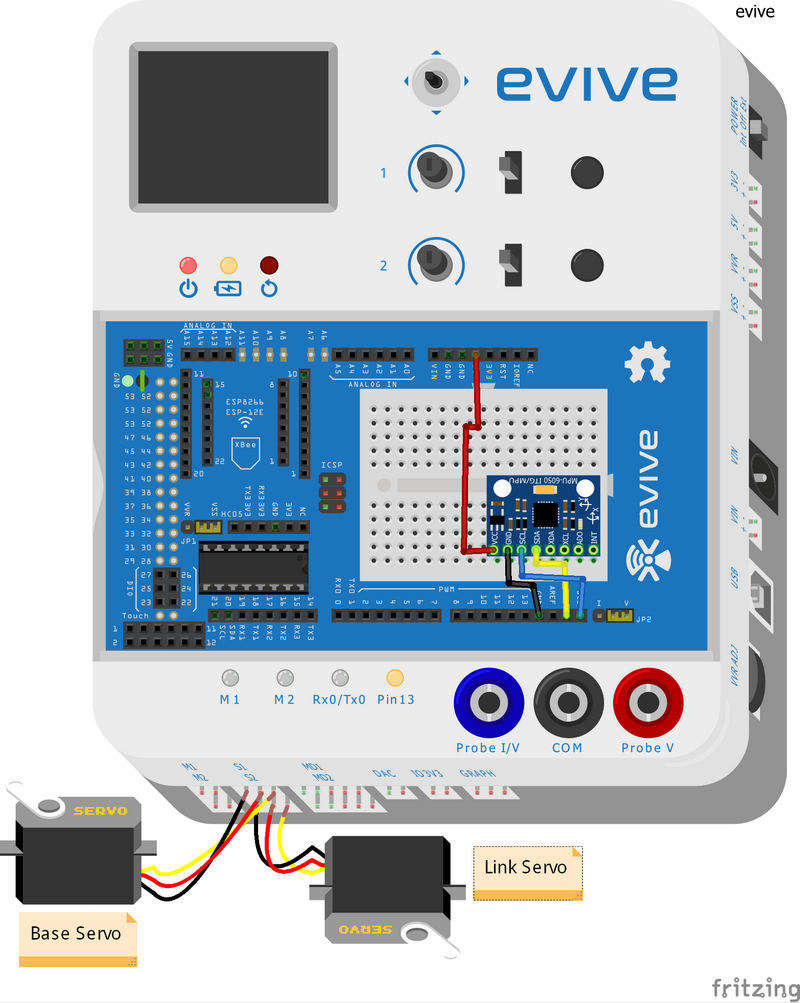
The circuitry for the Robotic Arm is as shown:
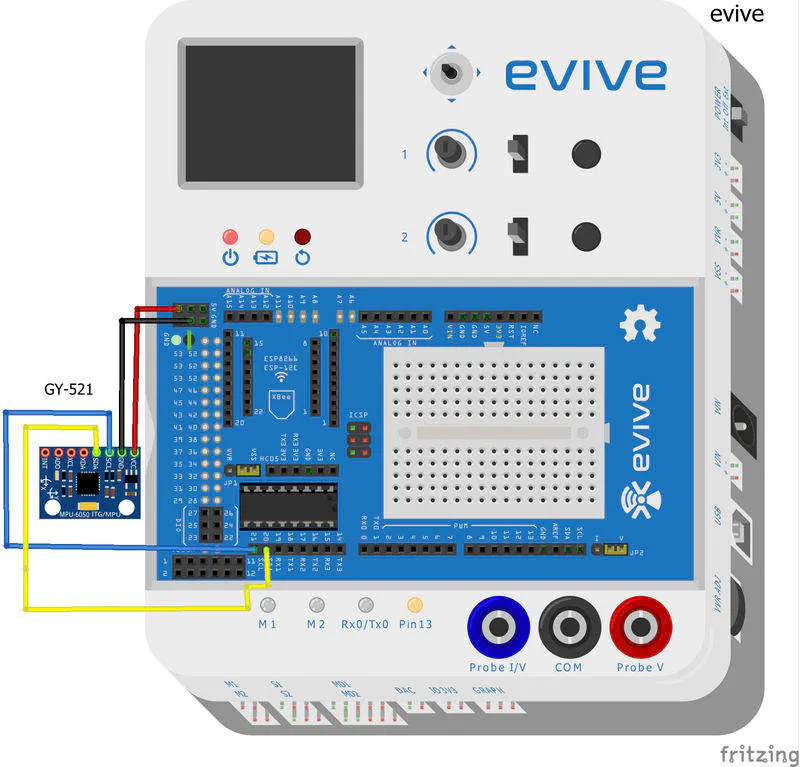
The connection for how the Accelerometer to be used as Game Controller is shown:
The code which is to be followed for driving the Mobile Robot can be downloaded from the Code section below:
To know more about Arduino visit here:
https://thestempedia.com/tutorials/arduino-ide/
Step 9: Arduino Code for Robotic Arm:To control the Robotic Arm / Pick and Place Robot with the accelerometer, we should write the code given in the.
Step 10: Code for Game Controller:Here we will be using Processing along with Arduino.
Once the key is pressed, Arduino assigns the number to it according to the code.
We use processing as the interface between Arduino and the PC.Arduino then sends the signal number to Processing. Eg., when we press UP key. Arduino sends ‘1.’ to Processing. Processing performs the action that it corresponds too.
Make sure that you change the COM port in the processing. The COM port should be similar to the COM port in the Arduino.
The Arduino code is as below:
The Processing Code can be downloaded from the link given below:
https://thestempedIa.com/wp-content/uploa...
You can download evive library by clicking the link below:
https://thestempedIa.com/wp-content/uploa...
Step 11: ConclusionWith this, your DIY Joystick using accelerometer is ready! Now you can have double the fun playing your favorite games!
To explore more projects, visit: http://thestempedia.com/projects


Comments