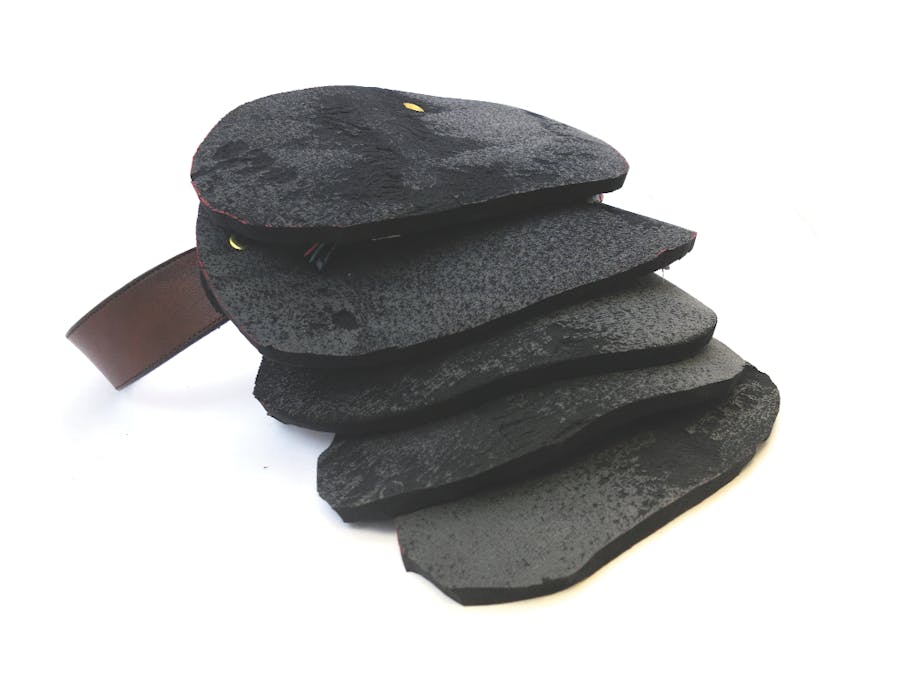
Hertzian Armor
Making the invisible visible
What is Hertzian?
Hertzian space, as described by Dunne and Raby, is a holistic view of the electronic object and its cultural interactions, and is the interface between electromagnetic waves and human experiences. Using Hertzian Armor we can now begin to see some of these invisible interactions that happen all around us.
Motivation:
Our initial approach to this assignment was to create an object that allows us to see the unseen. In this way we could begin to explore how we interact with the invisible world around us, and start a conversation about something we may come in contact with everyday, but not fully understand.
We initially started looking at alcohol sensors and pollution sensors, two things we are affected by but never see. While brainstorming how to implement this technology in the wearable, we stumbled on a larger goal, how can we make WiFi visible?
WiFi exists in the Hertzian space and is constantly around us. We use it almost every time we interact with an electronic device, but only understand it through the generic signal strength icon seen on most devices. We wanted to create a wearable device that could explicitly visualize WiFi, and did so using a WiFi sensor and LEDs.
Functionality:
The LED output color is defined by type of WiFi in the area:
- red value = ( # of restricted networks / total networks ) x 255
- green value = ( # of open networks / total networks ) x 255
- blue value = ( # of Hotspots / total networks ) x 255
The number of lit LEDs is determined by the average Wi-Fi signal strength (RSSI) in the area:
- all 3 strips lit: RSSI > 60
- 2 strips: 50 <= RSSI <= 60
- 1 strip: RSSI < 50
Design Process:
Our Methodology:
We started out the design process by deciding who we wanted to design for and in what setting. We decided on creating shoulder armor because we wanted a wearable that would be bold enough to display at Burning Man or an event like Silicon Valley Fashion Week, but also simple enough to be worn around Berkeley.
We began with paper prototypes to understand the initial form. Iterating quickly with cardboard, brass fasteners, duck tape, and canvas, we were able to hone in on a form factor that would fit on most shoulders and cleanly house our electronics.
Initially we wanted to use leather for the final prototype. After visiting Discount Fabrics, we realized that leather is fairly expensive and difficult to work with, so we decided instead to use neoprene. Neoprene is a forgiving material that is soft but easily holds its shape, which gave us the flexibility we needed while finalizing our design.
The final prototype uses Chicago screws to hold the neoprene pieces together along with canvas strips which allow the device to drape down the wearers shoulder. We used Velcro to hold the LED strips in place under the flaps, and an adjustable leather belt to attach the device to the wearer.
Technology Used:
Wi-Fi Scanning:
In order to scan local WiFi, we used Adafruit CC3000 WiFi Breakout with the on-board antenna. For best hardware-to-software compatibility, it is recommended to use Arduino software 1.0.6 as opposed to the current version available, 1.6.4. The Adafruit CC3000 library conveniently has a function in the buildtest example to list the SSID (service-set identifier) results that we adapt for our purposes.
More about SSID:
- SSID is an unique 32 bit character identifier attached to the header of packets which are sent over a wireless local area network (WLAN) that acts as a password when a device tries to connect to the basic service set - standards imposed by IEEE 802.11 standards.
Wi-Fi stands for Wireless Fidelity, and it is a term trademarked to brand products that belong to a category of WLAN devices. SSID differentiates one WLAN from another such that all access points and all devices connecting to a specific WLAN, or Wi-Fi network, must use the same SSID.
Scanning SSID and Averaging RSSI:
- We initialize our CC3000.
- We begin a SSID scan and compute the following:
- The number of secured networks using the WPA2 protocol.
- The number of unsecured networks.
- The CC3000 does not have an easy way to distinguish Wi-Fi hotspots from other access points so we used the number of networks using the WPA and WEP protocols for now.
3. Disconnect the CC3000.
NeoPixels:
In order to represent the overall Wi-Fi strength around us, we used Adafruit NeoPixel Strip as it is wonderfully bright, and it is supported by the Adafruit NeoPixel library which makes working with RGB values simple.
Mapping Wi-Fi RSSI to Lights:
- We initialize the NeoPixel strip.
- We use the values saved from our SSID scan and map them as we have described before:
- All 3 strips lit: avgRSSI > 60
- 2 strips lit: 50 <= avgRSSI <= 60
- 1 strip lit: avgRSSI < 50
Mapping Network Security to Pixel Color:
We simultaneously determine how many pixels we want to activate in order to represent the signal strength of Wi-Fi around us, and we choose a RGB color value to light the NeoPixel strip based on the types of Wi-Fi networks detected.
The color chosen is mapped from the total number of each type of security network found divided by the total number of networks multiplied by 255. We map RGB as the following percentages:
- f : WPA2 → Red
- f : (WPA, WEP) → Green
- f : Unsecured → Blue
Library Dependencies:
- Arduino 1.0.6 IDE
- Adafruit CC3000
- Adafruit NeoPIxel


Comments