![Start Your [ANYTHING] with NFC](https://prod.hackster-cdn.online/assets/transparent-a0c1e3063bcabc548a5f3fa7328f3c1c97f747e6e764da4c14439567baa79ae1.gif)

![Start Your [ANYTHING] with NFC](https://hackster.imgix.net/uploads/cover_image/file/80233/Motorcycle%20Hacks_Fourbythree.png?auto=compress%2Cformat&w=900&h=675&fit=min)
Hardware components | ||||||
| × | 1 | ||||
| × | 1 | ||||
| × | 1 | ||||
| × | 2 | ||||
Hand tools and fabrication machines | ||||||
 |
| |||||
| ||||||
| ||||||
| ||||||
We hate keys. They're the worst.
At FamiLAB, there were a large number of us members with implanted NFC chips in our hands. We decided a good use case for these things was to use it to securely start our motorcycles.
So here we are, ya know... in the future. With a relatively simple circuit, you can hotwire your motorcycle/car/Nintendo 64 to start right up using any sort of NFC tag you might have such as a subway pass, a Disney World card, or even your own embedded hand chip!
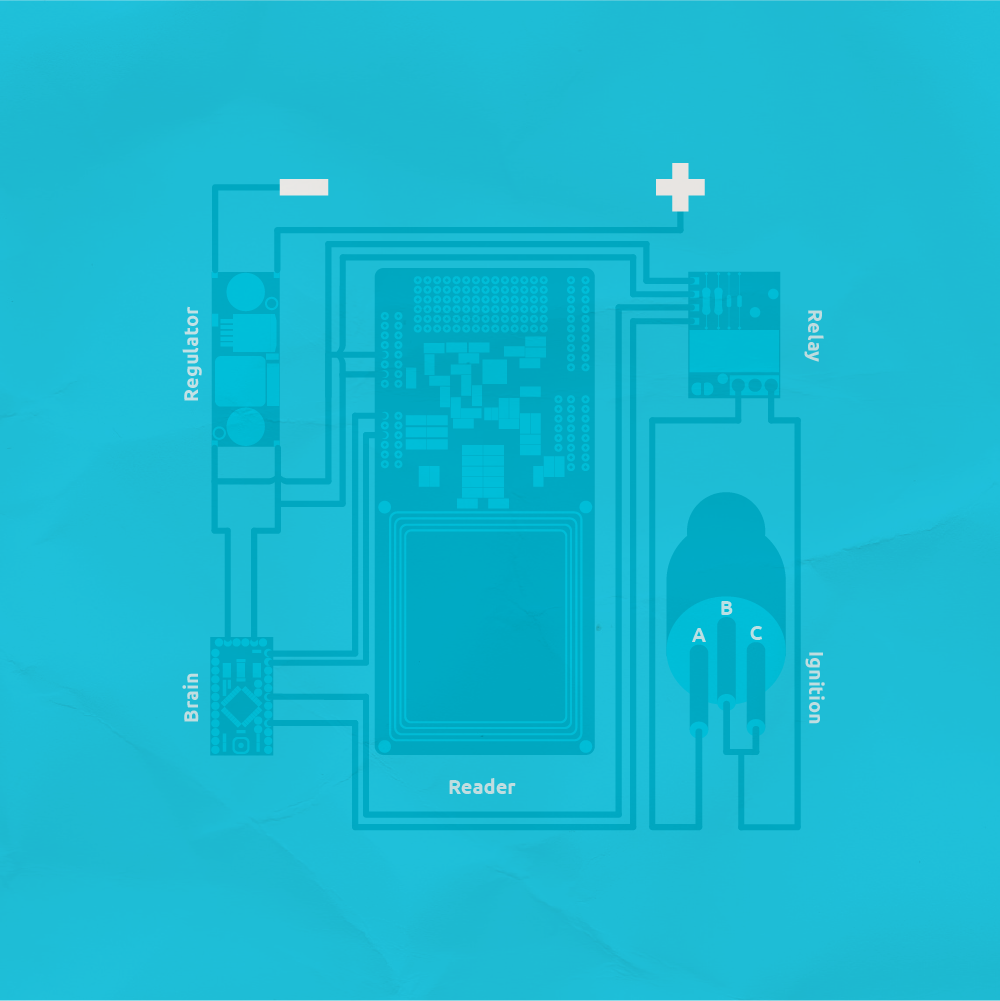
Mock Schematic
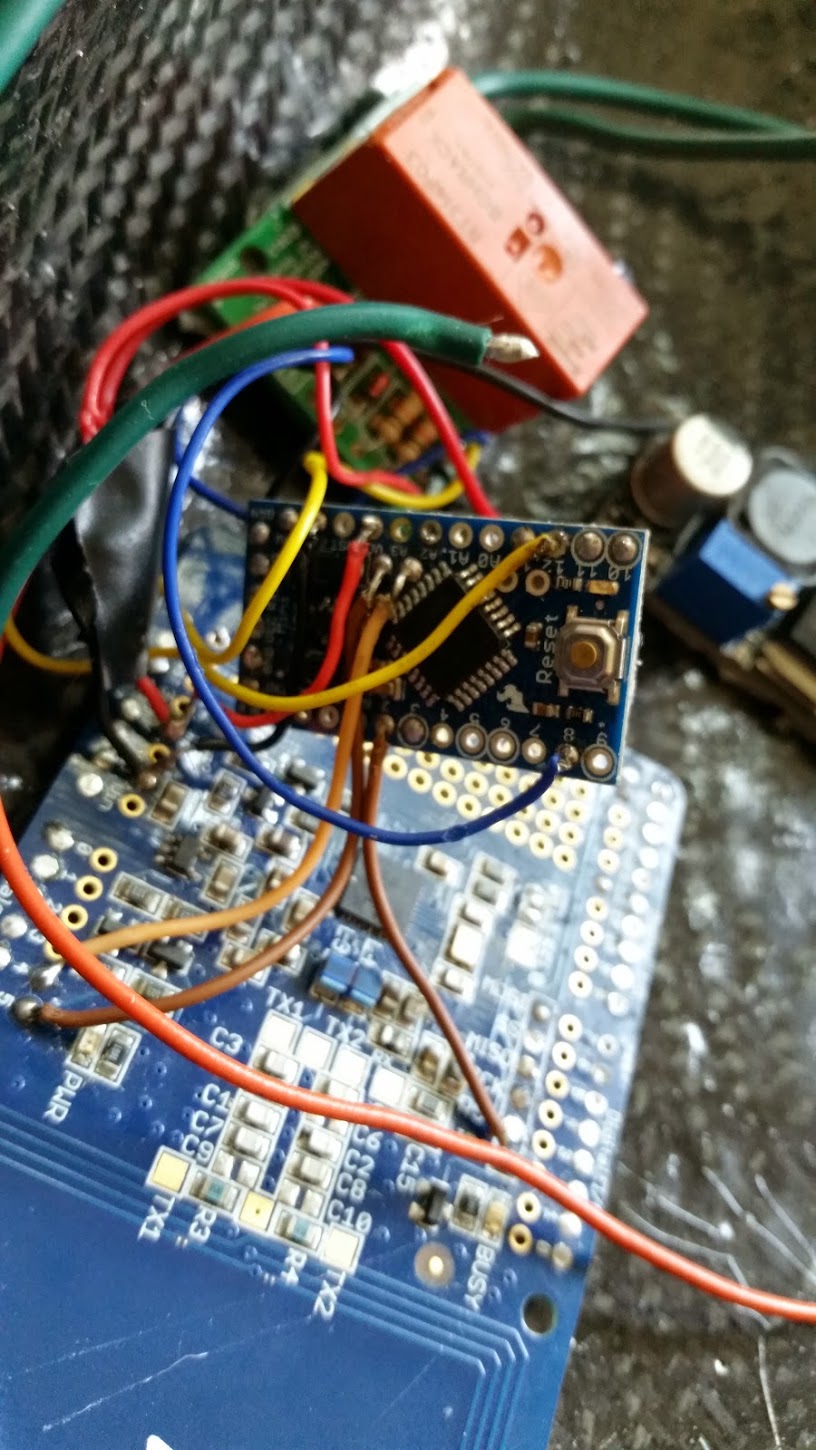
Head to https://learn.adafruit.com/adafruit-pn532-rfid-nfc/shield-wiring
for updated proper wiring of PN532 shield to Arduino pins.
Pins for Uno (which can be used instead) will be equivalent on Pro Mini.
Pins 11 and 12 on Arduino will be used to Engage and disengage the relay.
I made this to help you see how everything is wired up.
This is the general appearance of the components as they will be wired together. Add an optional on and off switch if you don't ride the motorcycle daily, to conserve power on the motorcycle battery.
Placement of Reader
I had to make a custom cover for my battery. Harleys are all metal and block the NFC signal. Note: So does carbon fiber.


2 projects • 4 followers
Don't call me a programmer. I just hack things together, even if I don't know what I'm doing (which is always the case)
Thanks to Lance Vick and David Sikes.


Comments