


Hardware components | ||||||
 |
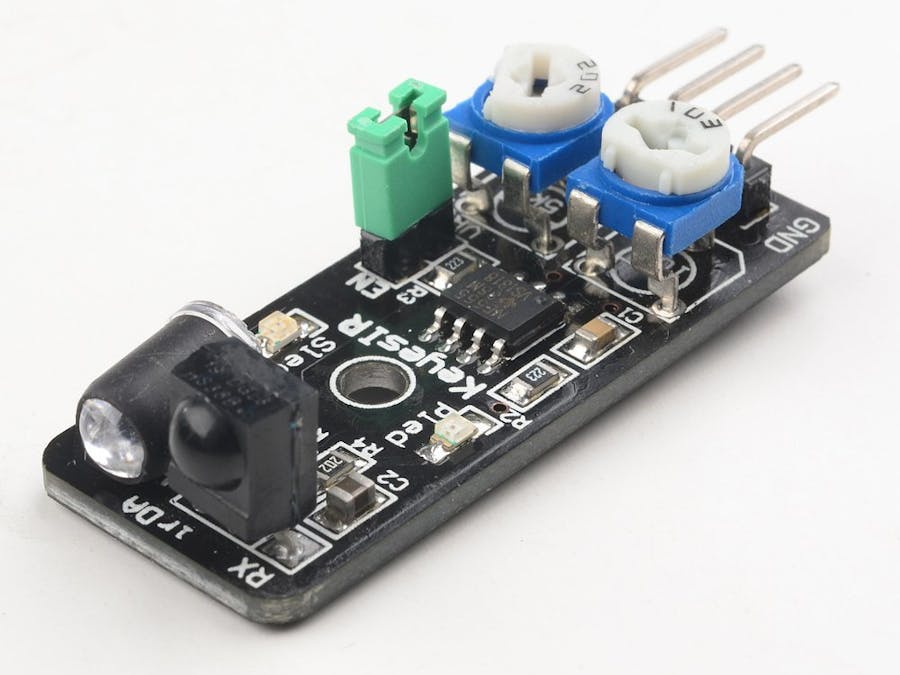
| × | 1 | |||
| × | 1 | ||||
Software apps and online services | ||||||
| ||||||
This hands on lab will show you how to read an obstacle avoidance sensor (or any switch-like sensor) using the Devices for Microsoft IoT Core library. This lab barely scratches the surface of what the library provides, but it does demonstrate how the library helps expose simple sensors in an event-driven way.
We'll start by creating a new Windows Universal project in Visual Studio 2015. We'll use the Blank App template and call our application AvoidanceSample.
At this point we have an application that can run anywhere Windows Universal apps run. This includes phones, tablets and eventually HoloLens and XBOX One.
Next we'll add a reference to Windows IoT Extensions for the UWP, which gives us access to the GPIO pins on our microcontroller. To do this, right-click on the References folder inside our project and choose Add Reference… In the window that pops up expand the Windows Universal branch on the left and select Extensions. Then, check the box next to Windows IoT Extensions for the UWP on the right and click OK to close the dialog.
Next we'll add a reference to the Devices for Microsoft IoT Core library. This library provides easy access to sensors, displays and other hardware connected to our device. To do this, right-click on the References folder inside the project and choose Manage NuGet Packages. In the window that pops make sure the Include prerelease checkbox is checked and type Microsoft.IoT.Devices in the search box.
Select Microsoft.IoT.Devices on the left-hand side and click the Install button on the right.
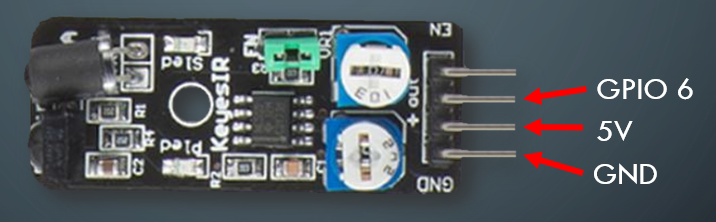
Now it's time to connect the Obstacle Avoidance sensor (or any other "switch-like" sensor) to our board. Connect Pin 1 to GND, Pin 2 to 5V and Pin 3 to GPIO 6.
Next let's build a simple UI to see the output of our sensor.
In the Solution Explorer window, double-click on MainPage.xaml.
Inside the main <Grid> tag we want to add a TextBlock we can use to display some text. Paste the following XAML inside the <Grid> tag:
<TextBlock x:Name="StatusText" FontSize="48"
         HorizontalAlignment="Center" VerticalAlignment="Center" />
Your XAML should look like this when you're done:
Now let's write some code!
In the Solution Explorer window, expand MainPage.xaml and double-click on MainPage.xaml.cs.
We don't want to start reading the sensor until our UI has finished loading. The easiest way to do that is to wait for the Loaded event to happen. In the constructor right after the call to this.InitializeComponent(); add the following code:
this.Loaded += MainPage_Loaded;
And after the constructor, add the following handler for the loaded event:
private void MainPage_Loaded(object sender, RoutedEventArgs e)
{

}
Now, inside the MainPage_Loaded event handler we can create the "switch sensor" and start listening for sensor events. But before we can do that we need to add some using statements that give us access to the libraries we referenced above as well as to a list of known colors. At the top of the file below the other using statements, add the following lines:
using Microsoft.IoT.DeviceCore.Input;
using Microsoft.IoT.Devices.Input;
using Windows.Devices.Gpio;
using Windows.UI;
Now that the using statements have been added we can add the following code inside the MainPage_Loaded event handler:
var controller = GpioController.GetDefault();
var SwitchSensor = new Switch()
{
    Pin = controller.OpenPin(6)
};
SwitchSensor.Switched += SwitchSensor_Switched;
This code first gets a reference to the GPIO controller, then it creates a "Switch" sensor connected to pin 6. Finally the code subscribes to the Switched event.
By default, Switch sensors consider a low (or grounded) pin to be "ON" and they use internal pull up or pull down resistors to stabilize the value if available. Switches also wait a default of 50 milliseconds for the sensor to "debounce" before reporting a change. These defaults can be changed through the OnValue, UsePullResistors and DebounceTimeout properties respectively.
Next we need to add the event handler for the switch. Below the MainPage_Loaded event add the following code:
private async void SwitchSensor_Switched(ISwitch sender, bool args)
{

}
And finally, inside the SwitchSensor_Switched event handler, add the following code to update the UI:
await Dispatcher.RunIdleAsync((s) =>
{
    if (args)
    {
        StatusText.Foreground = new SolidColorBrush(Colors.Red);
        StatusText.Text = "Close";
    }
    else
    {
        StatusText.Foreground = new SolidColorBrush(Colors.Green);
        StatusText.Text = "Far";
    }
});
The code above first checks args to see if the switch is being turned "ON" or "OFF". It then sets the color and text of the TextBlock accordingly. All of this code is wrapped inside a special call to Dispatcher.RunIdleAsync. We need this line of code because all sensors report data on their own thread, but we can only interact with UI controls on the main UI thread. Dispatcher.RunIdleAsync allows us to say "even though this event was started on its own thread, run the following code on the UI thread".
The final completed C# code should look like this:
Now it's time to test our solution. At the top of Visual Studio change the architecture to ARM, then click the dropdown next to the green play button that says Device and change it to Remote Machine.
When you do this, a new window will pop up where you can enter the IP address of your Raspberry Pi. Don't forget to change Authentication Mode to None before clicking the Select button to lock in the configuration.
If you ever need to change these settings later you can right-click on the project, choose Properties then switch to the Debug tab.
Once everything is setup correctly, click the green play button that should now say Remote Machine. After a few moments the application will appear on the HDMI monitor. When you place an object near the sensor "Close" will be displayed in red text, and when you remove the object "Far" will be displayed in green text.
Congratulations on creating a switch-based sensor application using the Devices for IoT Core library!
NOTE: A completed version of this HOL can be downloaded here.


Comments