

Hardware components | ||||||
 |
| × | 1 | |||
Application Scope
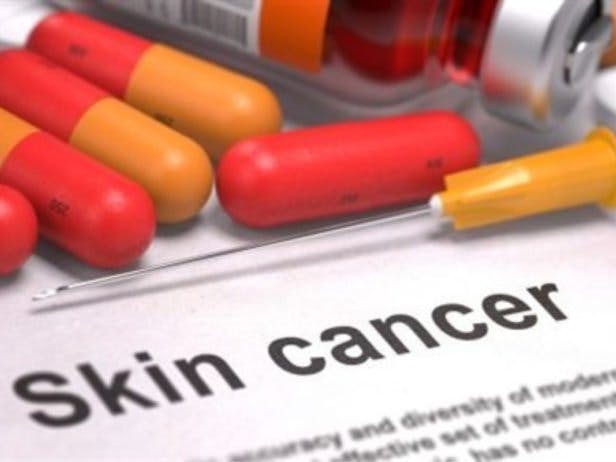
In recent years AI assisted diagnostic technologies are building up rapidly in the medical sector, whether inference is based on signals or images. Such a prolific area is skin cancer, although as stated recently in https://www.aad.org/news/ai-and-skin-cancer-detection, “AI systems for skin cancer detection are still in their very early stages”. However, hardware advances such as the Jetson Nano and the increasing availability of large datasets such as the "HAM10000 dataset of pigmented skin lesions" provide the necessary tools to construct portable (Edge positioned) devices that can be used initially for educational purposes (in Hospitals, Universities, Conferences etc.) and subsequently as mass screening assistants, in particular at remote areas where population is difficult to receive professional specialized medical services.
Hardware Setup
In order to prepare the Jetson Nano for inference the following steps are required:
1. Perform initial setup of the board as described in:
https://developer.nvidia.com/embedded/learn/get-started-jetson-nano-devkit
2. Setup the inference environment by going through the instructions at:
https://github.com/dusty-nv/jetson-inference/blob/master/docs/building-repo-2.md
3. Install additional python libraries
a. xlrd to manipulate Excel Files:
$ sudo pip3 install xlrdb. OpenCV:
$ sudo apt-get install python3-opencv
$ sudo apt-get remove python3-opencv
(this will bring up the correct version, it will not uninstall opencv!)
c. Matplotlib:
$ sudo apt-get install python3-matplotlibd. Python Imaging Library (PILLOW):
$ sudo apt-get install python3-dev libjpeg-dev libfreetype6-dev zlib1g-dev
$ sudo ln -s /usr/lib/`uname -i`-linux-gnu/libfreetype.so /usr/lib/
$ sudo ln -s /usr/lib/`uname -i`-linux-gnu/libjpeg.so /usr/lib/
$ sudo ln -s /usr/lib/`uname -i`-linux-gnu/libz.so /usr/lib/
$ sudo pip3 install Pillow==6.1
4. Prepare the training Data
Training Data can be downloaded from:
https://www.kaggle.com/kmader/skin-cancer-mnist-ham10000
The unzipped file will produce two image directories: HAM10000_images_part_1 and HAM10000_images_part_2, and a number of csv files.
For the training we need the image files and the csv file: HAM10000_metadata.csv which is opened by Excel. Create a copy of the file, delete all columns except column B and column C (i.e. image_id and dx), delete the first row (which are labels), sort the data according to the second column (dx) and you will end up with file names sorted according to lesion type. Save this new file as an excel file.
The python code ‘excellCopy.py’ processes the new excel metadata file and splits the images in 7 sub directories, namely akiec, bcc, bkl, df, mel, nv, vasc which are the different classes the NN will be trained on. The scientific names are:
Actinic keratosis
Basal Cell Carcinoma
Benign Keratosis
Dermatofibroma
Malignant Melanoma
Melanocytic Nevi
Vascular Lesions
In line 9:
loc = ("YOUR_PATH/Metadata_2_columns.xlsx")the location of this file is provided, and in line 14:
imgpath='YOUR_PATH\HAM10000_images_part_1'the location of the first images directory is given. The script should be run again on the second part of the images once finished with the first by changing the above line to
imgpath='YOUR_PATH\HAM10000_images_part_2'The code can be made more compact by creating and iterating a list of the above classes, but at the moment it is in a more brute force mode (job is done though)!
Once the seven sub directories are created you can proceed to the final organisation of your data as follows:
YOUR PATH/train
YOUR PATH/val
YOUR PATH/test
All seven directories must be copied under YOUR PATH/train and then create the same directories, but EMPTY, under YOUR PATH/eval and YOUR PATH/val. Cut a few images (approx. 20) from each directory in YOUR PATH/train and place them in the corresponding sub directory in YOUR PATH/val so that you create the evaluation dataset. Repeat the same procedure with YOUR PATH/test so that you create the test data set. It should be noted here that the data set is heavily biased towards the Melanocytic Nevi class (over 60% of images) and this reflects heavily on the classification of new images from the other categories.
At this point we are ready to perform "Transfer learning" to one of the pretrained image classification networks for the JETSON NANO. Please follow the instructions at (use sudo for the torch install script):
https://github.com/dusty-nv/jetson-inference/blob/master/docs/pytorch-transfer-learning.md
If you get errors in importing torch because of older numpy version then you need to install Cython
$ sudo pip3 install Cythonand then update numpy:
$ sudo pip3 install numpy --upgrade --ignore-installedBe patient, it takes time for the above to complete.
The PyTorch training scripts are located in the repo under jetson-inference/python/training/classification/. These scripts aren't specific to any one dataset and by default are set to train a ResNet-18 model, but you can change that with the --arch flag.
Once finished creating the proper environment (stop at the Training Datasets heading), issue the command:
$python3 train.py --model-dir=YOUR_PATH1 YOUR_PATH --epochs n
The command must be issued from the location of the jetson-inference tools installed in step 2 above (probably in ~/jetson-inference). YOUR_PATH1 is the location where the retrained model will be saved, and YOUR_PATH is the location of the 3 sub directories: train, test and val with the images.
It will take about 8 hours to complete the tranfer learning process so sit back and relax, or do it overnight! However, I would suggest that first you train 4 epochs only, and test the whole tool chain for possible errors which creep up often because of the updates in the various models. I have tried to provide such fixes in all problems I encountered during two tests set 40 days apart! When the whole tool chain behaves as expected then train properly for 40 or more epochs.
To run the re-trained ResNet-18 model with TensorRT for testing and realtime inference, you need to convert the PyTorch model into ONNX format format so that TensorRT can load it. ONNX is an open model format that supports many of the popular ML frameworks, including PyTorch, TensorFlow, TensorRT, and others, so it simplifies transferring models between tools.
PyTorch comes with built-in support for exporting PyTorch models to ONNX, so run the following command to convert the HAM10000 model with the provided onnx_export.py script:
$ sudo python onnx_export.py --model-dir=YOUR_PATH1This will create a model called resnet18.onnx under YOUR_PATH1 (eg. jetson-inference/python/training/classification/HAM1000/
You can also download the retrained model (I trained it for 60 epochs, approx. 15 hours) from:
https://drive.google.com/open?id=1Nj7wTkgyBxVyC6cnIXucvLyc3Nx59TgINote: If later on (when you execute image.py), you get TENSORT errors and classification can not run, you need to reinstall the torchvision package as follows:
$ sudo pip uninstall torchvision
$ python3 -c "import torchvision"   # should produce error if succesfully uninstalled
$ git clone -bv0.3.0 https://github.com/dusty-nv/vision
$ cd vision
$ sudo python3 setup.py install
After that you need to retrain and re-export your model.
Application Framework
The Python script image.py provides the testing/usage environment for the new resnet18 retrained model. It utilises a modified version of the imagenet-console.py tool provided by NVIDIA, so make sure its location is accessible when executing image.py.
Please make sure you provide your paths for PATH, PATH_TO_CONVERTED_MODEL, PATH_TO_LABELS, and TEMP_PATH in image.py script. The TEMP_PATH must also be provided at the imagenet-console_mine.py script.
The 'labels.txt' file contains the seven classes in whatever terminology suits you, for example:
Actinic keratosis
Basal Cell Carcinoma
Benign Keratosis
Dermatofibroma
Malignant Melanoma
Melanocytic Nevi
Vascular Lesions
The image.py script provides the following interface:
The Open File button selects and displays the image to be classified.
The process button performs the classification and overlays the result on the image.
A result is provided if confidence is above 60% as defined in imagenet-console_mine.py (line 64):
if confidence*100>60:The Camera Frame captures a frame each time it is pressed in order to create new images to be processed.
The camera is interfaced in image.py by the
cap=cv2.VideoCapture(0)command and for the particular instance controls a USB Camera (/dev/video0 in my case). There are numerous sites offering info on interfacing USB or RPI cameras to the JETSON NANO but things can be kept simple for the particular application. The camera quality is what really matters.
Conclusions
This project provides a framework to expand upon with the inclusion of more images for the less represented skin lesion classes, that can develop to a powerfull tool for medical training and assistive diagnosis. The model should also be trained on normal lesions in order to be more effective, while a backround removal preprocessing would benefit it, since it is currently biased with a skin background.
The required infrastructure, i.e. the NVIDIA JETSON NANO and a USB camera fall well below the $150 mark maiking it affordable to everyone interested in experimenting or building powerful medical diagnostic assistants.

Comments