

Hardware components | ||||||
| × | 1 | ||||
 |
| × | 1 | |||
 |
| × | 1 | |||
 |
| × | 1 | |||
 |
| × | 1 | |||
 |
| × | 1 | |||
| × | 1 | ||||
Ever wanted to get rid of that tic-tac sound electromagnetic relays make? Electromagnetic relays require quiet power to turn the electromagnet on/off and need a driver circuit for that, oh! wait! also they need a flyback diode to avoid the risk of inductive spiking which may not be suitable for projects running on battery or projects which you want to be power efficient.
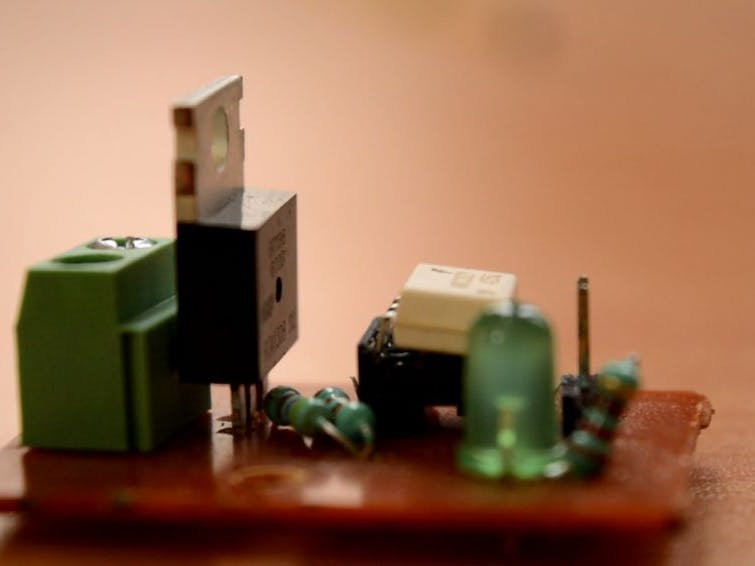
If you want to get rid of all those things in once you are at the right place, here I will show you how to make Solid State Relay using just couple of components.
WARNING:- THIS PROJECT DEALS WITH HIGH-VOLTAGE (AC MAINS) USE FULL PRECAUTIONS. I WILL NOT BE RESPONSIBLE FOR ANY KIND OF DAMAGE CAUSED TO YOU.
LET's GET STARTED!!
DOWN HERE IS THE COMPLETE VIDEO TUTORIAL FOR THE SAME.
Step 1: THINGS WE NEED(https://www.utsource.net/ is an online platform for technicians, Makers, Enthusiasts, Kids to buy electronic components
- Triac- BT136
- Optocoupler- MOC3021 (used to isolate high-voltage from low-voltage input)
- Resistors- 220 ohms and 470 ohms
- LED - Just for indication of state
- Breadboard- For making prototype
- Jumpers
- 5V power supply ( I will use my arduino for this)
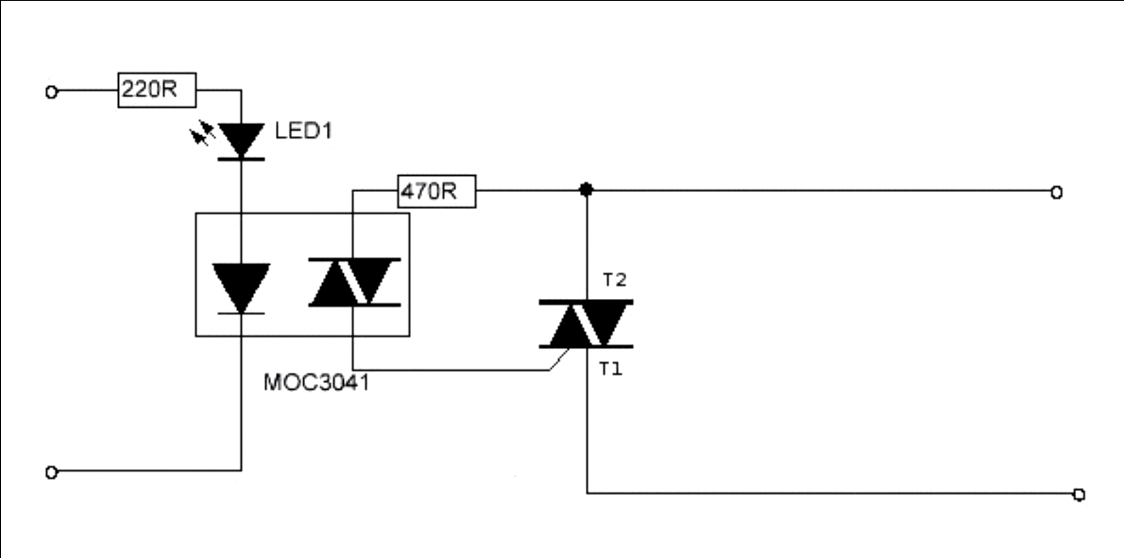
Finally the Schematic.
Step 2: OPTOCOUPLERAdd it to the breadboard.
Step 3: Add positive pin of led to pin 1 of optocouplerI used my arduino mega with blink sketch.
Step 11: Print the final PCBDon't know how to print PCB's? Watch this.
From HERE you can download the PCB file in .pcb extension.
Don't know how to print PCB's?
PAY ATTENTION- you need to make the traces thick because it is a high-voltage project, to know how to tin PCB see this instructable
To see the working watch the video I linked in Introduction.
Thanks to DIY bloke for my inspiration for this project.
Thank You for coming here!
See you again,
Tanishq Jaiswal

Comments