

Hardware components | ||||||
 |
| × | 1 | |||
| × | 1 | ||||
 |
| × | 1 | |||
Software apps and online services | ||||||
 |
| |||||
DFRobot Micro: Maqueen Micro: Bit Robot Platform is an educational and graphical programming robot for STEM education, which receives playability and simple operation of micro: bit. This maqueen robot features plug-and-play that allows children to quickly learn graphic programming. The micro: maqueen robot platform supports Makecode and will support scratch and python later. This robot platform offers small size and flexible movement which makes it easy to install and easy to use. The maqueen is a perfect toy for kids to start learning robotics. This micro: maqueen includes sensors that support sound, light, object, or even wireless signal interaction.
The Micro:Maqueen is really easy to assemble and can be put together in less than 15 minutes by a 8+ years old child. You can use the Micro:Maqueen to introduce your child to the world of STEM and get them going with coding introducing them to the world of robotics using the micro:bit. The Micro:Maqueen is a great way to get started with the basics of coding and robotics using a flexible, affordable and easy to work with robotic platforms.
FEATURES- Support for Makecode, scratch, and python
- Small size and flexible movement
- All-metal miniature gear motor, good quality, and strong driving force
- Easy to install and easy to use
- Line patrol, ambient light, LED lights, ultrasonic interface, buzzer, I2C interface, and mechanical expansion screw hole are full-featured and highly expandable
- Exclusive customized POM bearing wheel, flexible and reliable, and strong obstacle crossing ability
The micro:Maqueen robot is very easy to assemble. The official page of DFRobot contains lots of information about the assembly. The following image shows the components that come with Maqueen.
The following figure shows the components and their location on the PCB.
The video can be a good resource to visualized the assembling procedure.
The new version of the maqueen comes with an excellent plastic box and it is very helpful if you want to carry the Maqueen in your backpack.
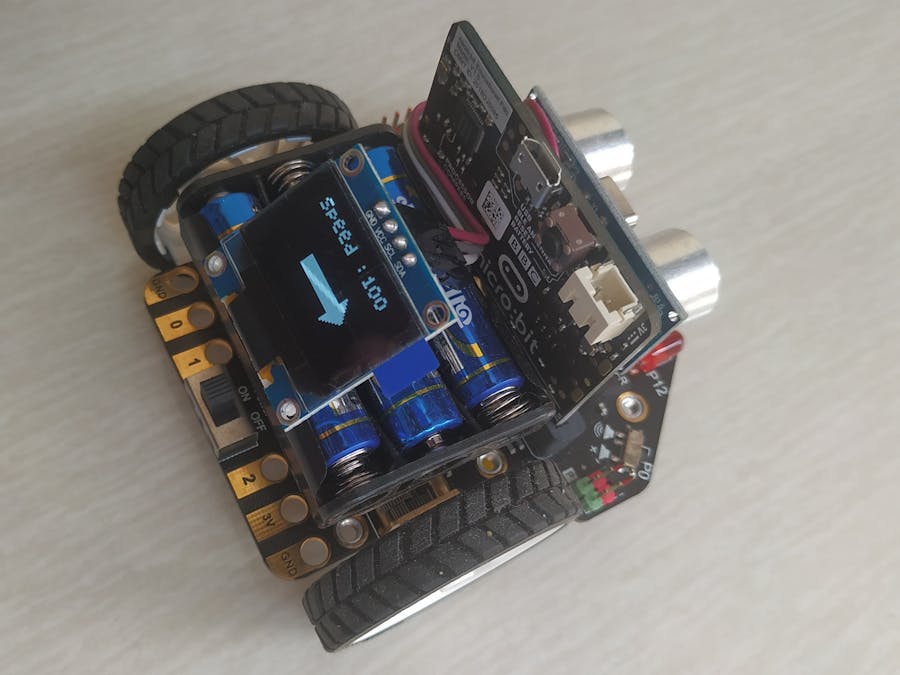
Connecting The OLEDThe micro:Maqueen robot has an I2C connector beside the sonar connector and contains a male header with 4 pin headers for connecting any I2C device or sensors. As the Maqueen does not contain any built-in display so I planned to connect an OLED display with the I2C header. This can be used to monitor the speed, direction or any sensor data. I leveraged the I2C connector to connect an I2C OLED. As I already mentioned the I2C connector contains four pins. Two are for providing power, one for data (SDA) and one for clock (SCL).
In Maqueen PCB, the data pin is marked as D and clock pin is marked as C. So connect the OLED display to Maqueen as:
SCL ------> C
SDA ------> D
VCC ------> +
GND ------> -
After making the connection you need to set the display to the backside of the robot. I used double-sided tape to attach the display in the backside above the battery case. The display is set as 45-degree angle so that it can be visualized easily from the back.
After placing the display you need to upload the program into the Maqueen. I will show here how it can be controlled by a remote controller. To make it work with your remote you first need to read the button code of the remote buttons. Then you should embed the code to the program.
To read the code of the remote follow the tutorial: https://learning.kidzcancode.com/lesson/lesson-7-read-infrared-key-assignments/
After knowing the code you can replace the code with your own code from MakeCode web IDE. Click the link below and make the required modifications. Then upload the code to the microbit. You will be able to control the Maqueen using your own remote and the speed and direction will be displayed in the OLED.
Code link: https://makecode.microbit.org/_24CcxgJEEfx9
The following two figures show the block used in the program.


Comments