


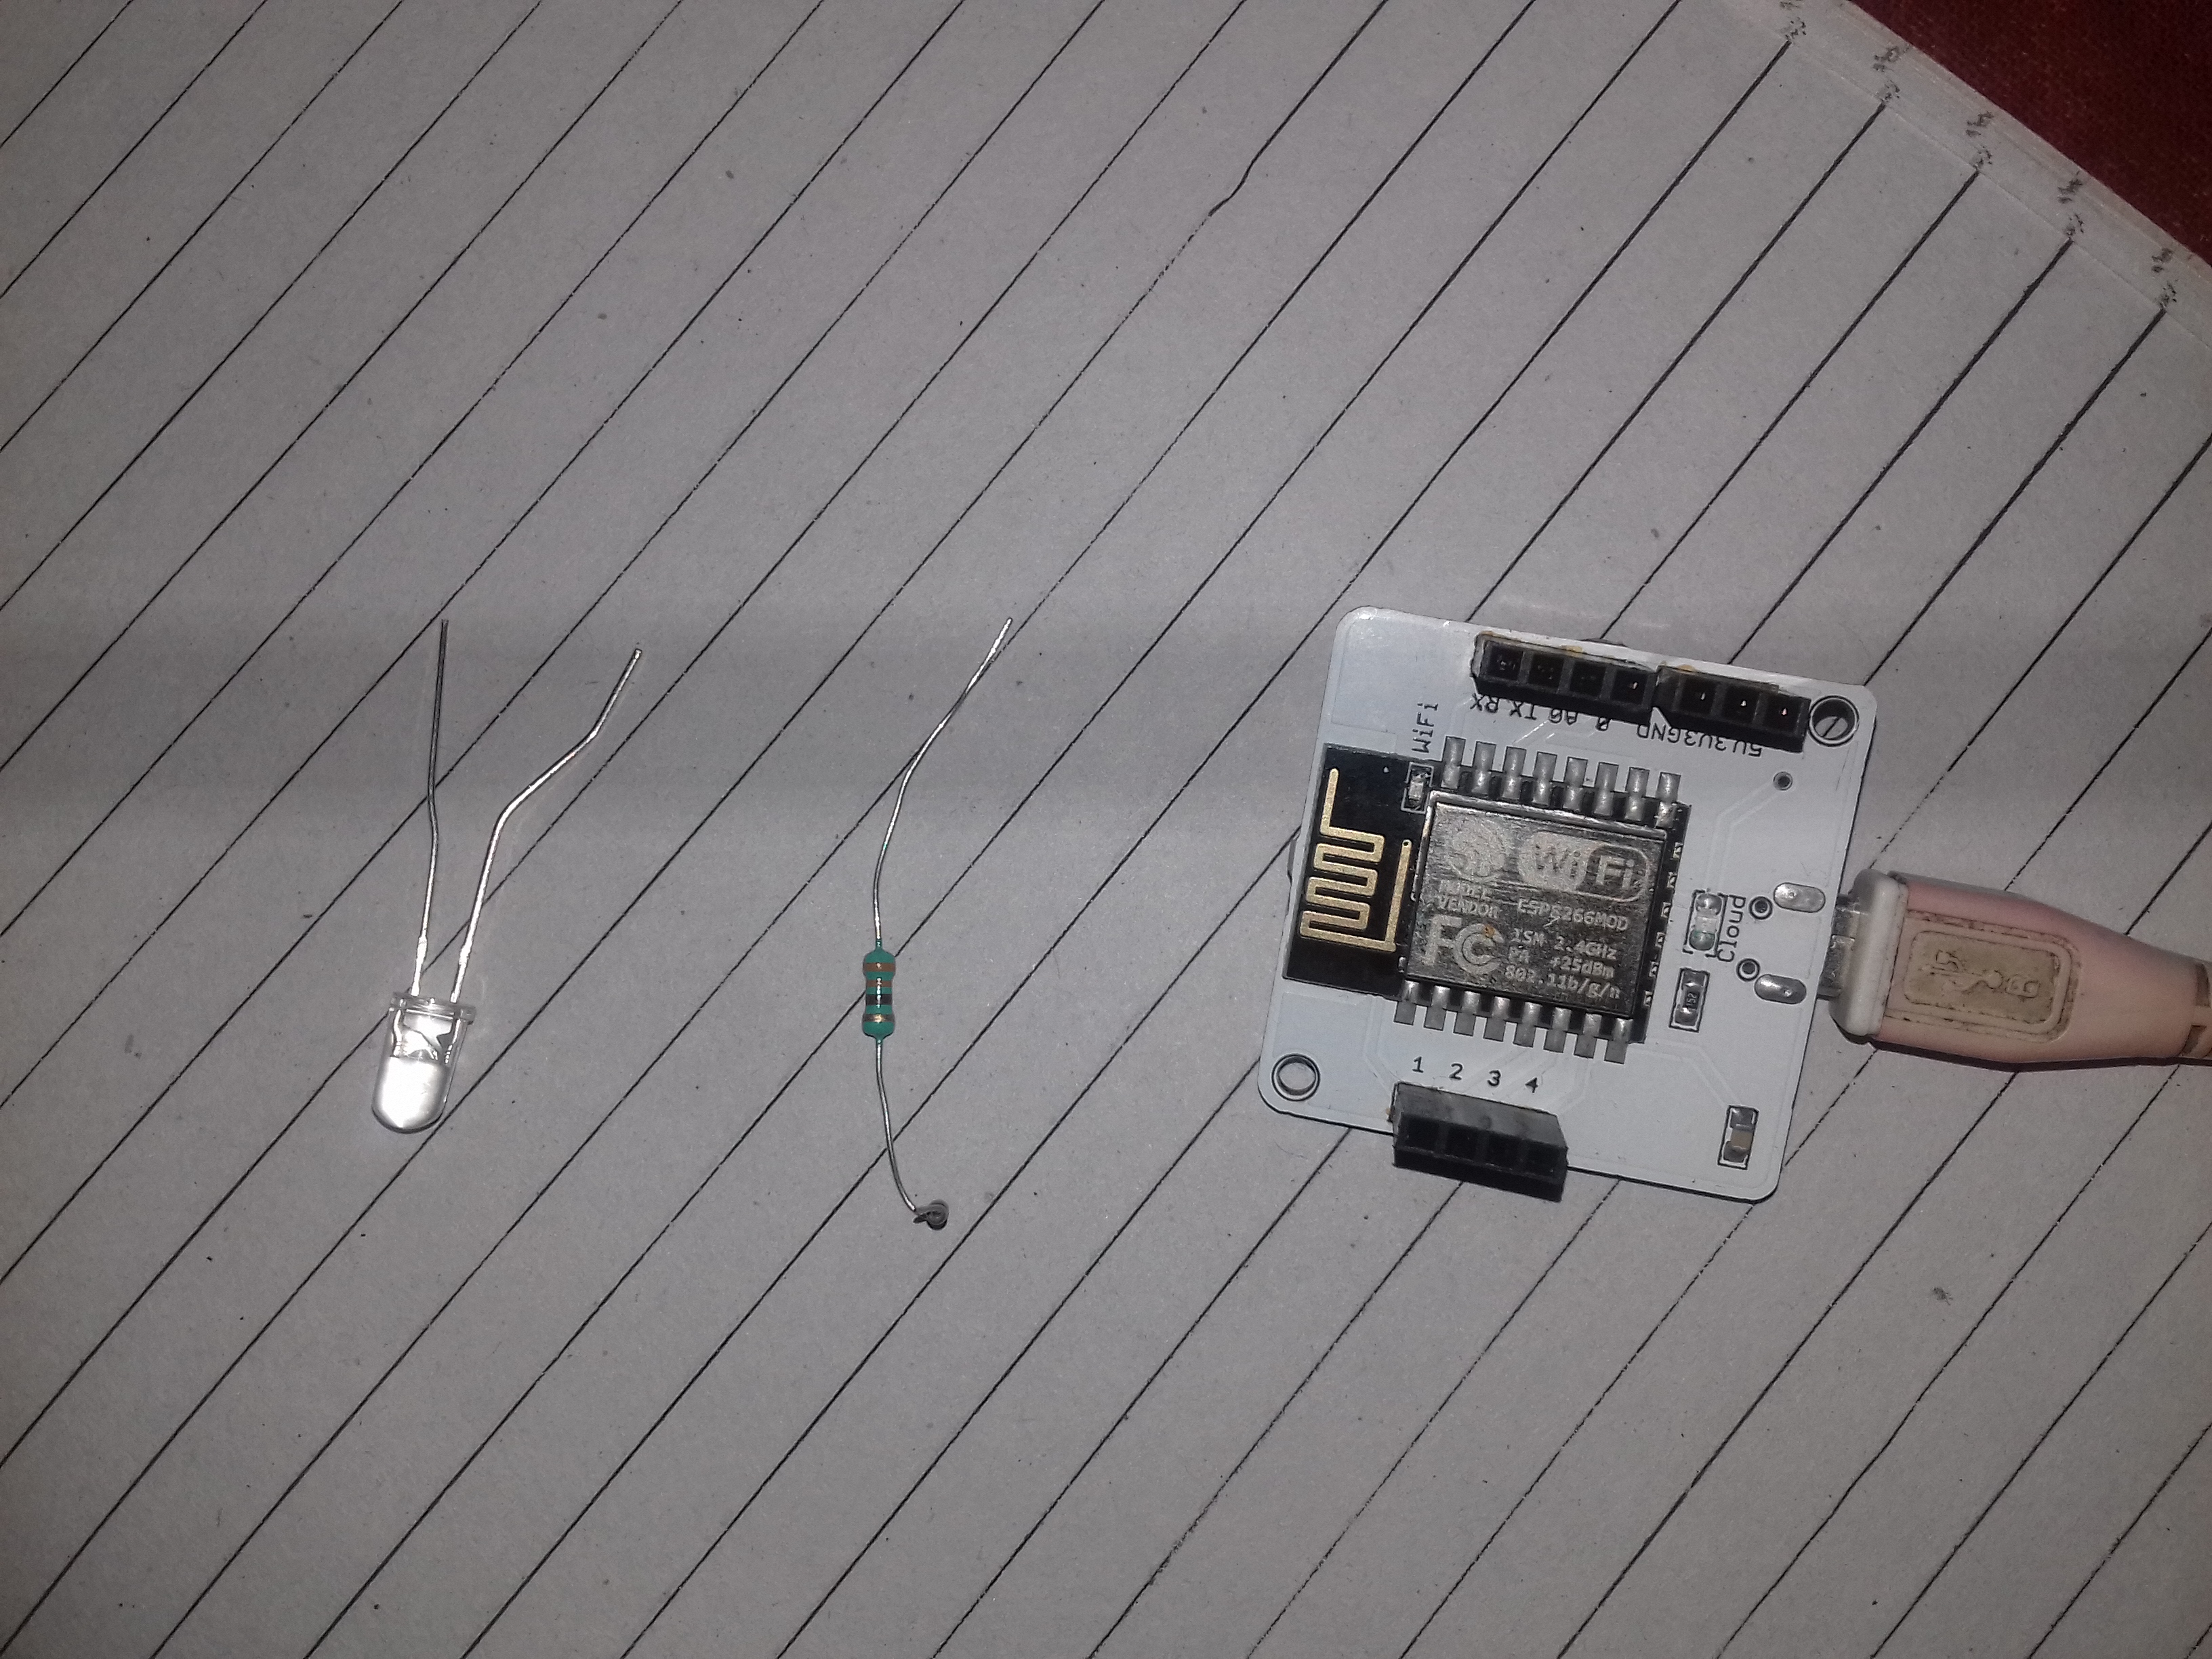
Hardware components | ||||||
 |
| × | 1 | |||
 |
| × | 1 | |||
 |
| × | 1 | |||
Software apps and online services | ||||||
 |
| |||||
| ||||||
my project is about controlling led using bolt wifi module and bolt cloud. we will first assemble the components and then connect the component to the bolt module and then power on the module after that we will create a product on bolt cloud (https://cloud.boltiot.com) and then give a name to it and then write a code to control led in html code and save this code and after that we will link or device and then configure our device in the cloud there we will see the controlling button for controlling the device.
The step by step procedure for making this project is shown below -
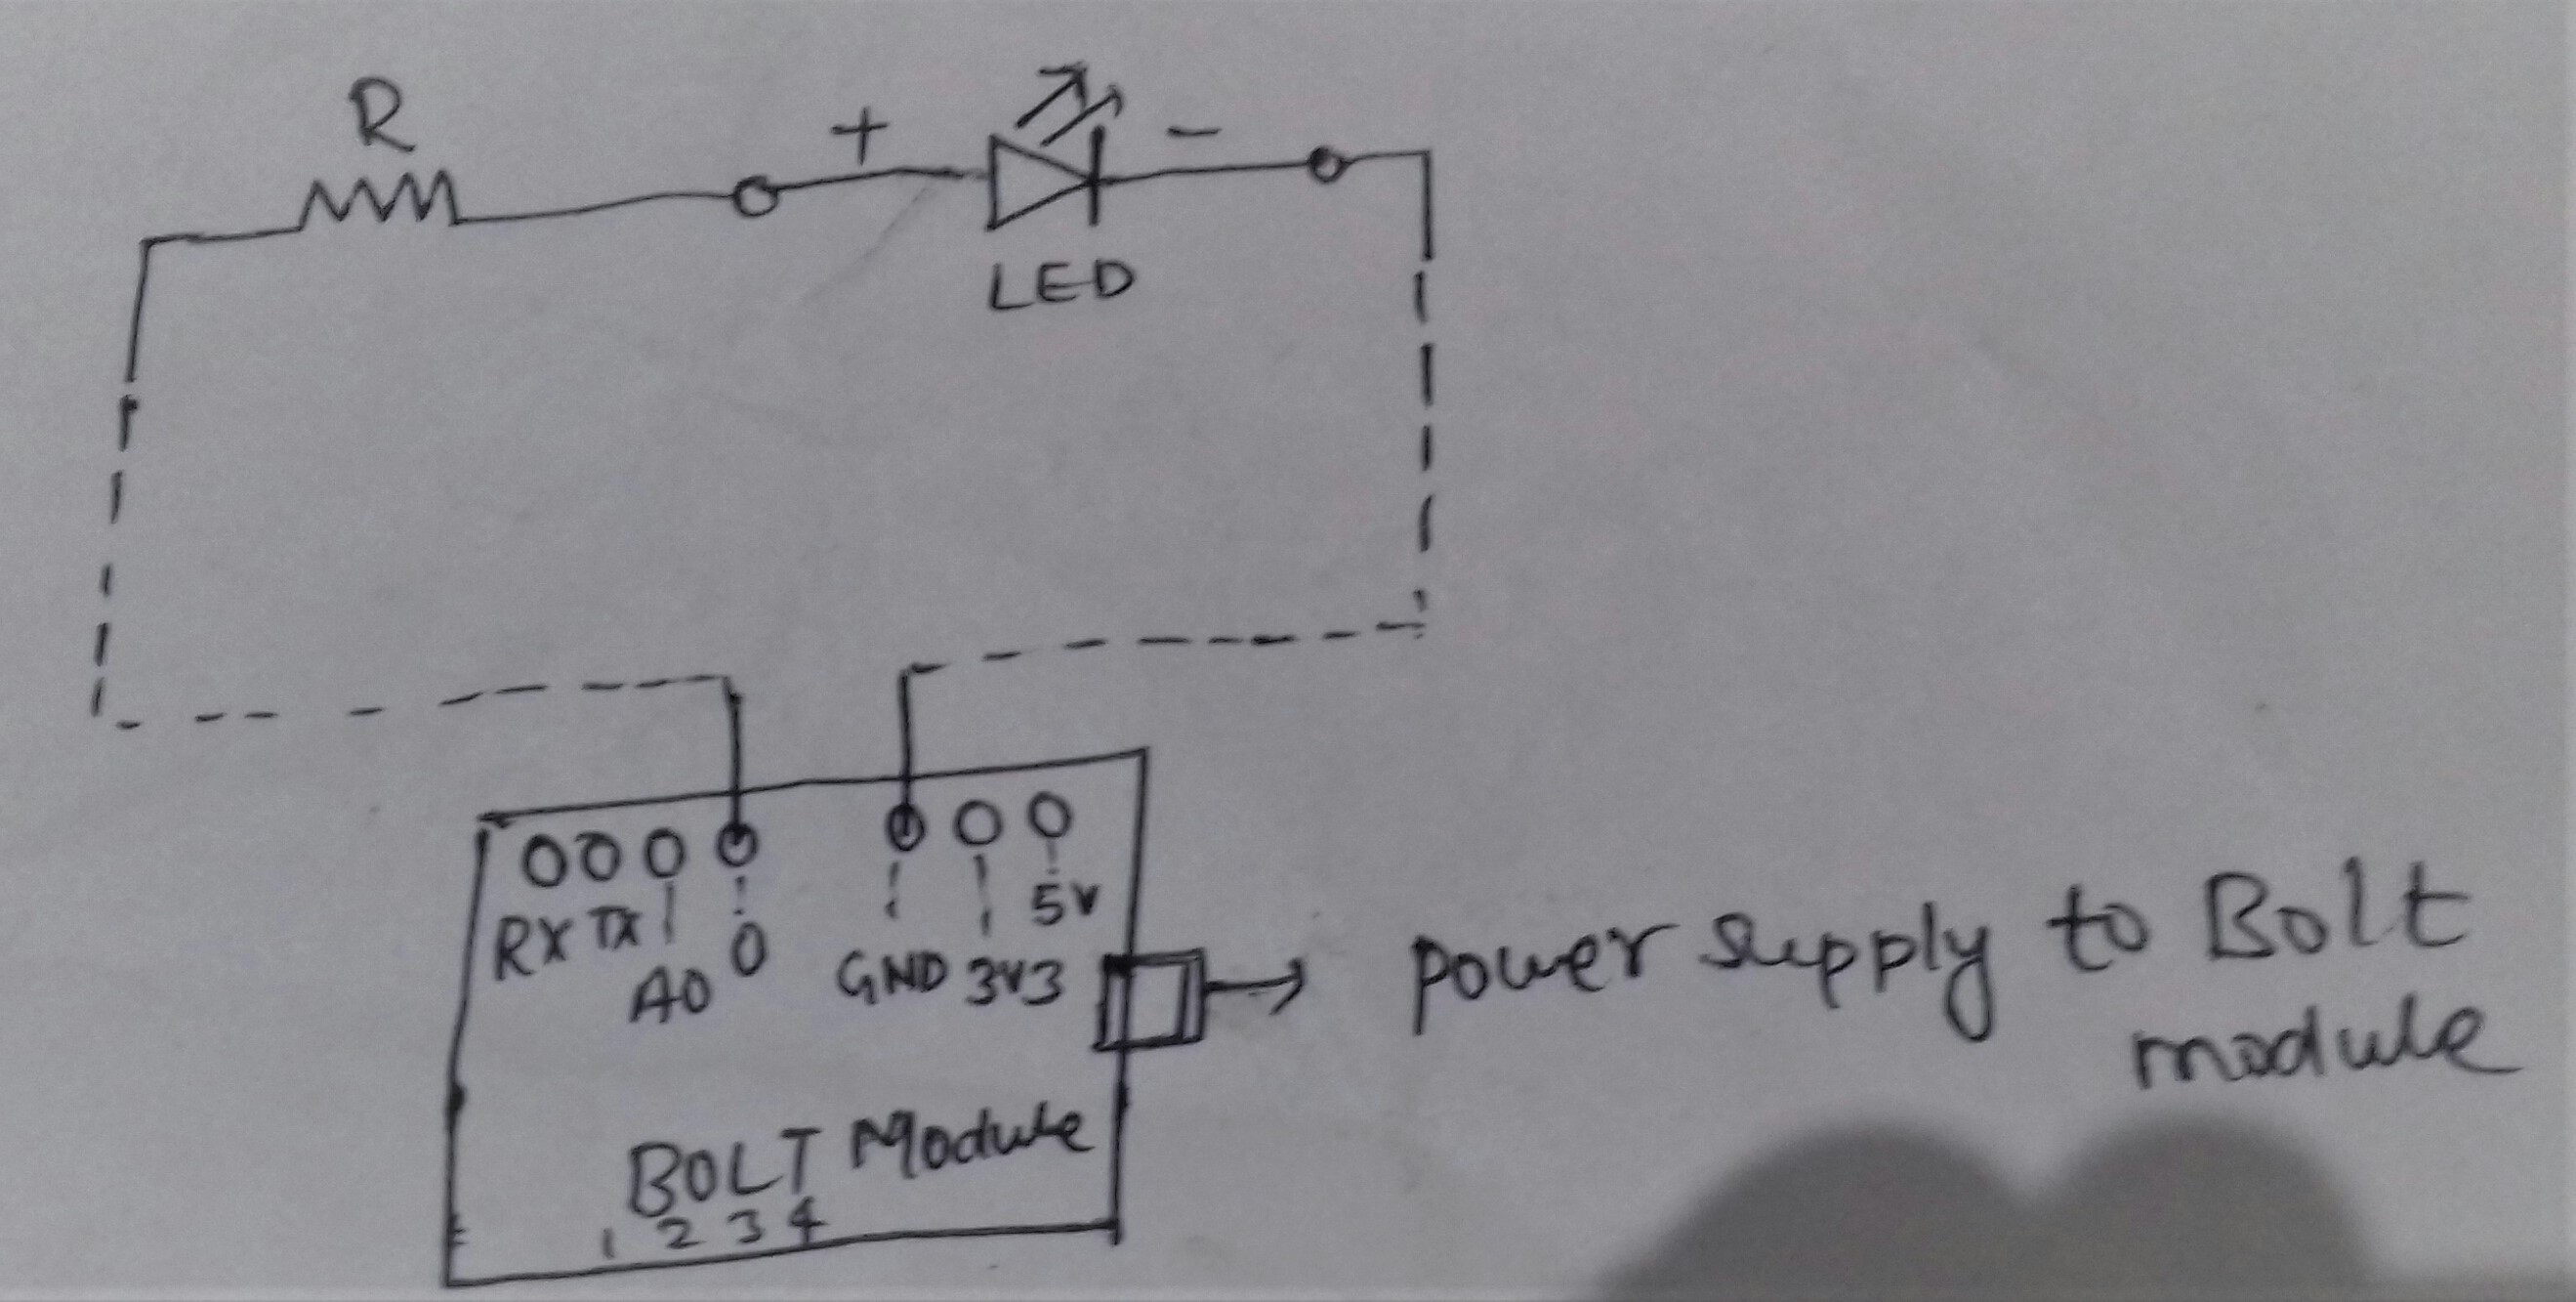
1. Assemble the components (like- bolt kit, resistor and led)
2. Now wrap the longer leg(+ve leg) of the LED around the resistor and then insert the short leg(-ve leg) of the Led into the ground pin of the bolt and the other leg of the resistor in digital pin0 of the bolt.
3. Now give power to the bolt wifi module. for this connect the module with usb cable which is connect with adapter(5v) or with laptop.
3.After giving power supply to the bolt module led will begin to glow.at first the blue led will glow then you will have to connect the module to the bolt cloud using bolt smartphone app.
4. after connecting the bolt module to the cloud the green led will blink.when both blue and green led on the bolt device are glowing stable this means that the bolt device has connected to the internet and also to the bolt cloud(as shown in the below image).
5. After that login to (http://cloud.boltiot.com) and create new product there.
6.Give the name of the product as led_control and product type as input device and in collect data column click on GPIO.
6. Then click on done button and save it.after that click on configure the product icon.
7. After that configure the product icon and go to code tab.
8. Here give a suitable name to the code file here we have given name as ledcontrol and then write the code below for controlling the led and save the file type as html and then click on save icon.
9.Now link the device to the product.here choose your bolt module and then click on link device.
10. Here in the above screenshot the status of the device is showing OFFLINE because the bolt module power is off. Now power on the bolt wifimodule by connecting it to the power adapter.Then the status of the device will be show ONLINE as below in the screenshot.
11. Now click on view this device icon.This will take you the page for controlling the led.
12. On clicking the view this device icon, it will take you to a page where you will see the output of the html code which you has written in the code section.Here you will see the buttons as a result of code.These button will control the LEDs.the button will be shown as-
12.when you click on the ON button the LED will glow.
13. when you click on OFF button the LED will turn off.this is shown in below pics..
By this means we are controlling LED using bolt device and bolt cloud as explained above.
- here is the video of the project explaining the and connection of the project.


Comments