While I was working on another project, I had the necessity to save some data into a SD card. Not having a shield I thought I could just figure out a way to connect the MicroSD card to my Arduino using what I had at my disposal.
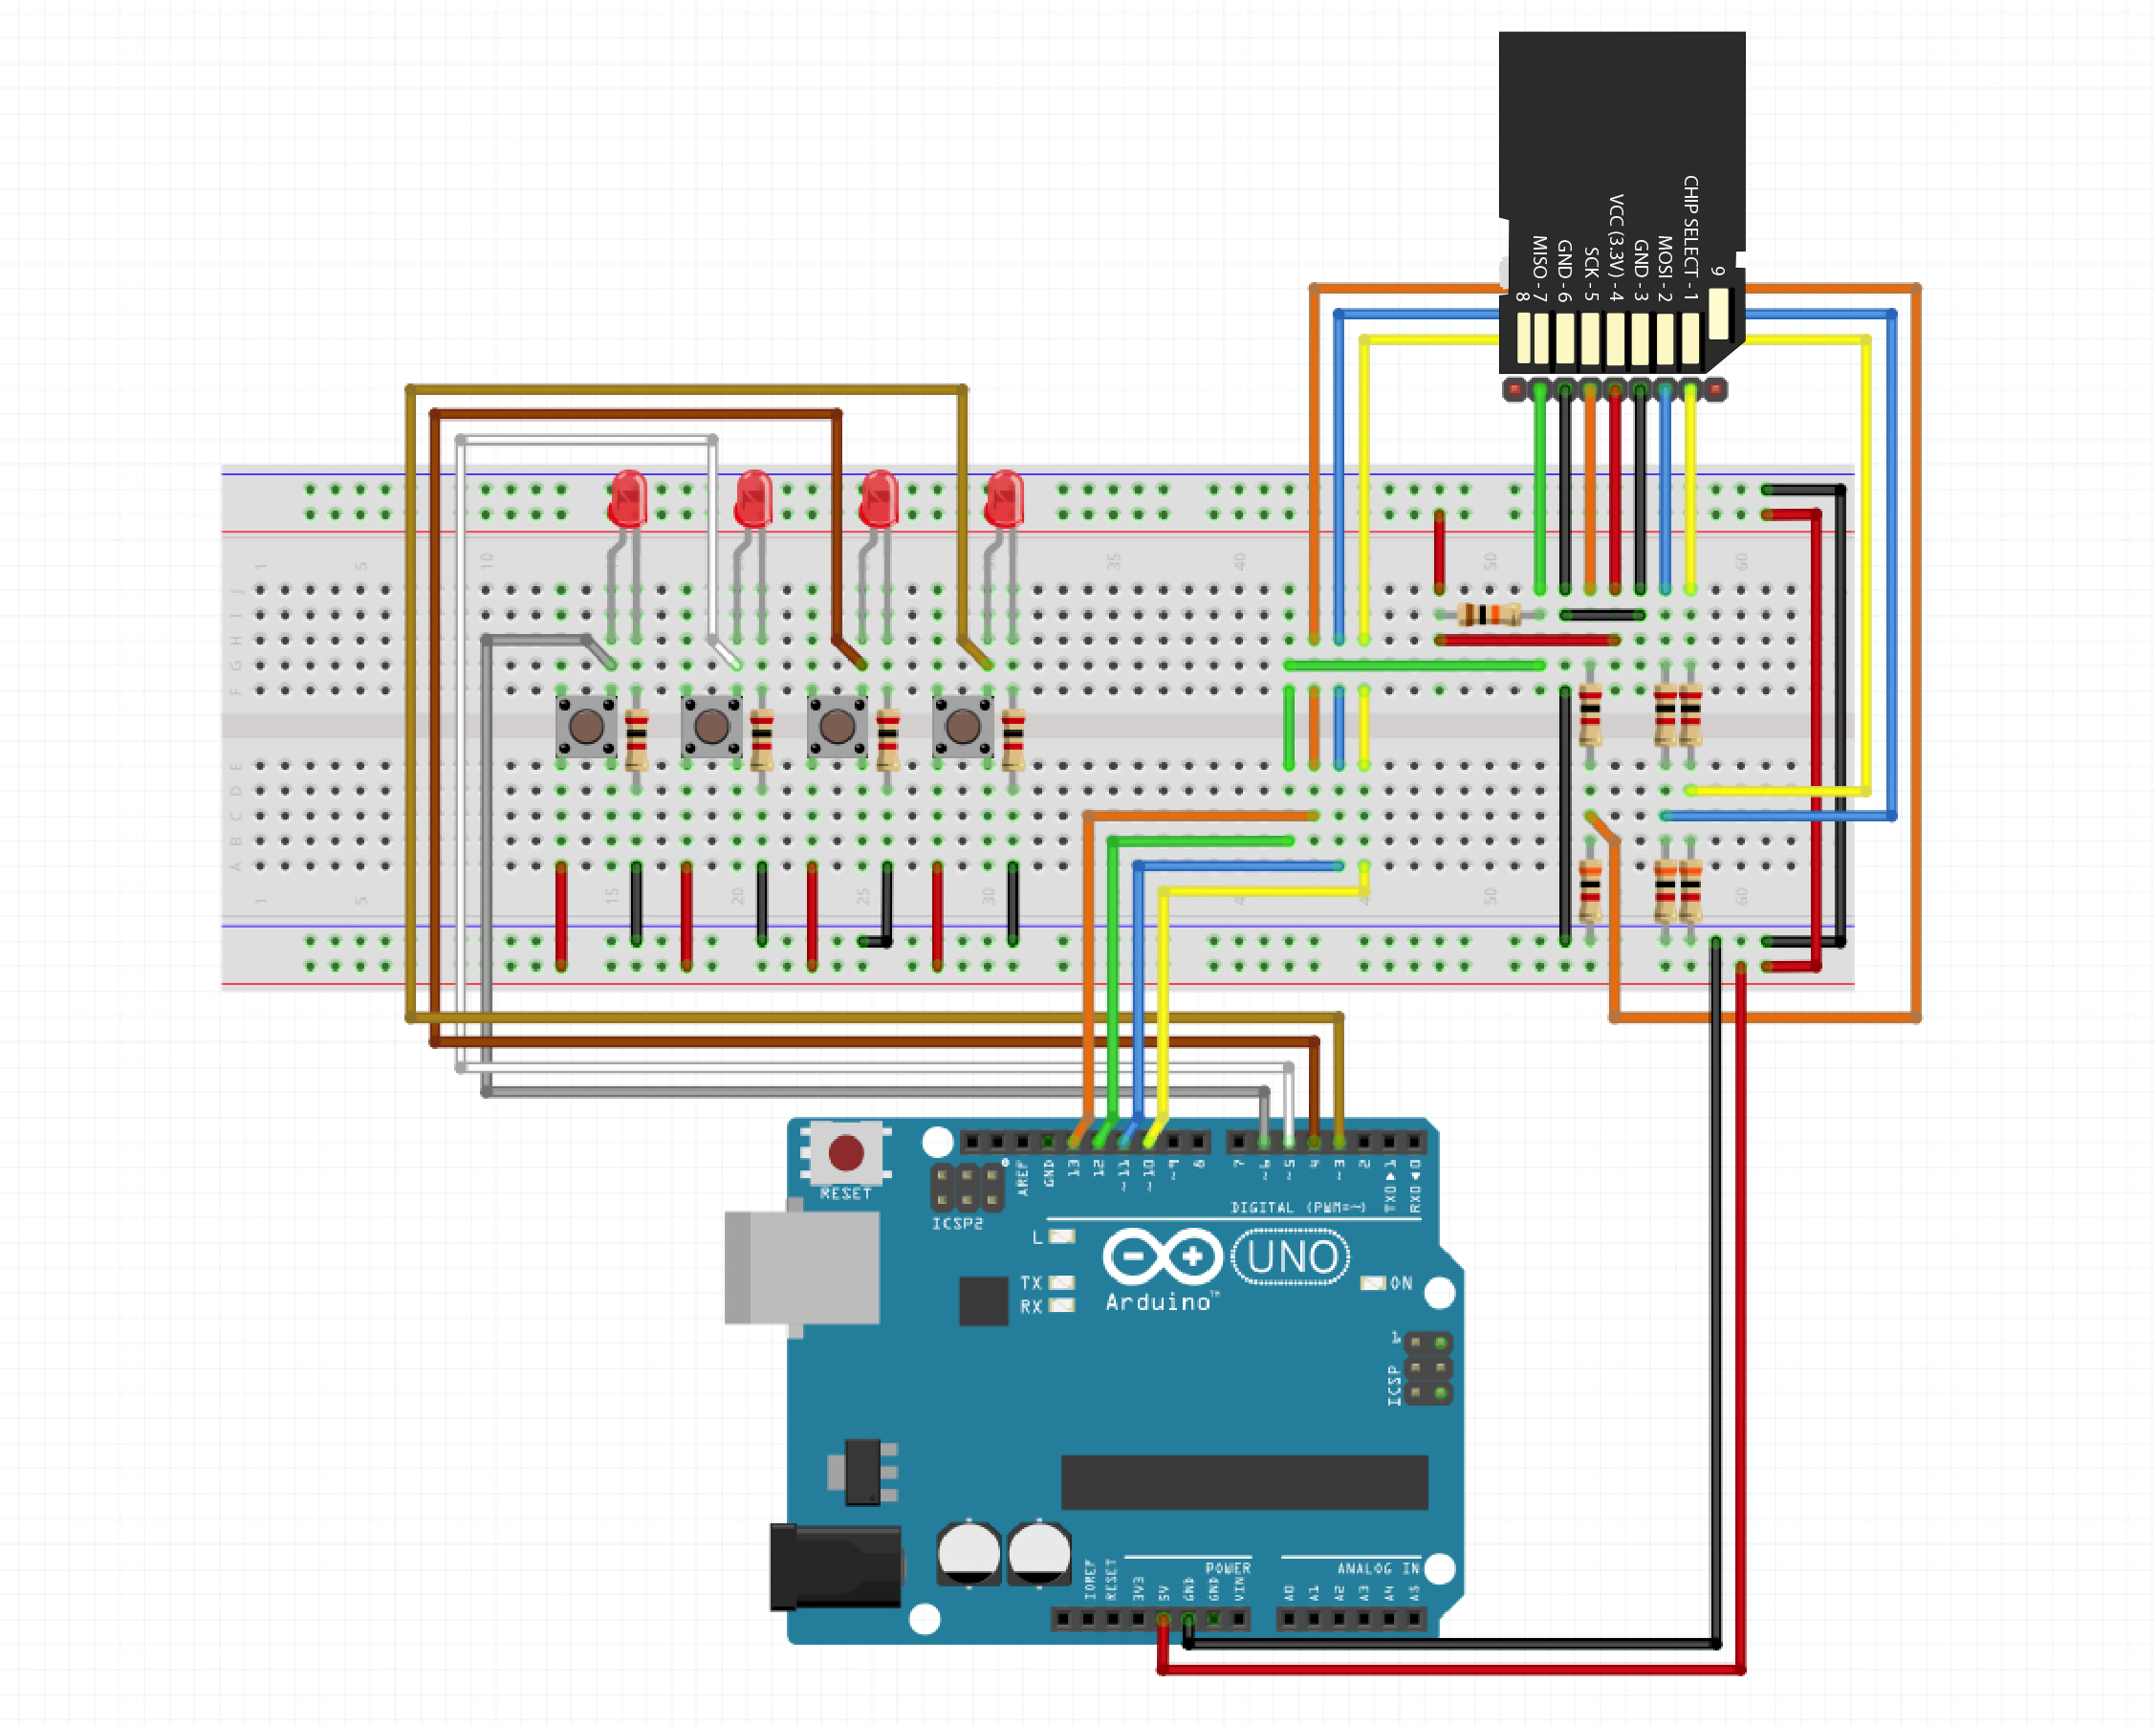
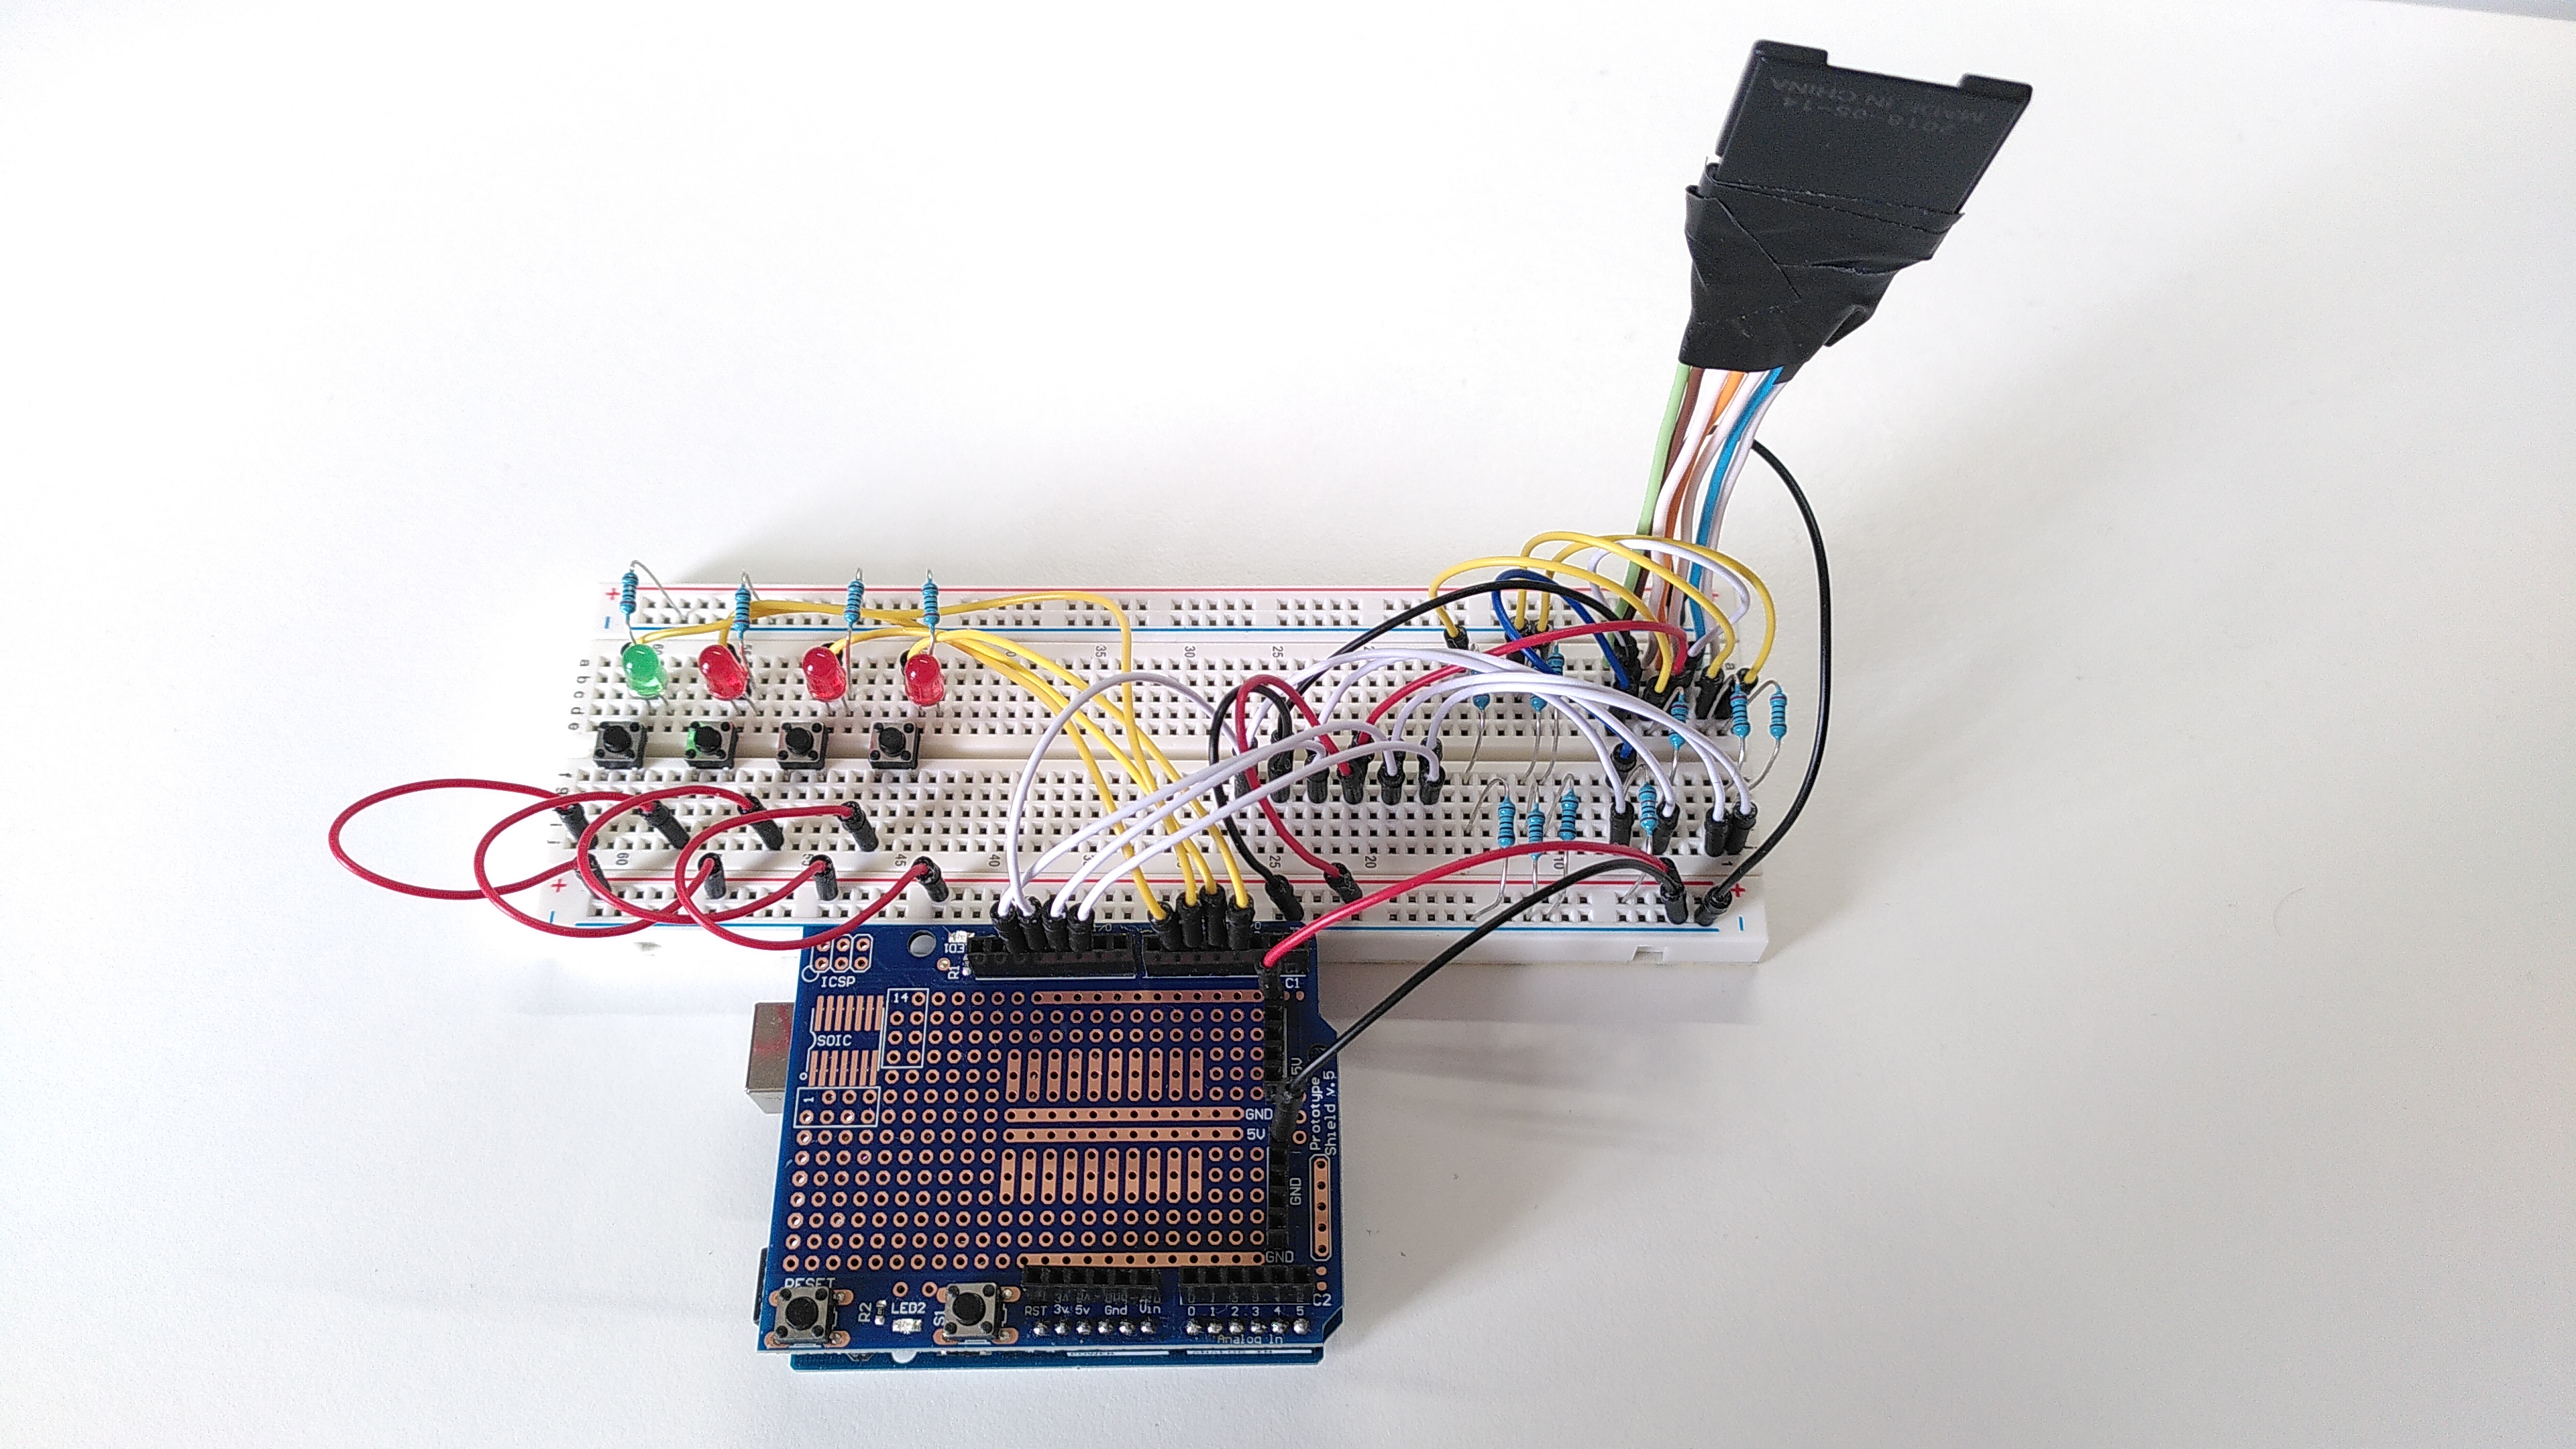
In this project, you will need some basic soldering skills. This tutorial will also show you some basic instructions in order to transfer data to the SD card. Your data can be anything, it can be collected by some sensors or it can be the result of some operations you have done. For simplicity, I will use 3 buttons for digital I/O and one extra button to enable the reading (as if it was a clock signal). I have also set my Arduino to check for new data every 3 seconds. That can be changed according to how frequent you will need to collect your data.
in the video you will see how I generate the inputs and how they get saved while I look at the console. In the end, you will get a csv file which can be opened using any text editor or spreadsheet software (in the video, I open that first using Sublime Text and then using Numbers).
Small technical note: please don't be too scared by the amount of wires you see in the pictures. I didn't have any 3 Kohm resistance, so in the pictures you will see I joined 1x 1 kohm + 1x 2 kohm instead.


_ztBMuBhMHo.jpg?auto=compress%2Cformat&w=48&h=48&fit=fill&bg=ffffff)


Comments