

Hardware components | ||||||
_ztBMuBhMHo.jpg?auto=compress%2Cformat&w=48&h=48&fit=fill&bg=ffffff) |
| × | 1 | |||
 |
| × | 1 | |||
| × | 1 | ||||
| × | 1 | ||||
 |
| × | 1 | |||
 |
| × | 1 | |||
Software apps and online services | ||||||
 |
| |||||
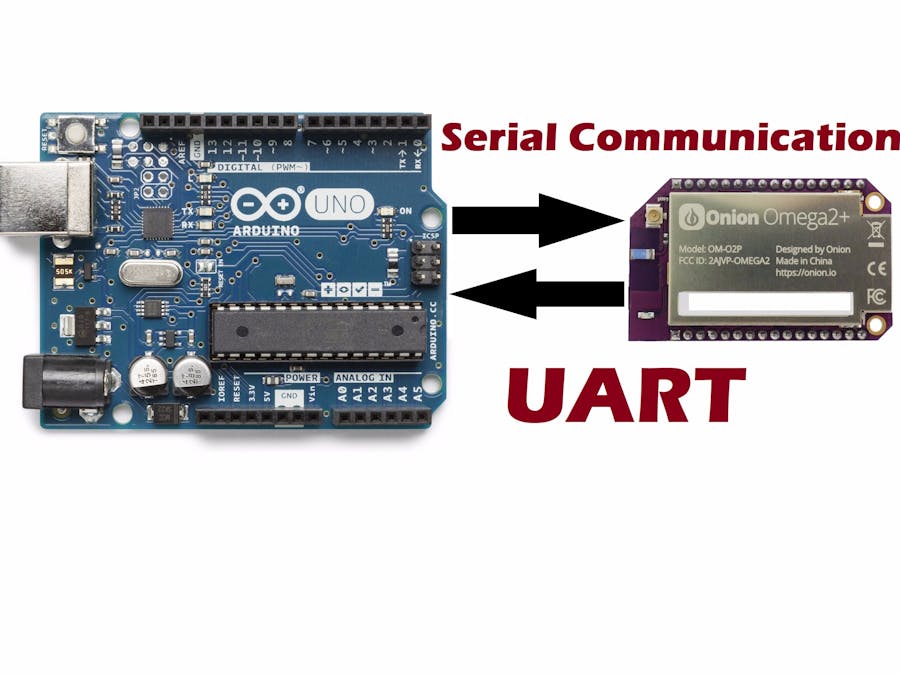
After learning that both the well-known Arduino board and the world's most affordable Linux device, the Omega2 support UART protocol, I decided to interface the two devices and take advantage of the best of both worlds. Once implemented, this allows you to create projects entirely based on Arduino and then make them could-compatible through the Onion Omega2 or Omega2+. An example would be an Arduino based robot with the power of AWS behind it.
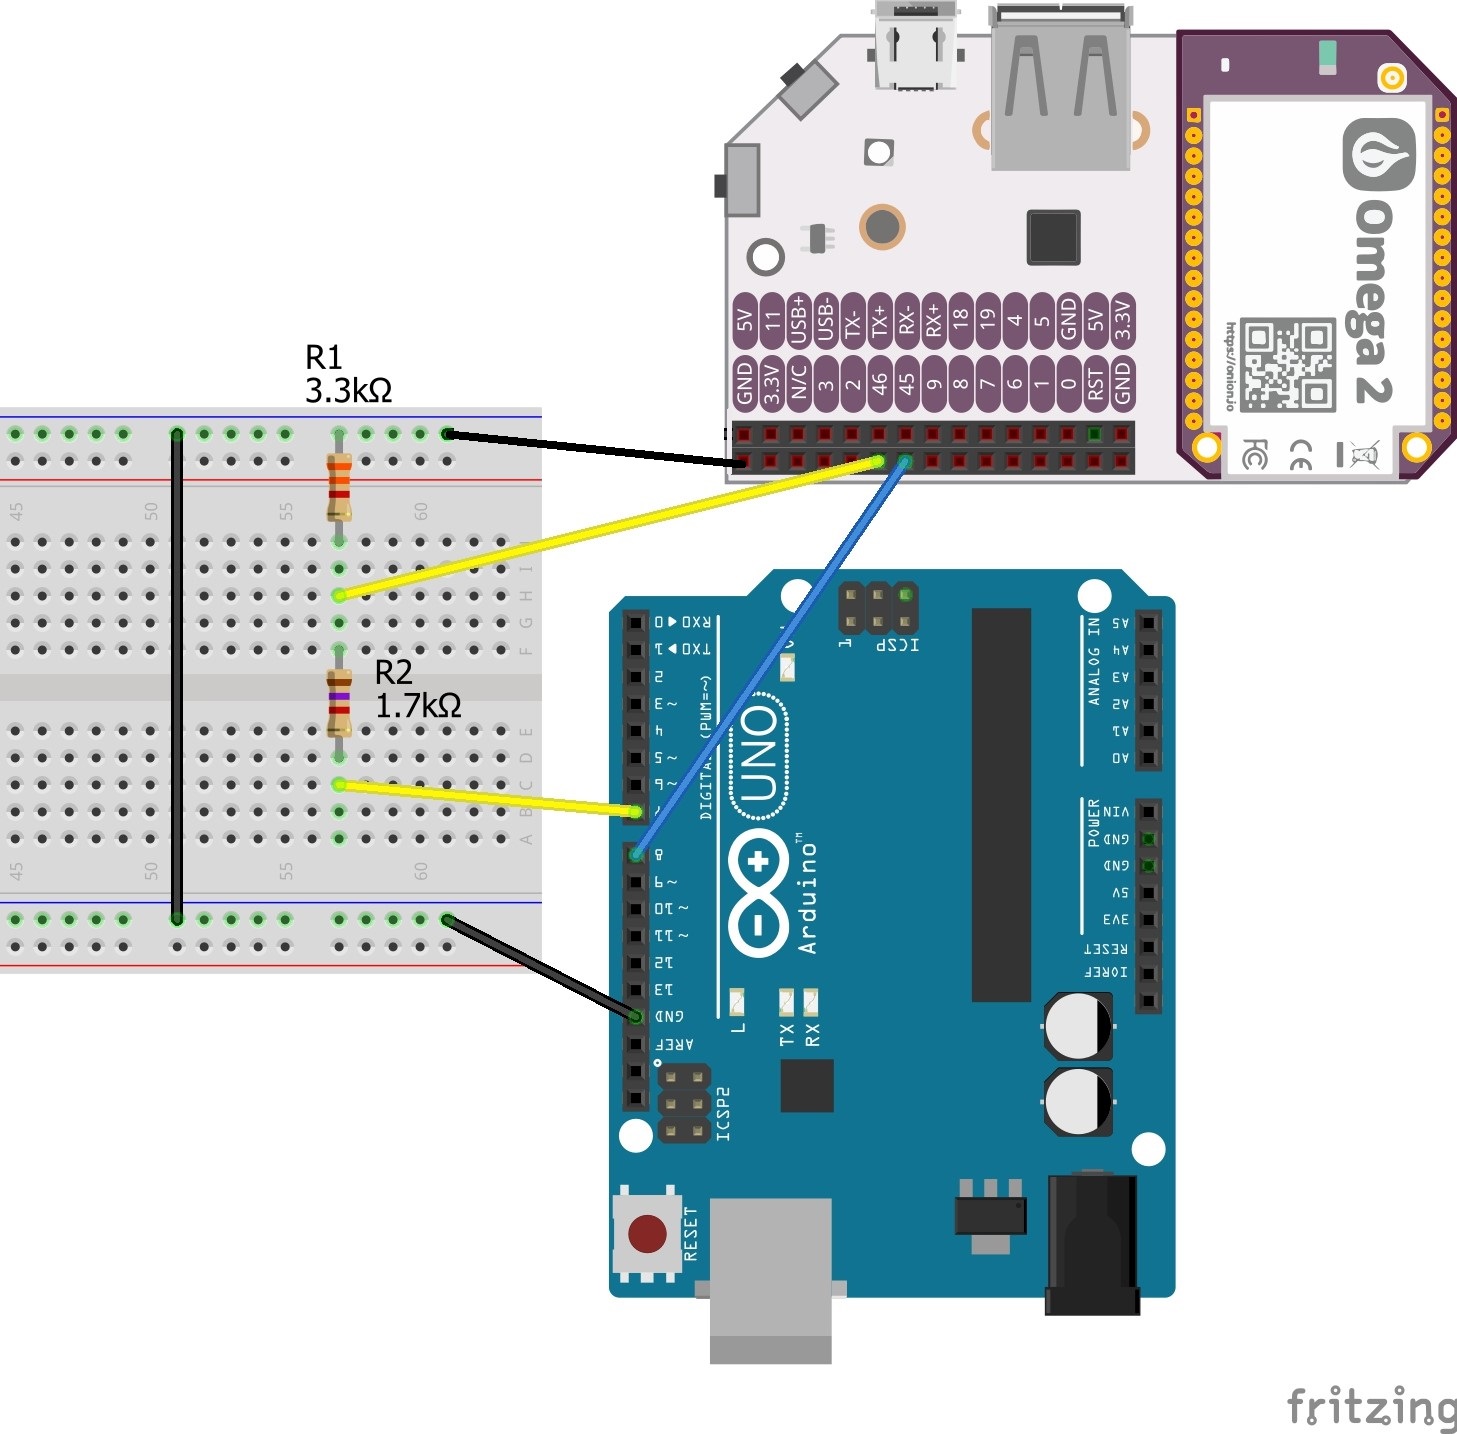
UART or Universal Asynchronous Receiver/Transmitter is a form of 1-to-1 serial communication, which relies on three connections between the two devices. One to transmit data, one to receive data and one for common ground. The below diagram demonstrates this. However in the case of the Arduino Uno and Omega2, we will be using a simple voltage divider circuit as well. This is just to avoid damaging the Omega2's internal circuitry, as the Omega2 cannot tolerate anything above 3.3v as an input.
Step 1: The HardwareWire the below circuit on a prototyping board. You will need two resistors (3.3 k and 1.7 k) and of course your Arduino Uno board as well as the Omega2. While the expansion dock for Omega2 is not required, it would make the wiring easier. If you don't have one, follow the instructions here.
Connect the Arduino Uno board to your computer's USB port. Then power up the Omega2 board.
Step 3: ProgramOpen the Arduino IDE and program the Arduino Uno board with the provided code in the "Code" section titled "arduino_serial.ino". The Arduino board is now ready and configured.
Step 4: TestTo test the serial communication, we will be using the 'screen' command on the Omega2 side and the 'serial monitor' tool on the Arduino IDE. On the Arduino IDE click on Tools > Serial Monitor.
To program the Omega2, you can either ssh to your device or use Omega's terminal utility through your web browser. For more information on setting up the Omega2, take a look at the Omega2 documentation.
On the Omega2 terminal, type in these commands to install the screen tool.
opkg update
opkg install screen
Now use the following command to monitor the serial port connected to the Arduino board.
screen /dev/ttyS1 9600
Once you run the command, a blank screen will open. When you type something in this screen, it is sent to the Arduino and should be displayed on the Serial Monitor window. Likewise, if you send a message using Arduino's Serial Monitor tool, you should see this message appear on the blank window.
Congratulations! You have now successfully established the UART link between the two devices.
For a more thorough overview of Omega's UART capabilities, click here.
Step 5: Using pySerialIn a more practical scenario, you would interact with the Arduino board through a Python script. The pySerial library allows you to achieve this. For instance, you may be reading sensor values through the script and you may wish to send those values to an IoT cloud platform, such as AWS through MQTT protocol.
To demonstrate this, I have written a very simple Python script (python_serial.py), that reads one-digit integers from the Arduino board and displays them on the screen. Feel free to experiment with this code and use it as a template for your projects.


Comments